20 ArtixScan 1800f Installation and Operation Manual
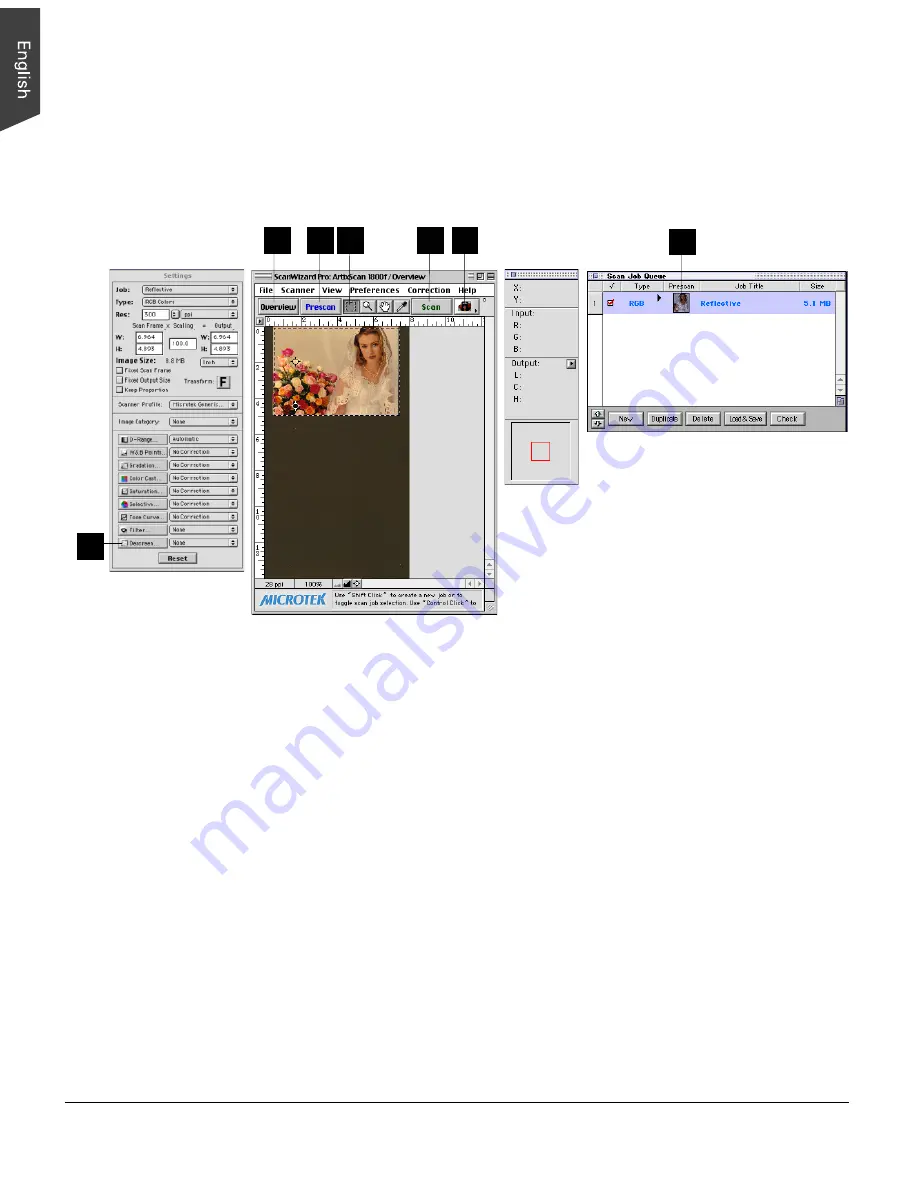
3. Click the Overview button to start an overview, and you will see the image appear
in your Preview window.
4. Select the Scan Frame tool from the Toolbar in the Preview window, and choose
the area to be scanned by dragging a rectangle around it. You will see a flashing
frame (marquee) around the selected area.
5. Click the Prescan button to start an overview, and you will see the thumbnail
image appear in your Scan Job Queue window.
6. [Option] To scan a photographic original, bring up the Settings Window, and
select “None” on the Descreen options menu. To scan printed material, on the
Descreen options menu select the suitable descreen level (Newspaper, Art
Magazine, etc.).
7. If you like what you see in the Preview window, click the Scan button to start
scanning. The image is then delivered to your image editing application program,
where the image can be saved, printed, or modified further.
If you launch ScanWizard Pro in “batch” mode, you may be asked to input a file
name for the scanned image.
For more details on various scanning scenarios, refer to the ScanWizard Pro
User's Guide included in your scanner package.
Settings Window
Preview window
Info window
Scan Job Queue window
5
5
2
7
4
3
6


