Microtek 714M User Manual Download Page 11

7

B. Adjusting the Monitor’s Display

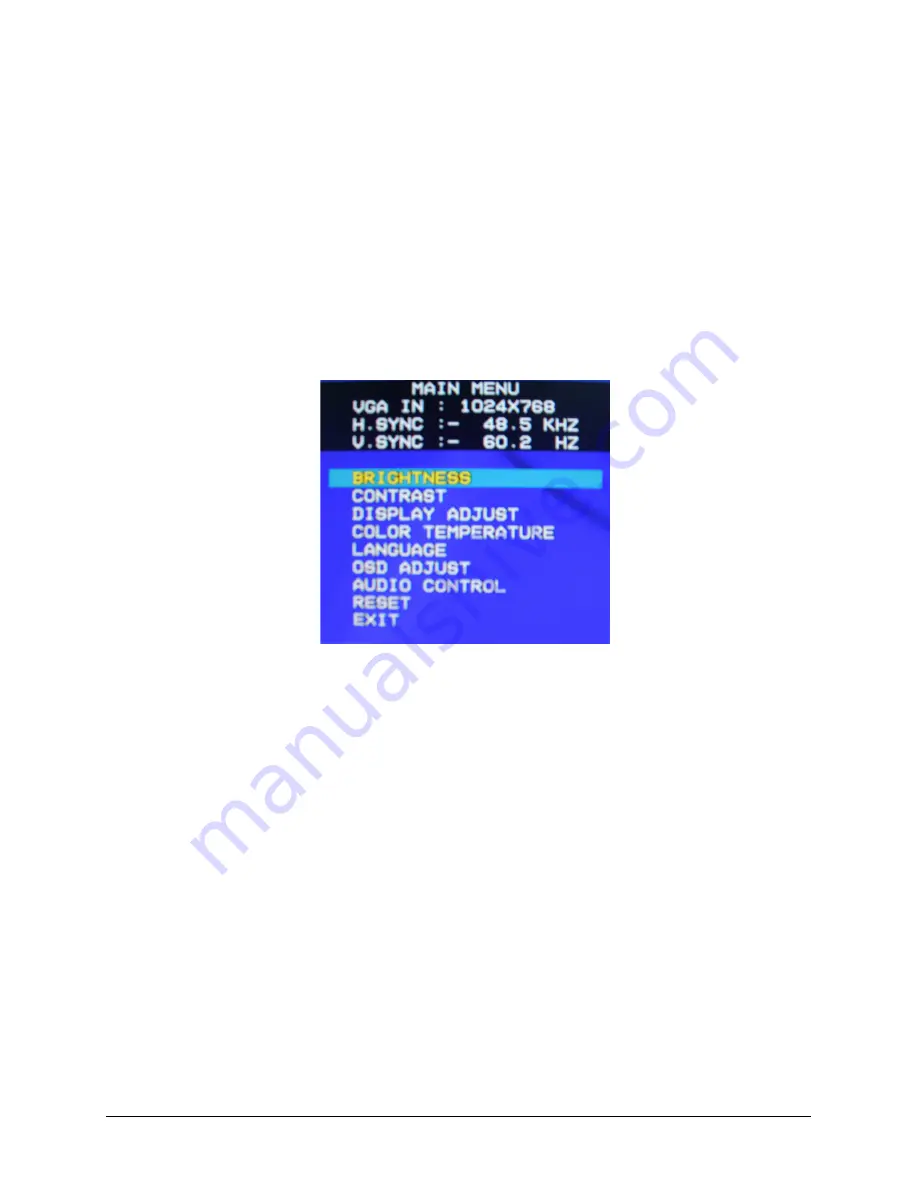
1. Pressing the OSD Menu button causes the screen below

(Figure 3) to appear.

2. Press the + or — button to select a menu item.

3. Press the OSD Menu button again to enter the selected

submenu.

4. Press the + or — button to change values.

5. Select EXIT and press the OSD Menu button when finished

adjusting.

Figure 3:  The OSD Main Menu

Summary of Contents for 714M

Page 1: ......

Page 2: ...al installation This equipment generates uses and can radiate radio frequency energy and if not installed and used in accordance with the instructions may cause harmful interference to radio communica...

Page 3: ...equate measures Canadian Doc Notice For Class B Computing Devices This digital apparatus does not exceed the Class B limits for radio noise emissions from digital apparatus as set out in the Radio Int...

Page 4: ...s 2 Cleaning 3 Installation 4 Before Using the Monitor 4 Connecting the Monitor 4 Adjusting theViewing Angle 5 Operating the Monitor 6 A The LCD Monitor s Control Panel 6 B Adjusting the Monitor s Dis...

Page 5: ...d Crystal Display Supports SXGA resolution of 1280 x 1024 pixels Wide viewing and tilting angle VESA PMS compliant power saving Automatically powers down the monitor after a defined period of inactivi...

Page 6: ...ease contact your dealer or nearest service center for advice or replacement of packaging Precautions Read all of these warnings and save the manual for later use Follow all warnings and instructions...

Page 7: ...reasons turn off the power switch and unplug the monitor before cleaning Do not scratch or rub the screen with a hard object Never use any of the following solvents on the LCD monitor Thinner spray ty...

Page 8: ...fore connecting your LCD monitor to the computer Place the monitor on a flat and level surface Do not operate the LCD monitor without verifying your power supply first Incorrect voltage will cause you...

Page 9: ...wing angles You can adjust the monitor upward to 35 degrees and downward to 5 degrees Note Do not touch the screen while changing the viewing angle as this may damage the screen In addition make sure...

Page 10: ...selects a submenu item 3 Adjustment button Indicates cursor movement or decreases the value of a selected OSD setting 4 Adjustment button Indicates cursor movement or increases the value of a selected...

Page 11: ...e screen below Figure 3 to appear 2 Press the or button to select a menu item 3 Press the OSD Menu button again to enter the selected submenu 4 Press the or button to change values 5 Select EXIT and p...

Page 12: ...s to the previous menu COLOR TEMPERATURE Adjusts the colors in the LCD monitor to a warmer or cooler shade depending on the selected color temperature LANGUAGE Changes the OSD language including Engli...

Page 13: ...al Viewing angle H 160 V 160 Control type OSD Plug Play VESA DDC 1 2B Audio 2W 2 Dimensions H xW x D 19 7 x 15 7 x 9 4 500 x 400 x 240 mm Gross NetWeight 15 9 13 4 lbs 7 2 6 1 Kg Vertical lift adjustm...

Page 14: ...1 6 8 7 3 9 0 8 2 7 5 0 8 4 x 0 4 6 0 0 5 7 3 0 0 0 5 7 6 0 0 4 x 0 2 7 9 6 4 1 3 7 8 0 0 7 7 0 0 6 x 0 0 8 6 5 1 5 3 0 5 2 6 5 8 0 0 6 x 0 0 8 9 7 8 7 3 7 1 3 0 6 9 0 0 6 x 0 0 8 7 7 0 8 4 8 8 1 2 7...

Page 15: ...is running on the correct timing Refer to the Supported Timing section 2 Turn off the LCD monitor and then turn it back on again Press the OSD Menu button once and then press one of the Adjustment Co...

Reviews: