background image

2

* Support of the PCD-47 series for any Unix system on an OEM basis must be arranged under

a separate contract.

• MS-DOS is the registered trademark of Microsoft.
• Apple and Macintosh are the registered trademarks of Apple Computer, Inc.
• IBM PC/AT is the trademark of International Business Machines Corporation.
• EZ-SCSI is the trademark of Adaptec, Inc.
• Photoshop is the registered trade mark of Adobe Systems, Inc.
• Other company names and product names are the trademarks and registered trademarks of

their respective companies.

© Copyright 2000 Microtech International, Inc.  All rights reserved.

          MP00621

Preface

Thank you for purchasing the Microtech PCD-47. The PCD-
47 can be connected to various makes of personal computers
to read and write digital film cards. The data recorded on a
digital film card with a digital camera can thus be directly read
into a personal computer. Please read these instructions
carefully before installation and use.

The features of this product include:

SCSI interface for high speed data transfer to your computer.

 Can be connected to Macintosh, IBM PC/AT compatible

computers, running Dos, Windows 3.x, Windows 98 and
Windows NT.

 Can be used with Solaris, Sun Sparc, Sun Ultra Sparc, Digital

Unix, VMS, AIX, HP and Linux.*

 One type III slot, one CompactFlash slot, and one SmartMedia

(SSFDC) slot.

Of the standard PCMCIA/JEIDA cards, ATA cards, CompactFlash,
and SmartMedia (both 3.3V and 5V, supports up to 128MB of
SmartMedia)  may be used.

Summary of Contents for PCD-47

Page 1: ...uct Outline Use with a Macintosh Windows 95 98 NT Safety Standards PCD 47 User s Manual Microtech PCD 47 SCSI PC Card Reader Writer PCD 47B internal for various systems PCD 47 MAC external for Macintosh PCD 47 PC external for PC Compatibles ver 1 1 ...

Page 2: ...hasing the Microtech PCD 47 The PCD 47 can be connected to various makes of personal computers to read and write digital film cards The data recorded on a digital film card with a digital camera can thus be directly read into a personal computer Please read these instructions carefully before installation and use The features of this product include SCSI interface for high speed data transfer to y...

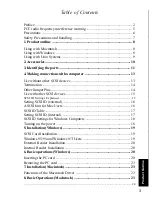
Page 3: ... other SCSI devices 13 Termination 14 Other Jumper Pins 14 Use with other SCSI devices 15 SCSI ID Settings Explained 15 Setting SCSI ID external 16 A SCSI hint for Mac Users 16 SCSI ID Table 17 Setting SCSI ID internal 17 SCSI ID Settings for Windows Computers 18 Turning on the power 18 5 Installation Windows 19 SCSI Card Installation 19 Windows 95 98 and Windows NT Users 19 External Reader Instal...

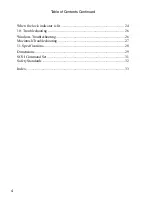
Page 4: ...ontents Continued When the lock indicator is lit 24 10 Troubleshooting 26 Windows Troubleshooting 26 Macintosh Troubleshooting 27 11 Specifications 28 Dimensions 29 SCSI Command Set 31 Safety Standards 32 Index 33 ...

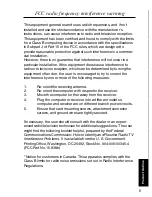
Page 5: ...ing the equipment off and on the user is encouraged to try to correct the interference by one or more of the following measures 1 Re orient the receiving antenna 2 Re orient the computer with respect to the receiver 3 Move the computer further away from the receiver 4 Plug the computer or receiver into a different outlet so computer and receiver are on different branch power circuits 5 Ensure that...

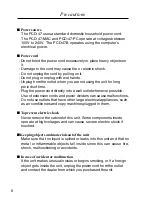
Page 6: ...ension cords and power dividers can cause malfunctions Do not use outlets that have other large electrical appliances such as air conditioners and copy machines plugged in them To prevent electric shock Never remove the cabinet of this unit Some components inside operate at high voltages and can cause severe electric shock if touched Keeping objects and materials out of the unit Make sure that no ...

Page 7: ...ternal temperature to rise Do not stack the units Do not use in an enclosed unventilated area Precautions for connection When connecting this unit to a personal computer or any other equip ment always first turn off the main power of the equipment to be connected Precautions for transportation Disconnect cables and remove any PC cards before transporting the unit Use the cardboard box in which the...

Page 8: ...PCMCIA hard disks Microtech includes Software Architects DOS Mounter SE with the Macintosh version of the PCD 47 part no PCD 47 MAC For owners of other versions of the PCD 47 this software can be purchased as an option through Microtech along with the reader or may be purchased from a separate vendor The software may also be purchased and downloaded online at http www softarch com go online html U...

Page 9: ...cameras Most Unix systems require a special mounting procedure such as the following to access DOS formatted media mount dev scsi dev000001 dev pccard Note Tech support for Unix systems is only available under special OEM contract and license Each Unix system may vary slightly in the above mounting procedure and it is assumed that the User understands how to use his her particular system For furth...

Page 10: ... 50 to HD50 included with PC version Users manual this manual Other Accessories SCSI cable Centronics 50 to DB25M included with Mac version screws jumper PCD 47 MAC and PCD 47 PC PCD 47B Internal I N T E R N A T I O N A L I N C power cord terminator Anti static strap Users manual this manual Included only with retail version of PCD 47B 5 25 mounting kit MountingKit ...

Page 11: ...o card is inserted These indicators light when the inserted card is locked orange Do not remove the locked card from the drive 3 Eject Buttons Pushing this button ejects the PC card 4 Card Slots Type I II and III PC cards may be inserted as well as SmartMedia and CompactFlash Note that CompactFlash and SmartMedia have their own special slots 5 Power Button The power switch is only featured PCD 47 ...

Page 12: ...ecurely and properly For internal units connect to one of the computers internal power cords 9 SCSI ID Switch Use this switch to set SCSI ID number Do not to set the SCSI ID number to numbers already in use by the computer or other peripheral devices 10 SCSI ID pins Use this to set the SCSI ID number internal units only Place jumpers to set ID number See above illustration for details REAR PANEL 1...

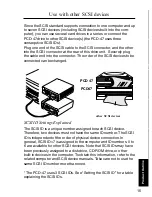
Page 13: ...a proper SCSI cable For connection with an IBM PC AT compatible computer a SCSI board must have been previously mounted in the computer Consult the documentation that came with the SCSI board for installation instructions CAUTION Turn off the power to the computer and SCSI device s before making the connections Use without other SCSI devices Plug one end of the SCSI cable into the SCSI connector a...

Page 14: ...hown in the above diagram Internal devices come with termination pins as shown in the right hand side of the above diagram Other Jumper Pins 1 Jumper off all three slots are active Jumper on only SmartMedia and CompactFlash are active type III slot is disabled 2 3 Vendor unique usage 4 Jumper on firmware rewrite mode Jumper off standard use firmware cannot be rewritten with jumper off Jumper shoul...

Page 15: ...e connector The order of the SCSI devices to be connected can be changed SCSI ID Settings Explained The SCSI ID is a unique number assigned to each SCSI device Therefore two devices must not have the same ID number The SCSI ID is independent of the order of physical device connection In general SCSI ID 7 is assigned to the computer and ID numbers 0 to 6 are available for other SCSI devices Note th...

Page 16: ... available A SCSI hint for Mac Users SCSI ID 0 is assigned to the built in hard disk drive SCSI ID 3 to the built in CD ROM drive and SCSI ID 7 to the computer before shipment Therefore SCSI ID 1 SCSI ID 2 SCSI ID 4 SCSI ID 5 and SCSI ID 6 are available for this drive unit It will therefore be necessary to pay close attention to the SCSI IDs on your Macintosh as the PCD 47 requires three SCSI IDs ...

Page 17: ...t the SCSI ID on internal units set the three jumper pins as shown in the diagram The default SCSI ID is 4 5 and 6 3 3 4 5 1 1 2 4 2 2 3 4 0 0 1 2 4 4 5 6 5 5 6 6 6 ID setting PCMCIA SmartMedia CompactFlash SCSI ID Table Setting SCSI ID internal terminator 1 2 3 4 5 6 SCSI ID pins first 3 rows SCSI ID pins first 3 rows 0 ...

Page 18: ...he power For external drives turn on the power for this drive unit then turn on the computer For internal drives after installation is complete replace the computer case and securely fasten the case Replace power cords and restart the computer Windows users may simply restart the computer and the unit will appear under My Computer as three drive letters The drive letters will vary depending on the...

Page 19: ...tec cards and may or may not work for other card types Refer to the SCSI card manual for details Technical questions concerning other SCSI cards should be directed to the SCSI card manufacturer not the PC Card reader manufacturer 1 Shut down the system and turn off the computer 2 Unplug all cables connecting to the computer and remove the case 3 Install the Adaptec SCSI card into an empty expansio...

Page 20: ... other needed external devices 6 Turn on the computer and boot to Windows 7 Insert the PC card to be accessed NOTE Make sure everything is connected properly the terminator is in the correct position and the SCSI ID is set to a number not currently in use by the system Internal Reader Installation 1 Follow the directions above to set up your SCSI interface card unless you have already done so prev...

Page 21: ... card may be lost When inserting SmartMedia cards be sure to insert the SmartMedia with the gold contacts facing up To insert CompactFlash cards gently push the card in all the way until the card is locked in place The card will slide in on the molded rails and a slight amount of resistance will be felt as the connectors make contact This is normal Note for Mac users With a Macintosh computer the ...

Page 22: ...C card 3 Using a Windows computer three icons will appear under My Com puter as a removable hard drive a drive letter will also be assigned Double click on an icon to open the drive If media is not inserted when double clicking the icon the message Device not ready will appear Insert card and click OK Removing the PC card Make sure that the access indicator and lock indicator are not lit and that ...

Page 23: ...a such as digital film cards ATA cards SmartMedia and CompactFlash on a Macintosh computer This sofware prodives the following functions Automatically mounts the Macintosh formatted or DOS formatted PC cards or other removable media most digital cameras use DOS formats on their cards NOTE The DOS format is used by IBM PC AT compatible computers and most digital cameras The files stored on a DOS fo...

Page 24: ...nd digital applications become available on the market If firmware upgrades are made available the necessary program files will be made available along with the updated instructions at http www microtechint com firmware SCSI jumper must be ON to upgrade firmware Jumper must be removed before unit can be used normally again ...

Page 25: ...s on the screen Put the card back into the slot where it was NOTE For Macintosh computers the access indicator may flash on and off even after the eject operation In this case you can remove the PC card NOTE Do not select the Eject Disk command from the Special menu to remove the card For IBM PC AT compatible computers the lock indicator does not light in normal cases You can remove the PC card wh...

Page 26: ...Revise the settings according to the SCSI board manual Plug in the SCSI connector again Activate the terminator Power off all the devices then change the SCSI ID Remove the terminator or deactivate the terminator on the PCD 47 Install EZ SCSI according to the EZ SCSI manual Check the CONFIG SYS file for the proper setting Insert the card properly Cause The power is not connected to an outlet or co...

Page 27: ...ected The terminator is not activated DOS Mounter SE is not installed DOS Mounter SE is in contention with other control panels or extended functions The card is not properly inserted Symptom The Macintosh computer hangs up at startup The PC card cannot be mounted no icon is displayed Corrective Measure Use a standard SCSI cable Use a standard SCSI cable 6m or shorter Change the cable connections ...

Page 28: ...nchronus transfer Power requirements External AC 100V to 240V 50 60 Hz Internal 5v 12v DC Standard PC Connector Power consumption 0 2A internal External Dimensions W x D x H 169 x 211 x 55 mm 2 5x7x8 inches Internal Dimensions W x D x H 101 6 x 25 4 x 150 mm 4x1x6 inches Weight External Approx 4 3lbs 150 grams Internal Approx 10 2oz 150 grams Ambient conditions for use Temperature 5 C to 40 C Humi...

Page 29: ...nical Specifications Troubleshooting Product Outline Use with a Macintosh Windows 95 98 NT Safety Standards Dimensions PCD 47B Top view Front view Side view 165 4 mm 101 6 mm 25 4 mm 101 6 mm 147 8 mm 25 4 mm ...

Page 30: ...30 Dimensions PCD 47 External I N T E R N A T I O N A L I N C 169 mm 211 mm 55 mm ...

Page 31: ...nit Ready Command Code Command name 00 01 02 Rezero Unit N A 03 Request Sense Format Unit N A Read Write Seek Inquiry Mode Select Start Stop Unit Send Diagnostic Prevent Allow Media Removal Read Capacity Read Write Seek Write and Verify Verify Read Defect Data N A 04 06 08 0A 0B 12 15 1B 1D 1E 25 28 2A 2B 2E 2F 37 C0 C1 C2 C3 N A N A N A ...

Page 32: ...32 Safety Standards For more information on safety standards please refer to the Pre cautions section on page 6 and the Safety Precaution and Handling section on page 7 ...

Page 33: ...ty 28 I Initialize 23 insecticide 7 Inserting 20 Installation 19 Installation Macintosh 23 Internal 20 J Japan 27 Jumper 12 jumper 10 Jumper Pins 14 L Linux 2 lock indicator 24 M Macintosh 20 24 26 Macintosh Driver 8 23 Maintenance 7 manual 10 Mode Select 31 Model Name 35 mounting 9 mounts 23 N noises 6 not ready 23 NT 19 O operations Windows 20 outlet 6 outline 8 P parts 11 Power consumption 28 P...

Page 34: ...m 8 Specifications 28 SSFDC 2 support 27 Symptom 26 T temperature 7 Termination 14 terminato 26 Test Unit Ready 31 transportation 7 Macintosh 27 Troubleshooting 26 Windows 26 U Unix 9 unix shell 9 User Support 35 V Verify 31 voltages 6 W Windows 95 98 19 Write and Verify 31 Index ...

Page 35: ...ng Product Outline Use with a Macintosh Windows 95 98 NT Safety Standards Microtech International Inc 242 Branford Road North Branford CT 06471 1303 USA Tel 800 626 4276 toll free US only Tel 203 483 9402 Fax 203 483 9792 www microtechint com ...

Reviews: