2
Microtech Designs
microtechdesigns.com.au
Menu options
Channels 8 button plus one two pair (TP) is set as standard.
To convert remote to 7 button and 2 x two pair (TP)
1.
Press and hold the
MENU
button, then press and hold the
7-G
button
for 5 seconds until the ‘TP’ LED comes on.
Now release the
MENU
button.
2.
The remote is now set for 7 button and 2 x two pair operation.
The
7-G
button is now the second two pair button.
3.
To change back, follow the same procedure.
To set the buttons the TP button will activate
1.
Press and hold the
MENU
button. ‘menu’ LED will illuminate.
2.
Now press and release the
TP
button while keeping your finger held on the
MENU
button. The ‘TP’ LED will illuminate.
3.
Press the first button number that you want the
TP
button to activate,
and the ‘TP’ LED will flash once.
4.
Press the second button number, and the ‘TP’ LED will flash twice. Release
the
MENU
button and the TP button allocation has now been set.
To change TP activation from true pair to report pair
1.
Press and hold the
MENU
button then press
5-E
button and the ‘TP’ LED will
activate. This indicates ‘true pair’.
2.
Press the
TP
button the ‘TP’ LED will now continuously flash which indicates
‘report pair’. Now release the
MENU
button.
3.
To change back, follow the same procedure.
To set the buttons the 7-G button will activate
1.
Press and hold the
MENU
button. ‘menu’ LED will illuminate.
2.
Now press and release the
7-G
button while keeping your finger held on the
MENU
button. The ‘TP’ LED will illuminate.
3.
Press the first button number that you want the
7-G
button to activate, and ‘TP’
LED will flash once, then press the second button number and ‘TP’ LED will flash
twice.
4.
Release
MENU
button and the
7-G
button allocation has now been set.
To activate voice mode
1.
Press and hold the
MENU
button.
2.
Press ‘Voice Enable’ button (
1-A
) and the ‘Voice’ LED will activate.
3.
Now remove finger from
MENU
button. Voice activation has now been enabled.
4.
To turn off voice activation, follow the same procedure to turn off the
‘Voice’ LED.
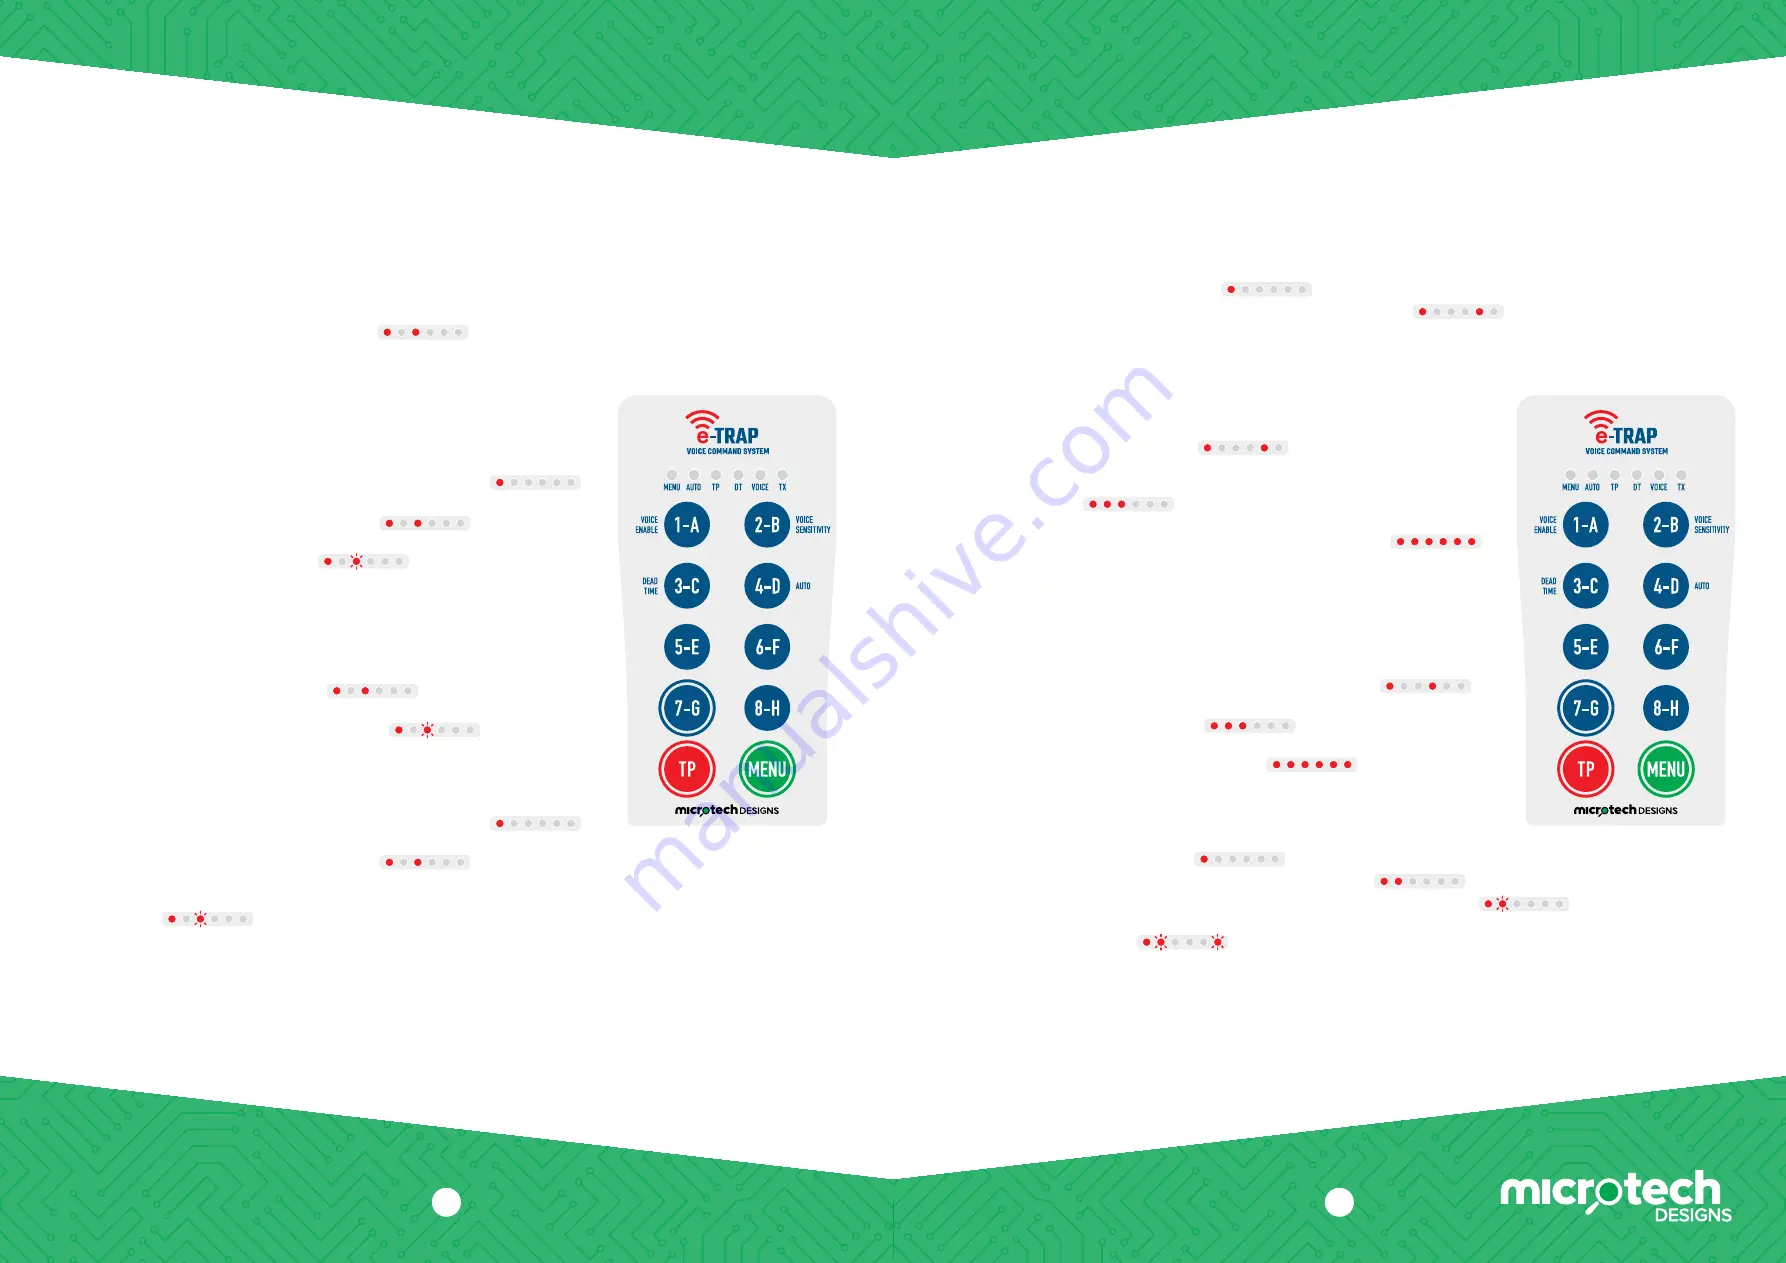
To change voice sensitivity settings
1.
Press and hold
MENU
button.
2.
Press ‘Voice Sensitivity’ (
2-B
). The voice sensitivity will show by the amount
of LEDs illuminated (1 LED means low sensitivity and 6 LEDs means high
sensitivity).
3.
To change settings, press a number between 1 and 6 and your new setting will
now show. This example is for highest voice sensitivity setting.
4.
Now remove finger from
MENU
button.
To set dead time (DT)
Dead Time (DT) is how long the voice stays deactivated after a trigger.
The standard time is 3 seconds, but this can be changed from 1 to 6 seconds.
1.
Press and hold
MENU
button, then press ‘Dead Time’ (
3-C
).
2.
The time will show by the amount of LEDs illuminated. (1 LED means 1 second
and 6 LEDs means 6 seconds).
3.
To change settings, press a number from 1 to 6 and your new setting will
now show. This example is for 6 seconds.
4.
Now remove finger from
MENU
button.
To set auto mode program sequence
1.
Press and hold
MENU
button.
2.
Press ‘Auto’ button (
4-D
) and the ‘Auto’ LED will illuminate.
3.
Now press a program button between 1 and 6. The ‘Auto’ LED will now flash.
4.
Enter firing sequence, for example
1
,
4
,
3
,
8
,
TP
. The ‘TX’ led will flash each time
a button is pressed.
5.
Now release the
MENU
button and the program has been stored.
NOTE:
Auto sequence is turned off when exiting. To add more programs, follow the
same sequence. Up to 6 programs can be stored.
3


