
Step 4 — Select Model
When you start
ESP
, the following menu will appear:
1. Click the MS-Q button and then click
OK
. If you do not want to
make this selection every time you start
ESP
, uncheck “Show
this dialog at startup”.
2. Select the default reader name (
MS-Q-1
), or type a name of
your choice in the
Description
text field and click
OK
.
3. Click
Yes
when this dialog appears:
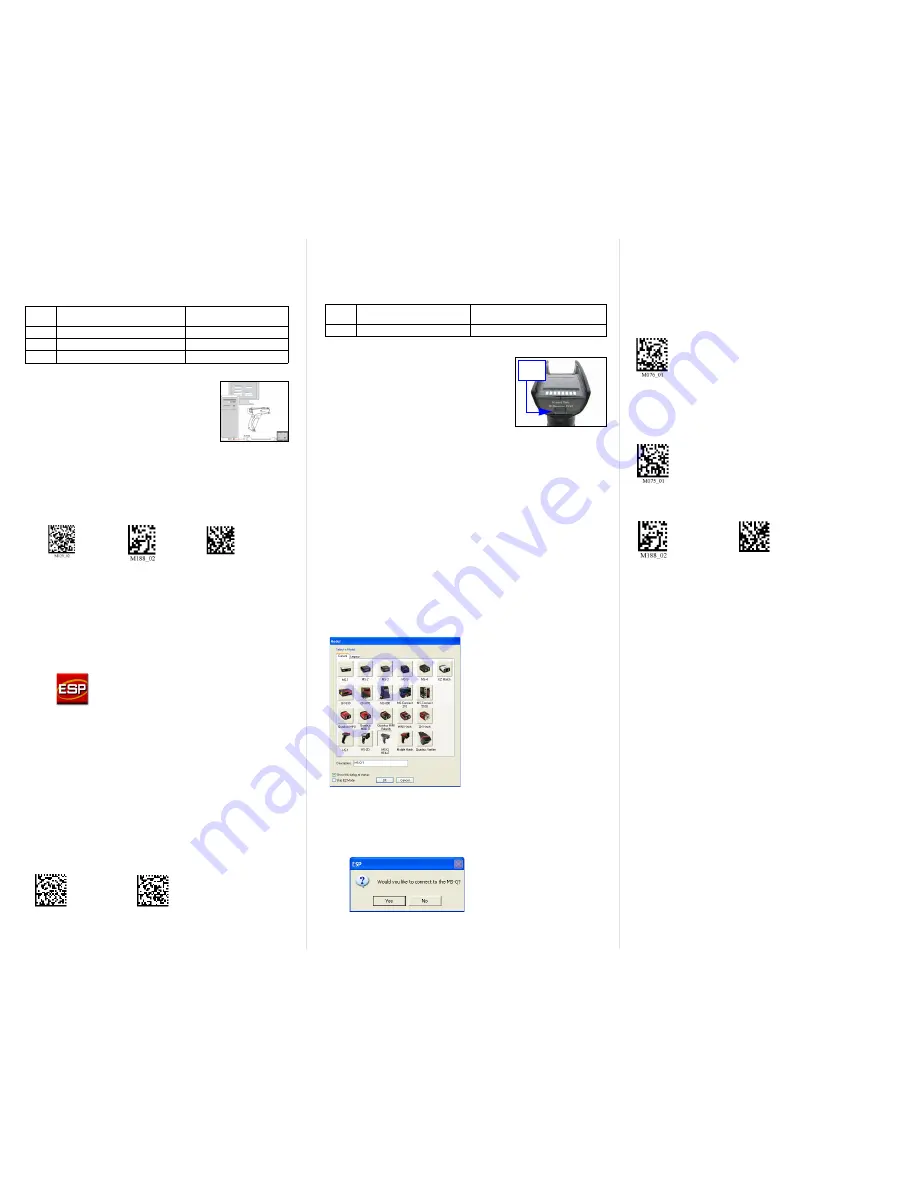
Step 5 — Select Protocol and Connect
In the
Select Protocol
dialog box, select the communications
protocol you are using and click
Next
.
RS-232
Print the
RS-232 Mode
symbol and read it with the imager to
ensure that you are in the correct communications mode. Keep
the printed symbol in a convenient place for future use. Click
Next
when you are finished.
1. In the Com Port dialog, select the communications port you are
using. If you don’t see your com port listed on the dropdown
menu, select
Other
.
2. Click
Connect
.
When you are connected successfully, the
CONNECTED
message
will appear in a green box in the status bar at the bottom right
of the screen.
USB
1. Print the
USB Mode
symbol and read it with the imager to
ensure that you are in the correct communications mode.
Keep the printed symbol in a convenient place for future use.
Click
Next
when you are finished.
2. This will bring up the
USB Reader ID
dialog. You will see a
reader ID in the
Select Device
field. Click
Next
to connect the
imager to ESP.
When you are connected successfully, the
CONNECTED
message
will appear in a green box in the status bar at the bottom right
of the screen.
Note:
If the imager is in the default
USB Keyboard Mode
when you attempt to connect, the
USB Reader ID
dialog will
tell you to click the
Switch Mode
button.
ESP
will attempt to
switch the imager to
USB HID Mode
. Once the imager has
switched modes, click
Next
.
Step 3 — Install ESP
ESP Software
can be found on the Microscan Tools CD that is
packaged with the MS-Q.
1. Follow the prompts to install ESP from the CD.
2. Click on the ESP icon to run the program.
Note:
ESP can also be installed from the
Download Center
at
www.microscan.com
.
ESP System Requirements
• 166 MHz Pentium processor (recommended)
• Windows Vista, XP, or 2000 operating system
• Internet Explorer 5.0 or higher
• 64 MB minimum RAM
• 40 MB minimum disk space
Important:
The imager must be in USB or RS-232 Mode to
connect to
ESP
. Read the symbol below that corresponds with
your communication interface.
USB
Mode
RS-232
Mode
Step 2 — Set Up Hardware
(Batch/Battery, cont.)
Batch Setup - Send and Log Mode
In
Send and Log Mode
, whenever you connect, all buffered
data will be downloaded to the host but retained in the imager’s
memory.
Batch Setup - Send and Buffer Mode
In
Send and Buffer Mode
, whenever you connect, all buffered
data will be downloaded to the host and
ERASED
in the imager’s
memory.
Send and Log Mode
Send and Buffer Mode
Save
Settings
Test Symbol
(ABCDEFGHIJKLMNOP)
Step 2 — Set Up Hardware
(Batch/Battery)
Hardware for Batch/Battery
Installation Steps for Batch/Battery
1. Insert the tab on the back of the BH1
or BH2 Handle into the imager’s
recessed slot at the base of the battery
bay.
2. Snap the imager onto the BH1 or BH2
Handle over the battery. Be sure that
the underside of the imager is latched
at the front of the handle.
3. Secure the underside of the imager to
the BH1 or BH2 Handle with the two screws provided.
4. Select one of the
Batch Setup
modes -
Send and Log
, or
Send
and Buffer
.
5. Read symbols as required.
6. Save settings.
7. When convenient, or when the buffer is full, open any
Windows-compatible program that can accept keyboard text
(for USB and PS/2) or serial data (for RS-232 and Bluetooth).
8. Attach a cable or connect to Bluetooth to download buffered data.
1
MS-Q Imager
FIS-6100-XXXXG
FIS-6150-XXXXG
2
Battery
Included
Tab
Step 2 — Set Up Hardware
(Bluetooth)
Hardware for Bluetooth
Installation Steps for Bluetooth
1. Power-off the host.
2. Connect the 8-pin mini-DIN on the
Bluetooth modem (
2
).
3. Connect the 9-pin D-sub connector (
3
) to
your host computer’s serial port.
4. Connect the RS-232 cable to the power
supply cable (
4
).
5. Plug in the power supply (
4
) and power-on
the host.
6. Open a terminal program (HyperTerminal, for example) and
set to
9600
baud rate,
8
data bits,
none
parity,
1
stop bit,
none
hardware.
7. Read the
RF Two-Way Mode
symbol below.
8. Read the symbol on the Bluetooth modem’s top label (
2
).
9. Read the
Save Settings
symbol below.
1
MS-Q Imager
FIS-6100-XXXXG
FIS-6150-XXXXG
2
USB Bluetooth Modem (Default option) 98-000076-10
3
USB Cable
Included with kit
Note:
RS-232 options also available
98-000076-07, -08, -09
Bluetooth Hardware
RF Two-Way
Mode
Save Settings
Test Symbol
(ABCDEFGHIJKLMNOP)


