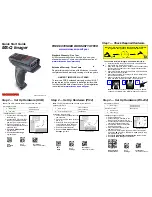
Step 2 — Set Up Hardware (USB)
Note:
The USB interface draws its power from the host.
Hardware for USB
Installation Steps for USB
1. Connect the USB cable (
2
) to
the MS-Q (
1
).
2. Connect the USB cable (
2
) to
the host. You
do not
need to
power off your host computer.
3. Open any program in your
host computer that can receive
keyboard text.
4. Read the
USB Keyboard
symbol below.
5. Read the
Save Settings
symbol below.
1
MS-Q Imager
FIS-6100-XXXXG
FIS-6150-XXXXG
2
USB Cable
Included
USB Hardware
USB
Keyboard
Mode
Save
Settings
Test Symbol
(ABCDEFGHIJKLMNOP)
Step 1 — Check Required Hardware
To assemble the MS-Q Imager with Cabled Handle (H2):
1. Insert the flexible connector at the back of the H2 Handle
into the MS-Q’s 8-pin DIN connector.
2. Snap the imager onto the H2 Handle over the battery blank.
Be sure that the underside of the imager is latched at the
front of the handle.
3. Secure the flexible connector at the back of the H2 Handle
with the two screws provided.
4. Secure the underside of the imager to the H2 Handle with
the two screws provided.
5. Attach the cable to the bottom of the handle. Secure the
cable and cable clamp with the two screws provided.
Important: It is recommended that battery-powered MS-Q
imagers be charged for 4 hours before first use.
Note:
Detailed instructions for the MS-Q Imager’s handle
options are available in the
MS-Q Imager User’s Manual.
3
4
5
Quick Start Guide
MS-Q Imager
P/N 83-210041 Rev R
Step 2 — Set Up Hardware (PS/2)
Note:
The PS/2 interface draws its power from the host.
Hardware for PS/2
Installation Steps for PS/2
1. Power-off the host and disconnect
the keyboard.
2. Connect the PS/2 cable (
2
) to the
MS-Q (
1
).
3. Attach the remaining connectors
to the keyboard cable and host
computer, as shown at right.
4. Power-on the host computer.
5. Read the
PS/2 Mode
and
Save
Settings
symbols.
1
MS-Q Imager
FIS-6100-XXXXG
FIS-6150-XXXXG
2
Keyboard Wedge Cable
60-000018-03
PS/2 Hardware
Save
Settings
Test Symbol
(ABCDEFGHIJKLMNOP)
PS/2
Mode
Step 2 — Set Up Hardware (RS-232)
Hardware for RS-232
Installation Steps for RS-232
1. Power-off the host.
2. Connect the 8-pin mini-DIN on the
RS-232 cable (
2
) to the MS-Q (
1
).
3. Connect the 9-pin D-sub connector to
your host computer’s serial port.
4. Connect the RS-232 cable to the
power supply cable.
5. Plug in the power supply (
3
) and
power-on the host.
6. Open a terminal program (HyperTerminal, for example)
and set
57.6K
baud rate,
8
data bits,
none
parity,
2
stop
bits,
none
hardware.
7. Read the
RS-232 Default Settings Mode
symbol below.
8. Read the
Save Settings
symbol below.
1
MS-Q Imager
FIS-6100-XXXXG
FIS-6150-XXXXG
RS-232 Kit includes:
98-000074-XX
2
RS-232 Cable
3
Power Supply
RS-232 Hardware
RS-232 Default
Settings Mode
Save
Settings
Test Symbol
(ABCDEFGHIJKLMNOP)
FREE EXTENDED WARRANTY OFFER
www.microscan.com/3year
Standard Warranty: One Year
All Microscan products are backed by a one-year
standard warranty. Full warranty details are online at
www.microscan.com/warranty
.
Extended Warranty: Three Years
Register this product online with Microscan to receive
complete extended warranty coverage for three years.
LIMITED TIME OFFER: ACT NOW!
To receive a FREE extended warranty, product MUST
be registered by the end-use installation facility within
four months of the date of manufacture. Online registration
is available at
www.microscan.com/3year
.


