Measurement Collection Specialists
Connect Any Gage into Any Software
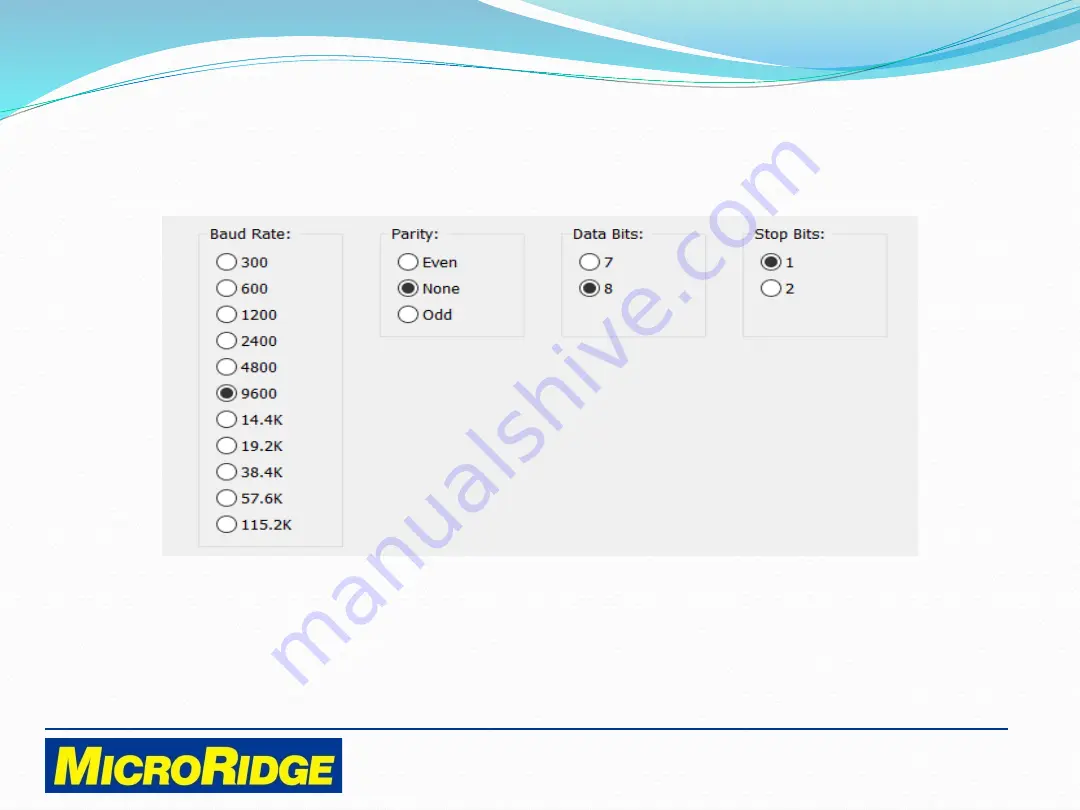
Supported Parameters
9600-N-8-1 factory default parameters selected
Page 1: ...Measurement Collection Specialists Connect Any Gage into Any Software...
Page 2: ...duction This document reviews how the Auto Baud Rate Detection feature is used to connect an RS 232 serial output device to the WedgeLink AT keyboard wedge The WedgeLink AT User s Guide contains multi...
Page 3: ...e into Any Software WedgeLink AT Back panel Front panel DB9 male input connect RS 232 device here Integrated Send button External Switch port USB serial port for device setup USB keyboard wedge port f...
Page 4: ...rement Collection Specialists Connect Any Gage into Any Software Required Items WedgeLink AT RS 232 output device Device data cable Your cable may look different DB9 female end connects to the WedgeLi...
Page 5: ...data from an RS 232 device to a WedgeLink AT the baud rate and communication parameters settings must be the same on both devices These parameters may be changed on the WedgeLink AT or the RS 232 dev...
Page 6: ...are Communication Parameters RS 232 communication parameters consists of four variables WedgeLink AT default is 9600 N 8 1 9600 baud No parity 8 data bits 1 stop bit Variables Options Baud Rate Multip...
Page 7: ...d when the parameters of your RS 232 device are unknown The RS 232 device must have a DATA SEND or PRINT button to use the Auto Baud feature Your device s data send function may need to be activated I...
Page 8: ...nto Any Software Installation Connect the WedgeLink AT to your computer using either the Wedge or RS 232 Prog ports Wait for the front panel LED to turn off Connect your RS 232 serial device to the We...
Page 9: ...Measurement Collection Specialists Connect Any Gage into Any Software Device Connected...
Page 10: ...o Any Software Auto Baud Process 1 Press and release the Reset button on the back of the WedgeLink AT 2 The LED will briefly display red and then display green for 5 seconds 3 Press the RS 232 device...
Page 11: ...by the WedgeLink AT front panel LED LED blinks GREEN 5 times Parameters were identified and stored in the WedgeLink AT LED blinks RED 5 times Parameters could not be identified no changes were made t...
Page 12: ...ine the parameters it is likely due to one of the following reasons The data cable is not correct for your RS 232 device Not enough data was sent from the RS 232 device 3 8 characters are required to...
Page 13: ...Measurement Collection Specialists Connect Any Gage into Any Software Supported Parameters 9600 N 8 1 factory default parameters selected...
Page 14: ...into Any Software Setup Program Communication parameters can be manually set using the WedgeLink AT Setup program This program also provides access to the WedgeLink AT s data parsing features To use...
Page 15: ...tion Specialists Connect Any Gage into Any Software Disable Auto Baud By default the Auto Baud feature is enabled on the WedgeLink AT Click on the Set Parameters button on the Home Tab to disable the...
Page 16: ...on Specialists Connect Any Gage into Any Software Manual Setup Selecting No disables the Auto Baud feature Manually select the baud rate parity data bits and stop bits To save return to the Home tab a...
Page 17: ...Collection Specialists Connect Any Gage into Any Software Tech Support Contact MicroRidge for assistance in using the Auto Baud Rate Detection feature Mon Fri 8am 4 30pm PST 541 593 1656 support micr...