background image

3


  MicroLinks  Technology  Co.,  Ltd.


a.


Capture  Button:  Press  the  capture  button  to  take  picture, 
which will pass to program. 

b.


Light Control Dial

  Light control dial can adjust the brightest of 

LED. 

c.


Focus  Dial:  Focus  button

Adjust  magnification  and  also  can 

adjust the distance just like a video camera. 

d.


USB  Port:  It  is  USB2.0  port.  Please  don’t  connect  a  different 
transmission line. 


1.5


USB Digital Microscope Operation 

a.


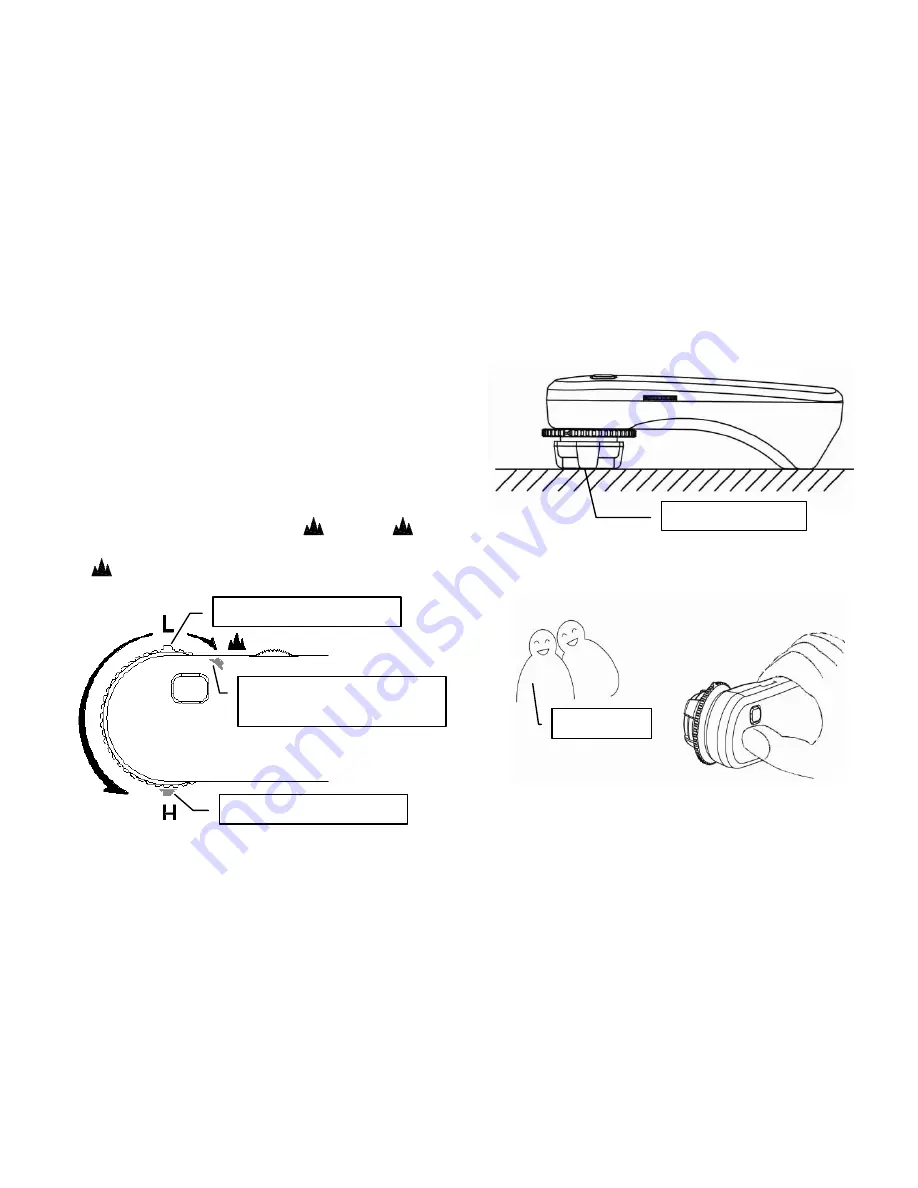
Focus mode: 3 Focus points as L

H & 

. L, H, and 

  are 

focus positions. L is low magnification, H is high magnification 

  is for far distance snapshoot. 


b.


Flat Mode: Adjust flat mode button to L or H to observer. 


c.


Distance  mode:  Distance  mode  is  just  like  a  regular  video 
camera to shoot. 


Film object 


Observation object


Far distance to focus position


High optical focus position.


Low optical focus position.


Summary of Contents for H-CAM

Page 1: ...MicroLinks Technology Co Ltd H CAM User s Guide USB Microscope Version 2 3...

Page 2: ...MicroLinks Technology Co Ltd...

Page 3: ...ntity USB Digital Microscope 1 User s Guide 1 Mini USB2 0 Cable 1 Installation CD 1 Microscope Accessories 1 5 1 2 Microscope Accessories Except for skin piece a general PC material the materials of t...

Page 4: ...Removal can clean ear wax 1 3 Exchange Accessories These accessories can be changed by hand with different types of pieces 1 4 USB Digital Microscope Function d Focus Dial b Light Control Dial a Captu...

Page 5: ...ort It is USB2 0 port Please don t connect a different transmission line 1 5 USB Digital Microscope Operation a Focus mode 3 Focus points as L H L H and are focus positions L is low magnification H is...

Page 6: ...please refer to the Manual set in the Installation CD User s Manual Programs shall be installed according to the following 4 steps 2 1 Insert Installation CD Step 1 Insert Installation CD provided tog...

Page 7: ...mera to the computer If not you can t install the program 2 4 Exit Installation Program Step 4 After installing Application Program and Driver please click and select the position of Step 4 Press butt...

Page 8: ...croscope camera Video image will be displayed in Video Preview Window after connection b Snapshot press the button to capture image from Video Preview Window The captured image will be displayed in Im...

Page 9: ...ages and AVI videos 3 6 video flip control mode After opening H CAM program also click connect button under video preview window will show Video Control Mode toolbar In this mode it can filp video ima...

Reviews: