5
Control program for VT-04
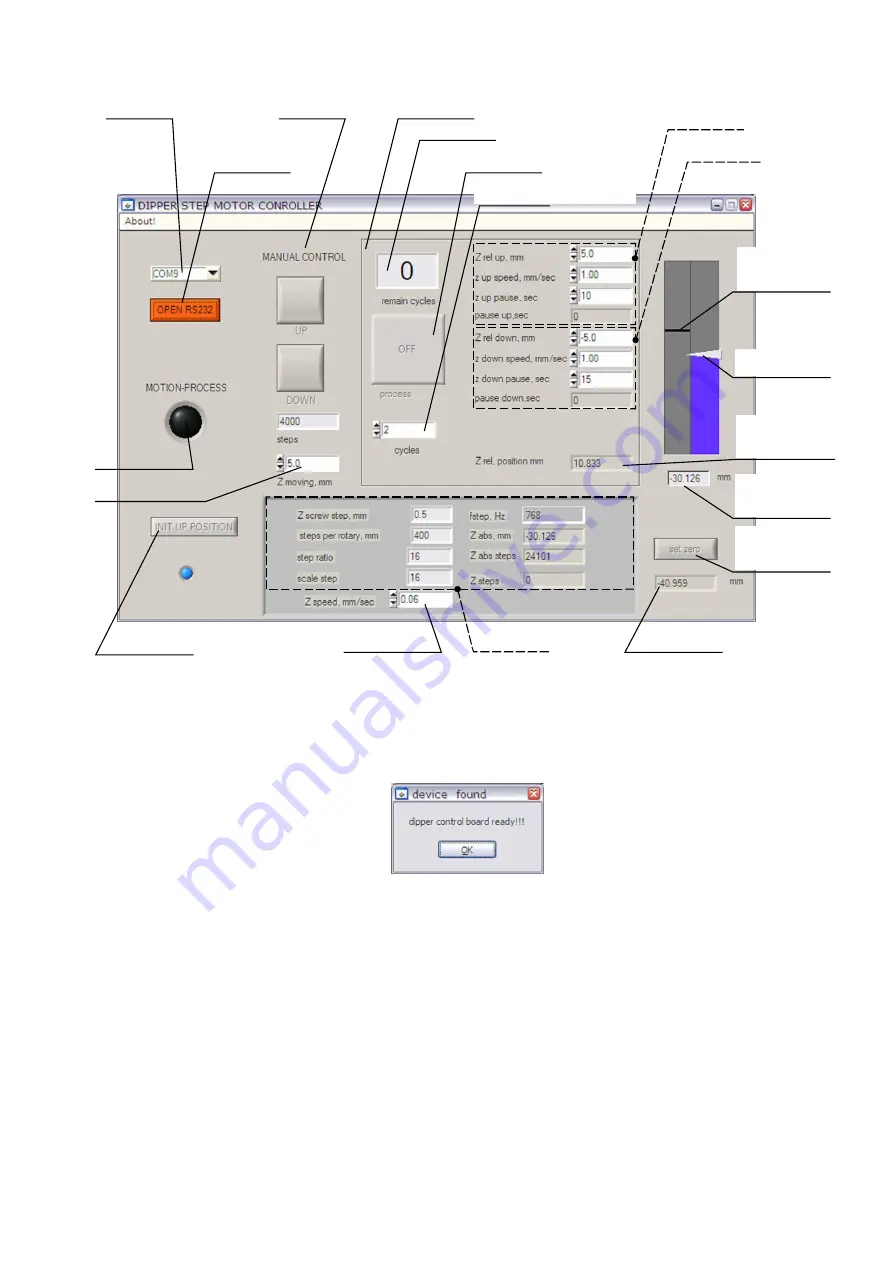
VT-04 control program panel and its elements are shown in the figure below:
COM-port selector
Button to connect/
disconnect the device
and host PC
Activity indicator
Upper point
calibration button
Pane to set speed
under manual mode
Area for hardware
settings indication
Pane to set travel distance
under manual mode
Manual control area
Programmable motion area
Absolute coordinate
of soft 0 position
Current absolute
coordinate of the
carriage
Button to set
current position
as soft 0
Number of remaining cycles
Start/Stop button for
programmable motion
Pane to set number of cycles
Current coordinate
of the carriage
relatively soft 0
Graphic indicator
of soft 0 position
Graphic indicator
of the carriage
current position
Parameters for upward motion
Parameters for
downward motion
[The program start]
Before the control program start, switch the control electronic unit on. After switching the hardware on, wait a couple of
seconds and start the control program. In the folder where the control program was installed, run executable file ‘serial.exe’.
In the control program panel, firstly, select correct COM-port in the port selector (corresponding to ‘USB Serial Port
(COM#)’ in Device Manager). Secondly, press button ‘OPEN RS232’ to connect the device with host PC. About correct
connection system will notify you with label “Device found / dipper control board ready!!!’:
and the port connection button will change color to green with inscription ‘CLOSE RS232’.
Note: If correct connection was not installed, check number of the selected COM-port and repeat the program start procedure
waiting more between the device switching on and the control program start.
Example of the program panel after the device connection is shown below


