9
©2021 Micro-Air Corp
July 1, 2021, revision 1.8
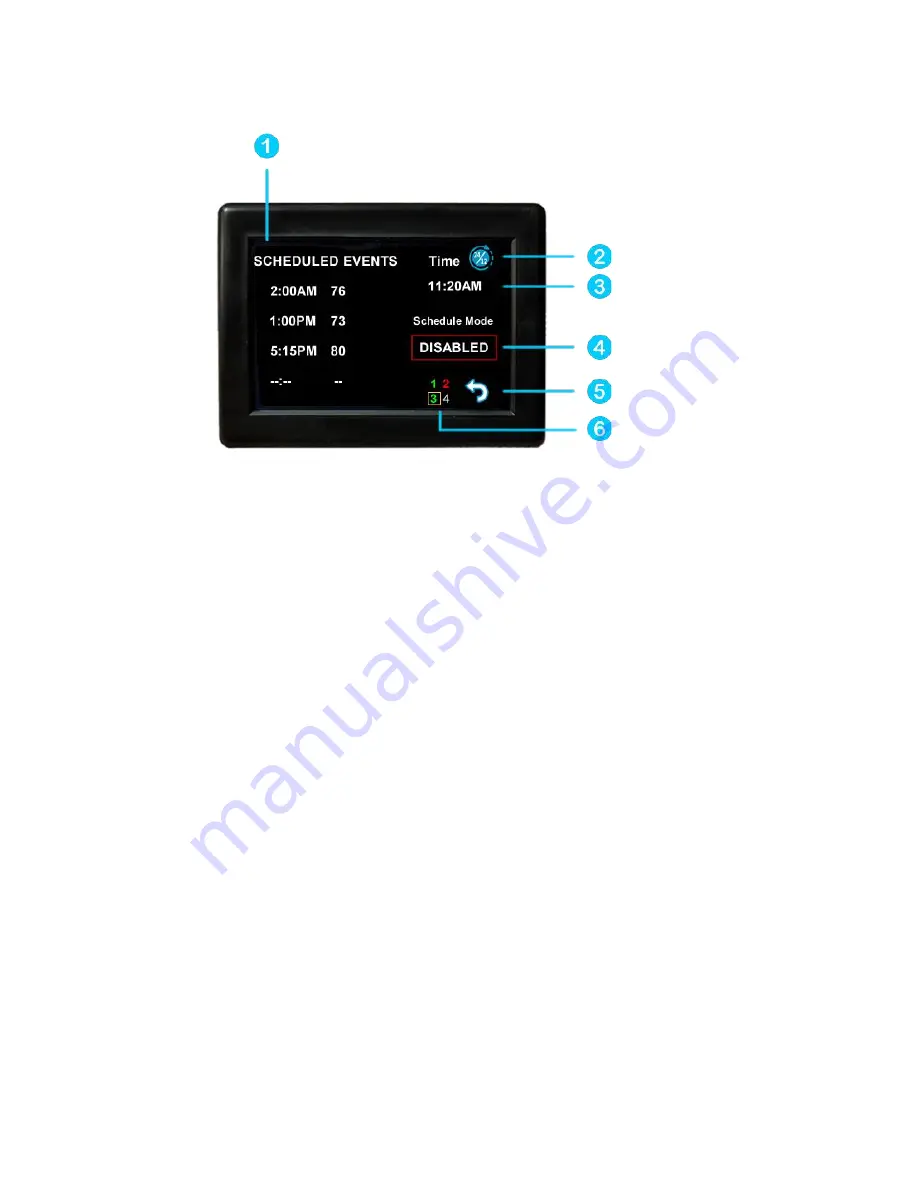
Schedule screen
Set points may be changed on a time-based schedule. The mode used will be the heating or
cooling mode set on the main screen.
Setting a change event
1. Events will show --:-- when the event is disabled. Press the
hour’s
position to set the hours. A
flashing bar will appear under the hours along with up and down adjustment selectors. Use the
adjustment selectors to change the hours.
Press the minutes to move the flashing bar under the minutes and allow ¼ hour adjustments.
Use the up and down adjustment selectors to make changes.
Press the temperature to change the desired temperature set point. This is the temperature the
system will try to achieve after the time that was set.
12- or 24-hour format
2. Press the time in the upper right to change 12 and 24-hour time formats.
Setting the time
3. Time zone is set and saved whenever the thermostat connects using Bluetooth. Time is set on
power up through the internet connection, or whenever a connection is made on either Bluetooth or
WIFI.
Enabling the schedule
4. Press the enabled/disabled button to enable the schedule. The schedule will be active and
make set point changes anytime the schedule is selected on the main screen. The Home/Schedule/Away
button will only toggle between schedule and away when the schedule is enabled. The button will only
select between home and away if the schedule is disabled. Away mode is not configurable on a
schedule.
5. Press the round arrow to return to the regular settings screen.


