6.NOMENCLATURE
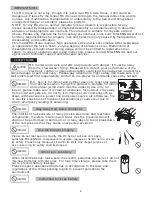
DO not disassemble
FORBIDDEN
(Power indicator light is red; low power is flashing slowly,and flashing fast when searching the frequency)
The model is using the last six-axis gyro system and auto frequency adjusting system,normally the user
don’t need to adjusting the trimmer.User can use trimmer when failed in auto-adjusting.
7.SPECIAL TIPS BEFORE OPERATING
1
.
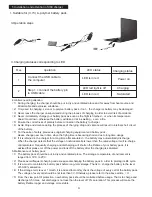
Power on the aircraft: Connecting the power of aircraft,then put the aircraft on a flat
ground or table,3 secs rest.
2
.
power on the remote:the indicator light is flashing,pull the throttle to the top and back
to the lowest.then the remote indicator light is solid lighting,that means the aircraft has
successfully connected with the romote,and you can prepare for your flying action.
3.Notes when flying:Throttle down the throttle stick to the lowest position promptly if the
aircraft is crashing or the rotor block down.Otherwise,the received circuit board will be
damaged.
8.BINDING OF RADIO TRANSMITTER AND RECEIVET
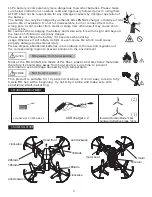
STEP1
put the aircraft on a flat surface
and insert the Li-Po battery as
indicated on the drawing into the
battery box until it is fixed. Do not
move the helicopter and regulate
the lever of remote and gyro to
their center point
Li-Po battery
3.7V 220mAh
Li-Po battery
3.7V 220mAh
CAUTION
put power
joystick to
lower
NO/OFF
power switch
NO/OFF
power switch
STEP2
push the throttle
stick to the lowest
point and switch
on the remoter
power
STEP3
after flight, please remove the battery
from the helicopter and please form
a habit doing this to keep them well
maintained.
if not taken out, they
may be damaged due
to over discharging,
which could even cause
fire
。
WARNING
F o r l o n g t i m e s t o r a g e , p l e a s e r e m o v e t h e b a t t e r y f r o m
t h e r e m o t e a n d k e e p t h e m w e l l m a i n t a i n e d .
STEP4
for long time storage, please
remove the batteries and keep
them well maintained.
if taken out, they may be
damaged due to over
discharging,which could
even cause fire.
WARNING
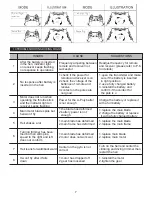
9.FLIGHT ADJUSTMENT AND SETTING
PRIOR TO FLIGHT, PLEASE PRACTICE FIRST
Prior to flight, please practice first so as to acquaint yourself with the operations Before it is
well understood how to maneuver the flight, please do not fly the R.C heli. Please read
instruction manual and keep practicing until the basic flying skills are mastered.
1.put the R.C heli in an open area with its tail facing the player.
2.practice operating all the controlling sticks on the remote (see detailed operation in below
picture) and repeat the practice for throttle sticks, L/R turning trimmer, and F/B flying
trimmer.
3.practice for flight is crucial, please keep practicing until all the operations can be done on
hearing the orders for each movement without thinking
5
speed switch
“ V ”
“ S ”
power switch
Flips button
battle switch
Forward/Backward
L/R sideward fly
L/R turning
ascend/descend
power
indicator light
battery
case
40%/70%/100%


