


53D9009
23
B-Vent Specialty Gas Fireplaces
OPERATING INSTRUCTIONS
OPERATING INSTRUCTIONS FOR UNITS WITH 6CN/6CLP CONTROLS
&0
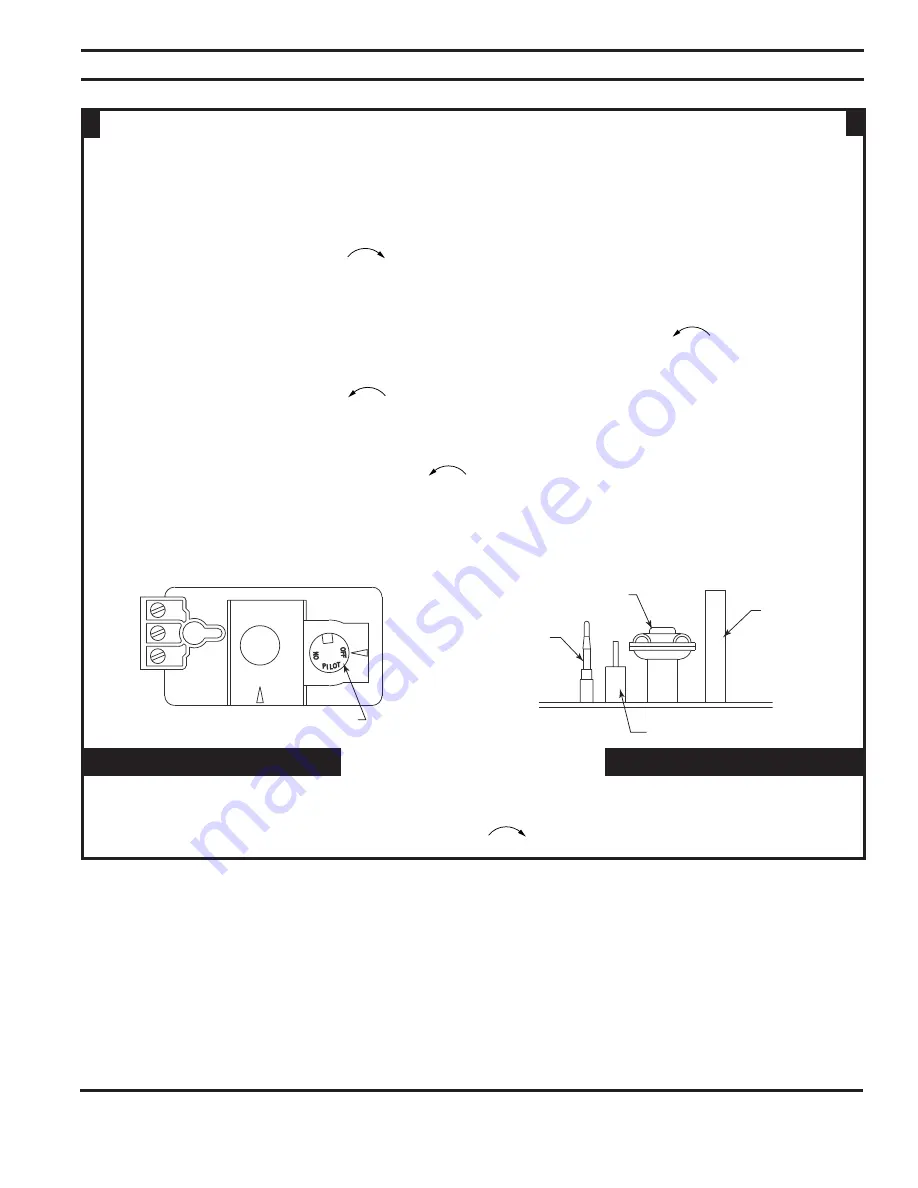
#.#,0CONTROLS
Gas Knob OFF
FP2213
When lighting and relighting, the gas knob cannot be turned from pilot to OFF unless the knob
is depressed.
1.
STOP!
Read the safety information on Page 19.
2. Turn off all electric power to the appliance.
3. Turn gas control knob clockwise
to OFF.
4. Wait 5 minutes to clear out any gas. Then smell for gas, including near the floor. If you smell
gas
STOP!
Follow “B” -
What to Do if You Smell Gas
. If you do not smell gas, go to the next
step.
5. If appliance is equipped with HI-LO adjustment valve, turn counterclockwise
to
HIGH.
6. Find pilot located in front of the middle log.
7. Turn gas knob counterclockwise
to PILOT.
8. Depress and hold gas knob while lighting the pilot with the push button ignitor. Keep knob
fully depressed for one minute, then release. If pilot does not continue to burn, repeat steps
3 thru 7.
9. With pilot lit, turn gas knob counterclockwise
to ON.
10. If equipped with remote ON/OFF switch, main burner may not come on when you turn the
valve to ON or HIGH. Remote switch must be in the ON position to ignite burner.
11. Turn on all electrical power to the appliance.
&0
#.,0PILOT
Pilot
Thermocouple
Piezo Electrode
Generator
FP2214
TO TURN OFF GAS
1. Turn off all electrical power to the appliance if service is to be performed.
2. Push in the gas control knob slightly and turn clockwise
to OFF. Do not force.