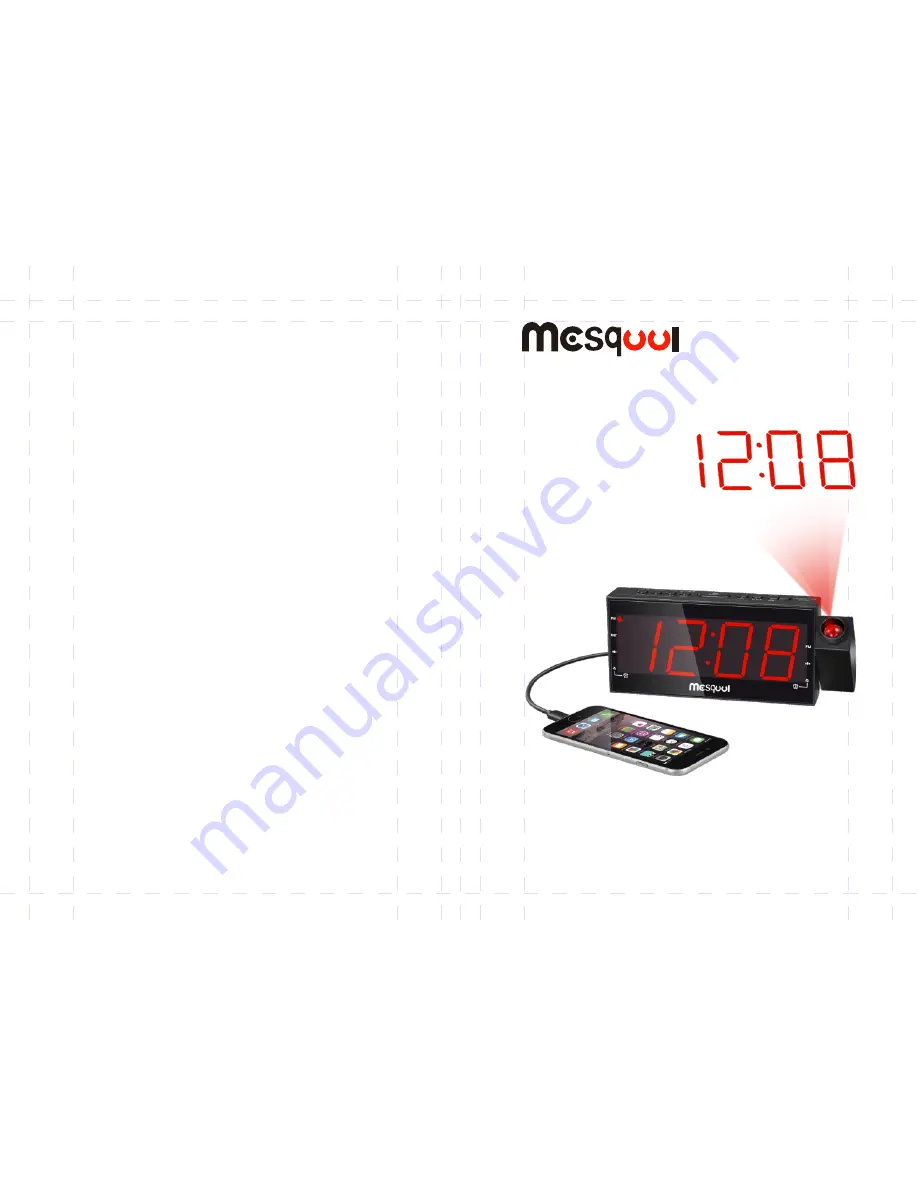
MS-CR1001
AM / FM Projection Alarm Clock Radio
User Manual
Version 2.9
Mon
- Sun
6am to 12am PST
6pm to 12pm PST
[email protected]
Speak with our experts
1-800-303-6081
Website: www.mesqool.com
Page 1: ...MS CR1001 AM FM Projection Alarm Clock Radio User Manual Version 2 9 Mon Sun 6am to 12am PST 6pm to 12pm PST support mesqool com Speak with our experts 1 800 303 6081 Website www mesqool com ...
Page 2: ...on Alarm Clock Radio For your convenience we have created a simplified users manual hoping that it will be easy enough for all to understand and follow Please keep this manual for your references We do not offer any guarantees for this product if misused or used in any other manner not stipulated in our user s manual This product was tested and working properly when it was shipped to us This Item ...
Page 3: ...east 2 seconds to return to CLOCK mode 9 PROJECTION MODE 10 DST Indicator 11 ALARM 1 Buzzer Indicator 12 ALARM 1 Radio Indicator 13 AM FM Indicator 14 ALARM 2 Buzzer Indicator 15 ALARM 2 Radio Indicator 16 Focus ring 17 Battery door 18 DC Jack 19 Speaker 20 FM antenna 21 USB port at the back for charging 22 PM indicator 23 Holder x 2pcs 1 2 3 4 5 6 7 8 9 22 10 11 12 13 14 15 16 02 17 18 20 21 19 2...
Page 4: ...ing to the correct time either press TIME SET PRO button 1 once or just leave it for 5 seconds When the display stops flashing the clock will start running from the set time 03 04 AM FM 1 2 3 AM FM Press or wait 5 seconds to confirm time setting Press and hold this button Press to set hour and minute 5 In RADIO mode To change the current time the Radio must be switched off Press and hold for RADIO...
Page 5: ...rojection clock Turn OFF 4 Adjust focus ring 16 to adjust the focus on projection clock image until clearly show on the ceiling or on the wall Note If you want to switch off the projection repeatedly press Projection mode button 9 until no clock image on the ceiling or on the wall Note if projection numbers are fuzzy please rotate the focus ring 16 to adjust proper angle for clear projection clock...
Page 6: ...brightness AM FM Press and hold to switch DST Chapter 5 ALARM SETTING DUAL ALARM FUNCTION This product features convenient dual alarms Each alarm function can be set independently with a choice of Wake To Radio or Wake To Buzzer Notes If either alarm is set to Wake To Radio please remember to select the desired band station and volume level before turning off the radio Please operate as the follow...
Page 7: ... the minute 4 After setting the desired alarm time press AL1 VOL button 6 again or simply wait for 5 seconds The display will return to the current time and the alarm time is saved 5 Now press AL1 VOL button 6 repeatedly to choose the alarm status The status indicators for Alarm 1 appear in the following sequence on the LEFT of the display A Wake To Buzzer Alarm 1 Buzzer indicator 11 is lighted up...
Page 8: ... the remaining time of the SLEEP period and the SLEEP time can be adjusted by pressing the SLEEP SNOOZE 5 button 3 To switch off the SLEEP timer function during SLEEP mode press the SLEEP SNOOZE 5 button repeatedly to find the OFF option 11 12 Chapter 6 SNOOZE SETTING Once the alarm starts sounding the snooze function can be used to pause the alarm temporarily for 9 minutes before it sounds again ...
Page 9: ...U button 2 or MIN TU button 3 repeatedly until the desired AM station is reached The radio can tune from 520kHz TO 1710kHz each press of the HOUR TU button 2 can tune down by 10KHz and MIN TU button 3 can tune up by 10KHz 13 14 Chapter 8 SETTING THE SLEEP TIMER AND ALARM TOGETHER 1 If you want to set the SLEEP timer function and Alarm function together you must follow the Chapter 5 ALARM SETTING t...
Page 10: ...radio again the memorized station will be broadcast at the memorized volume level 15 16 AM FM Press and hold these buttons to automatically scan radio station FM Operation 1 Press the RADIO button 8 once to turn on the radio The radio receives the FM band with the AM FM indicator 13 turned on and the LED display showing FM frequency Note FM frequency 87 5 MHz 108MHz 87 5MHz preset as a default Rep...
Page 11: ...rized AM station 17 18 Auto Scanning Press and hold either of the 2 tuning buttons HOUR TU button 2 or MIN TU button 3 for more than 2 seconds to start auto scan Scanning will stop automatically when a clear radio signal is found Repeat the same procedure by using the same button until your desired station is found To stop auto scanning press any button once Note In some area where the radio signa...
Page 12: ...he preset number will be shown for 2 seconds then the LED display will change to show the radio frequency 5 seconds after showing the frequency the LED display will change to show the current time 2 Press TIME SET PRO button 1 button repeatedly to cycle through the preset stations The sequence of loading preset AM station is F01 F02 F03 F04 F05 F06 F07 F08 F09 F10 F01 F02 and so on repeatedly Impo...
Page 13: ...ery backup power Important1 2pcs battery only work for recording your current time setting not power supply instead of AC power Important2 battery backup works on the condition that inserting 2pcs battery before AC Power interrupted ensure maintain batteries into the compartment when you plug this clock into outlet again Chapter 13 ABOUT RECOVERY When something wrong happens to this product such a...
Page 14: ...household waste Thank you to recycle collection points provided for this purpose Consult with your local authorities or dealer for advice on recycling Power Source AC DC Adapter Auto Voltage 100V 240V 50 60Hz Radio Frequency FM 87 5 108 MHZ AM520 1710KHZ Power Consumption 7 5 W Speaker 8Ω 1W USB Output 5V 1 5A DC battery 3V 1 5V AAA size x 2pcs For clock memory Not included Chapter 14 BATTERY BACK...