background image


Fig. 15 

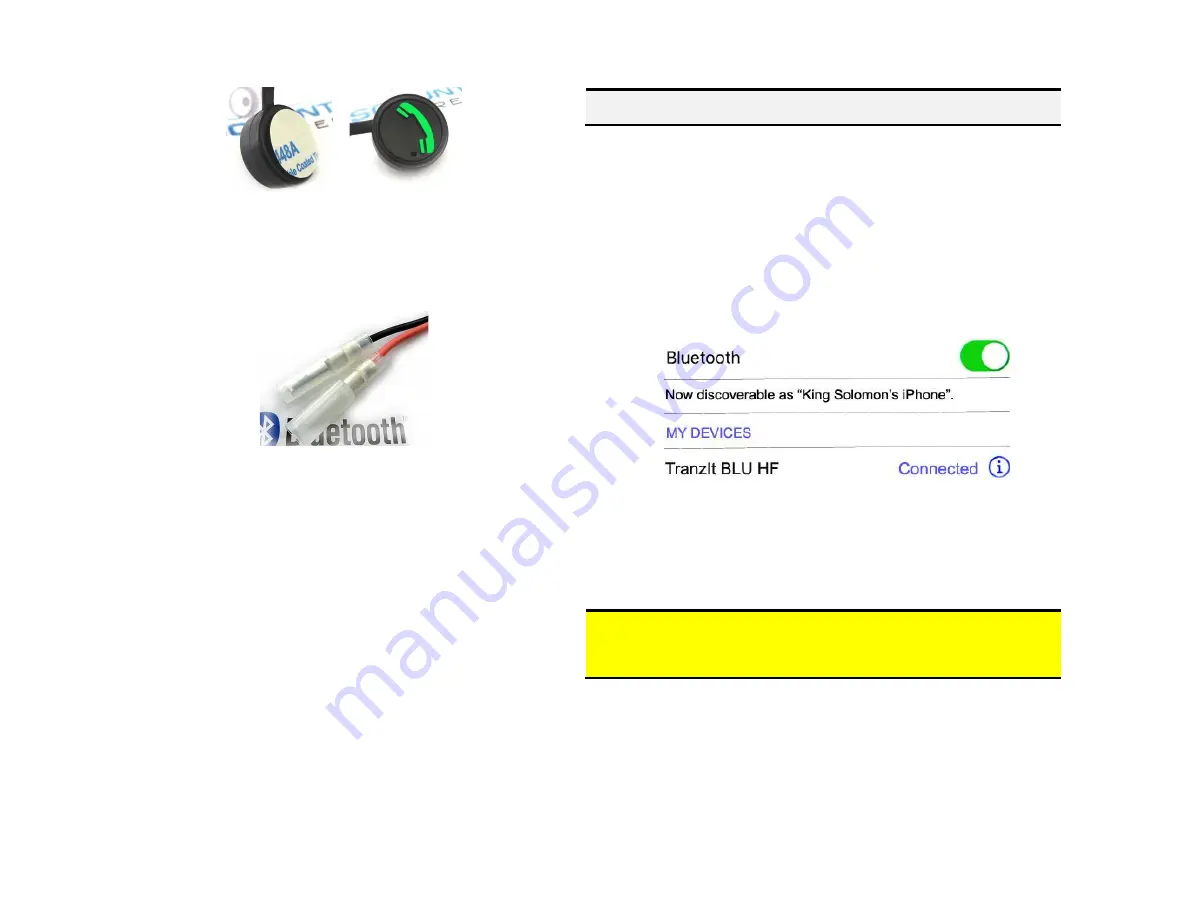
Control button 

11.


 Route control button PINK and BLACK wires (See 

Fig. 16

) behind the dash and 

mate with (2) matching wires on installation harness (See 

Fig.10

). 


Fig. 16 

 terminals 


Pairing and connection 

 
This process is required upon initial install. After initial pairing, the BLU-MBCD will 
automatically reconnect with paired device upon entering the vehicle. 
 

1.


Turn vehicle ignition to “ON”.


2.


Press and hold control button for 2-4 seconds (red/green LED inside 
module will begin to flash 

3.


Access smart device Bluetooth menu settings, and search for new devices. 

4.


Select “TranzIt BLU HF”. Choose “Connect” 


For specific instructions or in case of difficulty, please see “Phone Setup” on 

page 4 on the included ISfM2351 manual.  

 
R

adio must be in “AUX” 

or CD changer mode when using the BLU-MBCD. 


Warning!

 Caller ID and text display are 

not possible in CD mode

. Operating 

Bluetooth device is by pressing green control button and Voice Recognition 
application. Use radio volume button to control playback level


Summary of Contents for BLU-MBCD

Page 1: ...Courtesy of DiscountCarStereo com Serving the internet community since 1995 BLU MBCD QUICKSTARTINSTALLTIONGUIDEFORMERCEDESBENZWITHCDCHANGER ...

Page 2: ...ers can initiate hands free calls launch navigation streaming or any other application One button conveniently installed on the dash does it all The microphone captures your voice commands and allows your phone to make calls and launch important applications The BLU MBCD works in 1994 98 Mercedes Benz with analog CD changer Band and does not interfere with normal radio operation Notes 1 A working ...

Page 3: ...ect harness 10 pin plug See Fig 6 to radio C socket vacated in step 2 See Fig 4 Fig 6 4 Disconnect solid BLACK plug from radio A B sockets See Fig 4 7 and connect it to harness matting sockets on power harness See Fig 8 Fig 7 5 Connect harness 8 pin BROWN plug to the radio B socket See Fig 4 6 Connect harness 8 pin BLACK plug to the radio A socket See Fig 4 ...

Page 4: ... Fig 11 Module 8 Secure Install microphone to visor or headliner See Fig 12 13 using visor clip Fig 12 Microphone Fig 13 Visor clip 9 Carefully route microphones cable 1 8 plug behind the dash and plug into the MIC jack as seen in Fig 14 Fig 14 Module 10 Remove tape backing from control button and secure to dash area within drivers reach ...

Page 5: ...ss and hold control button for 2 4 seconds red green LED inside module will begin to flash 3 Access smart device Bluetooth menu settings and search for new devices 4 Select TranzIt BLU HF Choose Connect For specific instructions or in case of difficulty please see Phone Setup on page 4 on the included ISfM2351 manual Radio must be in AUX or CD changer mode when using the BLU MBCD Warning Caller ID...

Page 6: ... and are not compatible 3 Can I control Smartphone music from radio buttons NO you must continue to use audio device built in controls or control button and or voice commands to operate audio device Use the radio volume control button to set playback level 4 Where is the best place to install the control button We found that having the control button placed high on the dash works helped to keep ey...

Reviews: