


Important safety notes
G
WARNING
Handling discs while driving may distract you
from traffic conditions. You could also lose
control of the vehicle. There is a risk of an
accident.
Handle discs only when the vehicle is
stationary.
Inserting/ejecting an SD memory
card
Inserting an SD memory card
X
Insert the SD memory card into the SD slot
with the contacts at the front and facing
downwards.
Audio 15 automatically activates SD mode
and loads the files. The display shows
Reading Memory Card...
Reading Memory Card...
.
i
If Audio 15 cannot find any readable files
on the SD memory card, the display shows
No Playable Files
No Playable Files
. Information on
readable file formats can be found in the
technical data (
Y
page 60).
Ejecting an SD memory card
X
Press the SD memory card.
Audio 15 ejects the SD memory card.
X
Remove the SD memory card.
Connecting a USB device
The port for USB devices is located in the
stowage compartment on the driver's side of
the instrument panel.
X
Connect the USB device to the USB port in
the correct position.
Audio 15 automatically activates USB
mode and loads the files. The display shows
Reading USB device...
Reading USB device...
i
If Audio 15 cannot find any readable files
on the USB device, the display shows
No
No
Playable
Playable Files
Files
. Information on readable
file formats can be found in the technical
data (
Y
page 60).
i
Due to the wide range of USB devices
available on the market, playback cannot
be guaranteed for all USB device brands.
Information about suitable USB devices
can be obtained from an authorized
Mercedes-Benz Center.
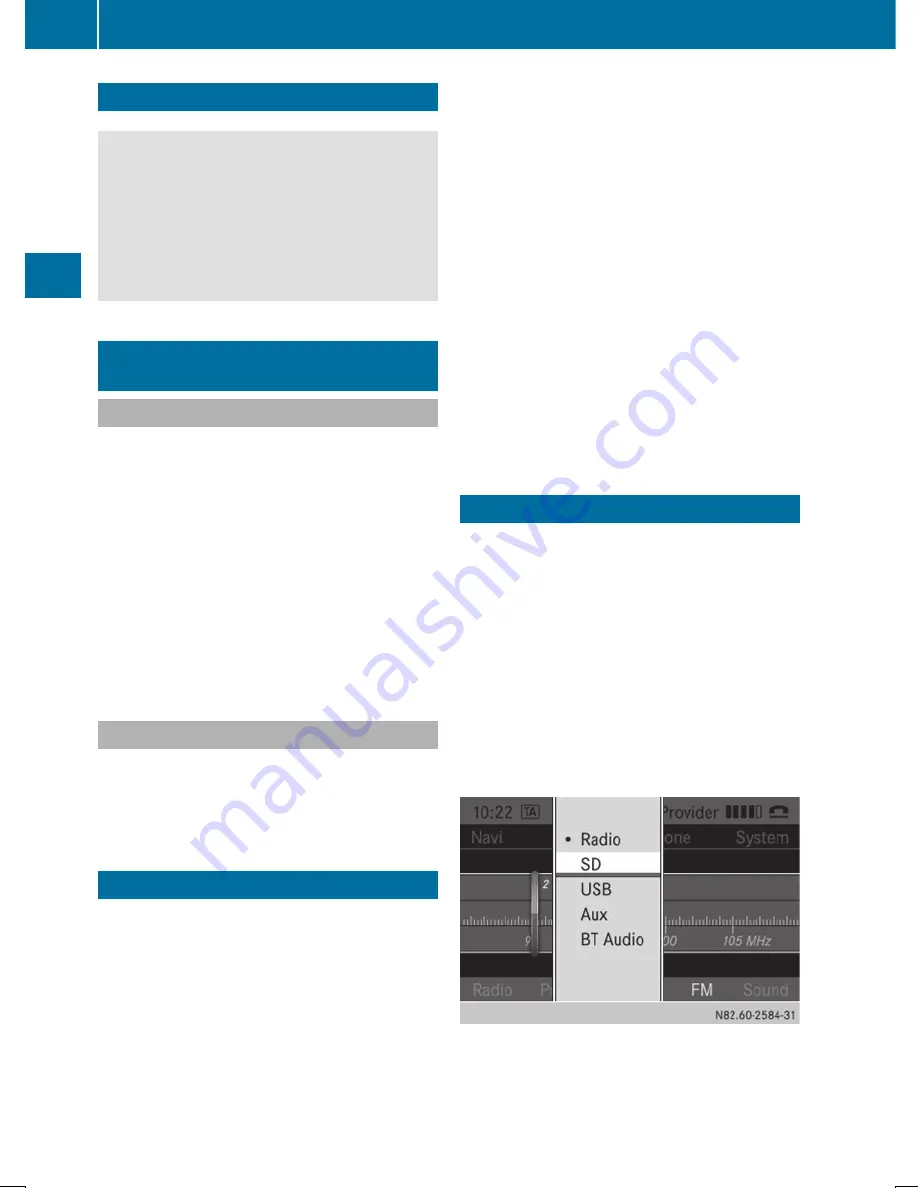
Selecting the SD function
X
Press the
Õ
button repeatedly, until the
display in the menu bar shows
SD
SD
.
Playback starts.
Alternatively, you can select the SD function
in the main menu bar.
X
Press the
9
button repeatedly until the
main menu bar is selected.
X
Select
Audio
Audio
.
The display shows all available audio
sources in a selection list.
X
Select
SD
SD
.
Playback starts.
30
Selecting the SD function
SD
me
mo
ry
car
d
an
d
USB
de
vice