background image

Important safety notes

G

WARNING

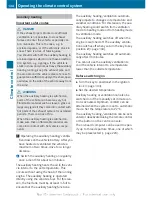
If the engine is switched off automatically and
you exit the vehicle, the engine is restarted
automatically. The vehicle may begin moving.
There is a risk of accident and injury.
If you wish to exit the vehicle, always turn off
the ignition and secure the vehicle against
rolling away.

General notes

:

ECO start/stop display

If the 

¤

 symbol is shown in green in the

multifunction display, the ECO start/stop
function switches the engine off automati-
cally if the vehicle stops moving.
The stop/start function is automatically acti-
vated each time you start the engine with the
ignition key.
If the ECO start/stop function has been man-
ually deactivated (

Y

 page 147) or a malfunc-

tion has caused the system to be deactivated,
the 

¤

 symbol is not displayed.

AMG vehicles: the ECO start/stop function

is only available in drive program 

C.

Automatic engine switch-off

General notes
The ECO start/stop function is operational
and the 

¤

 symbol is displayed in green in

the multifunction display, if:

R

the indicator lamp in the ECO button is lit
green

R

the outside temperature is within the range
that is suitable for the system

R

the engine is at normal operating temper-
ature

R

the set temperature for the vehicle interior
has been reached

R

the battery is sufficiently charged

R

the system detects that the windscreen is
not misted up when the air-conditioning
system is switched on

R

the bonnet is closed

R

the driver's door is closed and the driver's
seat belt is fastened

If not all conditions for automatic engine
switch-off are fulfilled, the 

¤

 symbol is

shown in yellow.

i

All of the vehicle's systems remain active

when the engine is switched off automati-
cally.

i

The engine can be switched off automat-

ically a maximum of four times (initial stop,
then three subsequent stops) in succes-
sion. The 

¤

 symbol is shown in yellow

in the multifunction display after the engine
has been started automatically for the
fourth time. When the 

¤

 symbol is

shown in green in the multifunction display,
automatic engine switch-off is again possi-
ble.

Vehicles with manual transmission
The ECO start/stop function switches off the
engine automatically at low speeds.

X

Brake the vehicle.

X

Engage neutral 

N(

Y

 page 151) (follow

gearshift instruction 

:

 to engage neutral

N, if necessary).

X

Release the clutch pedal.
The engine is switched off automatically.

146

Driving

Driving and parking

Summary of Contents for 2012 A-Class

Page 1: ...A Class Owner s Manual Nur für internen Gebrauch For internal use only ...

Page 2: ...i This symbol indicates useful instructions or further information that could be helpful to you X This symbol designates an instruc tion you must follow X Several consecutive symbols indi cate an instruction with several steps Y page This symbol tells you where you can find further information on a topic YY This symbol indicates a warning or an instruction that is continued on the next page Displa...

Page 3: ...tate of the art Mercedes Benz therefore reserves the right to introduce changes in the following areas Rdesign Requipment Rtechnical features The equipment in your vehicle may therefore differ from that shown in the descriptions and illustrations The following are integral components of the vehicle ROwner s Manual RService Booklet REquipment dependent supplements Keep printed copies of the documen...

Page 4: ......

Page 5: ...Seats steering wheel and mirrors 91 Lights and windscreen wipers 103 Climate control 121 Driving and parking 141 On board computer and displays 207 Stowing and features 267 Maintenance and care 283 Breakdown assistance 297 Wheels and tyres 317 Technical data 335 Contents 3 ...

Page 6: ...board com puter 222 Additional speedometer 220 Additives engine oil 344 Adjusting the headlamp range 107 Airbags Front airbag driver front passenger 43 Important safety guidelines 42 Kneebag 44 Sidebag 44 Triggering 41 Windowbag 45 Air conditioning system see Climate control Air filter white display message 245 Air vents Important safety notes 139 Rear 140 Setting 139 Setting the centre air vents ...

Page 7: ...56 Overview 151 Problem fault 159 Program selector button 155 Pulling away 144 Selector lever 153 Starting the engine 144 Steering wheel gearshift paddles 156 Trailer towing 155 Transmission position display 152 153 Transmission positions 153 Automatic transmission emer gency running mode 159 Auxiliary heating Activating deactivating 134 Activating deactivating on the centre console 135 Display me...

Page 8: ...y 295 Exhaust pipe 294 Exterior lighting 293 Gear or selector lever 295 High pressure cleaner 291 Interior 295 Matt paintwork 292 Notes 290 Paint 292 Plastic trim 295 Reversing camera 294 Roof lining 296 Seat belt 296 Seat cover 296 Sensors 294 Steering wheel 295 Trim pieces 295 Washing by hand 291 Wheels 292 Windows 293 Wiper blades 293 Wooden trim 295 Car wash care 291 Central locking Automatic ...

Page 9: ...automatic climate control 123 THERMOTRONIC 2 zone auto matic climate control 125 Cockpit Overview 28 see Instrument cluster COLLISION PREVENTION ASSIST Activating deactivating the dis tance warning function 218 Display message 230 Operation notes 62 COMAND Online see separate operating instructions Combination switch 107 Consumption statistics on board computer 211 Convenience closing feature 85 C...

Page 10: ... Safety systems 230 Tyres 251 Vehicle 252 Distance recorder see Trip meter Distance warning function Activating deactivating 218 Function notes 62 Warning lamp 266 DISTRONIC PLUS Activation conditions 175 Cruise control lever 174 Deactivating 177 Display message 249 Displays in the multifunction dis play 175 Driving tips 178 Function notes 174 Important safety notes 173 Selecting 175 Setting the s...

Page 11: ...unning in tips 142 Snow chains 321 Symmetrical dipped beam 104 Towing a trailer 201 Wet road surface 166 DVD audio on board computer 215 E EASY VARIO PLUS system Luggage compartment enlarge ment 272 EBD electronic brake force distri bution Display message 232 Function notes 69 ECO display Function notes 165 On board computer 212 ECO start stop function Automatic engine start 147 Automatic engine s...

Page 12: ...terior mirrors Adjusting 99 Anti dazzle mode automatic 100 Folding in out automatically 100 Folding in out electrically 99 Folding in when locking on board computer 225 Out of position troubleshooting 100 Parking position 100 Resetting 99 Storing settings memory function 101 F Fault message see Display messages Filler cap see Fuel filler flap Fire extinguisher 299 First aid kit 298 Fitting a wheel...

Page 13: ...eaning system 289 see Automatic headlamp mode Head restraints Adjusting 94 Adjusting electrically 95 Adjusting manually 95 Adjusting rear 96 Fitting removing rear 96 Heating see Climate control High pressure cleaners 291 Hill start assist 145 HOLD function Deactivating 180 Display message 246 Function notes 180 I Ignition lock see Key positions Immobiliser 69 Indicator and warning lamps Coolant 26...

Page 14: ...vating deactivating the Intel ligent Light System 221 Activating deactivating the inte rior lighting delayed switch off 223 Active light function 109 Automatic headlamp mode 105 Cornering light function 109 Dipped beam headlamps 105 Display message 239 Driving abroad 104 Foglamps 106 Foglamps extended range 109 Hazard warning lamps 108 Headlamp flasher 108 Headlamp range 107 Light switch 105 Main ...

Page 15: ... 215 Memory function 101 Mercedes Benz Service Centre see Qualified specialist workshop Message memory on board com puter 229 Messages see Display messages Mirror see Vanity mirror in sun visor Mirrors see Exterior mirrors see Rear view mirror Mobile phone Frequencies 336 Installation 336 Menu on board computer 215 Notes placing in the bracket 279 Transmission output maximum 336 Mobile telephone P...

Page 16: ... Problem malfunction 89 Rain closing feature 88 Resetting 89 Parking 162 Important safety notes 162 Parking brake 163 Position of exterior mirror front passenger side 100 Reversing camera 191 see Active Parking Assist see PARKTRONIC Parking aid Active Parking Assist 186 see Exterior mirrors see PARKTRONIC Parking brake Display message 233 Electric parking brake 163 Warning lamp 263 Parking lamps D...

Page 17: ...fuelling process 160 see Fuel Remote control Auxiliary heating ventilation 135 Changing the batteries auxiliary heating 136 Replacing bulbs Important safety notes 112 Overview of bulb types 113 Removing replacing the cover front wheel arch 113 Replacing the battery auxiliary heating remote control 136 Reserve fuel tank see Fuel Reserve fuel Display message 245 Warning lamp 264 Residual heat climat...

Page 18: ...SSYST PLUS Service Centre see Qualified specialist workshop Service menu on board computer 219 Service products Brake fluid 344 Coolant engine 344 Engine oil 343 Fuel 339 Important safety notes 338 Washer fluid 345 Service report see Qualified specialist workshop Settings Factory on board computer 225 On board computer 220 Setting the air distribution 129 Setting the airflow 129 SETUP on board com...

Page 19: ...56 Stopwatch RACETIMER 226 Stowage areas 269 Stowage compartment Spectacles compartment 269 Stowage compartments Armrest front 270 Armrest under 270 Centre console 269 Centre console rear 271 Cup holder 275 Glove compartment 269 Important safety information 269 Luggage net 271 Under driver s seat front passenger seat 270 Summer tyres 320 Sun visor 277 Supplemental Restraint System see SRS Suppleme...

Page 20: ...iving tips 201 Folding in the ball coupling 205 Folding out the ball coupling 203 Important safety notes 201 Lights display message 239 Mounting dimensions 348 Parktronic 185 Power supply 206 Trailer loads 349 Transmission see Automatic transmission see Manual transmission Transmission position display DIRECT SELECT lever 152 Transporting the vehicle 313 Trim pieces cleaning instructions 295 Trip ...

Page 21: ...ehicle identification plate 338 Vehicle maintenance see ASSYST PLUS Vehicle tool kit 299 Vehicle weights 346 Video DVD 215 Video DVD on board computer 215 VIN 338 W Warning and indicator lamps ABS 258 Brakes 258 Distance warning signal 266 ESP 260 ESP OFF 261 Fuel tank 264 LIM cruise control 169 LIM DISTRONIC PLUS 174 LIM variable SPEEDTRONIC 171 Overview 32 PASSENGER AIRBAG OFF 52 Reserve fuel 26...

Page 22: ...g on off 117 see Windscreen Winter driving General notes 320 Winter operation Slippery road surfaces 168 Snow chains 321 Winter tyres Limiting the speed on board com puter 223 M S tyres 320 Wiper blades Cleaning 293 Important safety notes 118 Replacing on the rear window 119 Replacing windscreen 118 Wooden trim cleaning instructions 295 Workshop see Qualified specialist workshop Z ZONE function Sw...

Page 23: ...the engine Rdo not warm up the engine when the vehicle is stationary Rdrive carefully and maintain a safe distance from the vehicle in front Ravoid frequent sudden acceleration and braking Rchange gear in good time and use each gear only up to Ô of its maximum engine speed Rswitch off the engine in stationary traffic Rmonitor the vehicle s fuel consumption Returning an end of life vehicle EU count...

Page 24: ...f other road users could be endangered Rif the emission or noise levels are adversely affected Always specify the vehicle identification num ber VIN Y page 338 and the engine num ber Y page 338 when ordering genuine Mercedes Benz parts Owner s Manual General notes Before you first drive off read this Owner s Manual carefully and familiarise yourself with your vehicle For your own safety and a long...

Page 25: ...anelling is damaged com bustible materials such as leaves grass or twigs can gather between the underbody and the underbody panelling If these materials come in contact with hot parts of the exhaust system for an extended period they can catch fire Have the vehicle checked and repaired imme diately at a qualified specialist workshop If on continuing your journey you notice that driving safety is i...

Page 26: ... components Mercedes Benz recommends that you use a Mercedes Benz Service Centre Vehicle registration Mercedes Benz may ask its Service Centres to carry out technical inspections on certain vehicles The quality or safety of the vehicle is improved as a result of the inspection Mercedes Benz can only inform you about vehicle checks if it has your registration data It is possible that your vehicle h...

Page 27: ... trace the vehicle s movements over distances travelled When your vehicle is serviced this technical information can be read out from the event and fault memory Services include Rrepairs Rservice processes Rwarranty claims Rquality assurance The information is read out by authorised employees of the service network including manufacturers using special diagnostic devi ces You can find more informa...

Page 28: ...26 ...

Page 29: ...Cockpit 28 Instrument cluster 30 Multifunction steering wheel 33 Centre console 34 Overhead control panel 36 Door control panel 37 27 At a glance ...

Page 30: ...CT lever 151 B PARKTRONIC warning dis play 182 C Overhead control panel 36 D Climate control systems 122 Function Page E Ignition lock 143 F Adjusting the steering wheel 98 G Cruise control lever 169 H Electric parking brake 163 I Light switch 105 J Diagnostics connection 23 K Opening the bonnet 285 28 Cockpit At a glance ...

Page 31: ... Horn B DIRECT SELECT lever 151 C Steering wheel gearshift paddles 156 D Light switch 105 Function Page E Electric parking brake 163 F Opening the bonnet 285 G Diagnostics connection 23 H Ignition lock 143 I Adjusting the steering wheel 98 J Cruise control lever 169 K Climate control systems 122 Cockpit 29 At a glance ...

Page 32: ...ls i Instrument cluster kilometres Function Page Speedometer with seg ments 209 Multifunction display 210 Rev counter 208 Function Page Coolant temperature 208 A Fuel gauge B Instrument cluster lighting 208 30 Instrument cluster At a glance ...

Page 33: ...uster miles Function Page Speedometer with seg ments 209 Multifunction display 210 Rev counter 208 Function Page Coolant temperature 208 A Fuel gauge B Instrument cluster lighting 208 Instrument cluster 31 At a glance ...

Page 34: ...e yellow 263 C Distance warning 266 D Turn signals 107 E 6 SRS 263 F ü Seat belts 257 G Diesel engine pre glow 144 M SPORT handling mode in AMG vehicles 261 Function Page H Coolant 264 I R Rear foglamp 106 J N Front foglamps 106 K Engine diagnostics 264 L h This lamp has no func tion M æ Reserve fuel 264 N å ESP OFF 260 O ABS 258 P J Brakes 258 32 Instrument cluster At a glance ...

Page 35: ...s or ends a call 215 Exits telephone book redial memory 6 Makes or accepts a call Switches to the redial mem ory WX Adjusts the volume 8 Mute Function Page A Selects a menu 209 9 Selects a submenu or scrolls through lists 209 a Confirms the selection 209 Hiding display messages 229 B Back 209 Switches off LINGUA TRONIC see the separate operating instructions Multifunction steering wheel 33 At a gl...

Page 36: ...e separate operating instructions c Seat heating 96 c PARKTRONIC 182 ECO start stop func tion 146 A Hazard warning lamps 108 Function Page B 4 PASSENGER AIRBAG OFF indicator lamp 52 C Ú Selects the drive pro gram 155 å AMG vehicles ESP 66 D Auxiliary heating 134 34 Centre console At a glance ...

Page 37: ...ction Page D Ashtray 277 Cigarette lighter 278 Power socket 278 Stowage compartment 269 E Stowage compartment 269 Function Page F Cup holders 275 G Stowage compartment 269 H Audio COMAND control ler see the separate oper ating instructions Centre console 35 At a glance ...

Page 38: ...erior lighting control off 111 ë Deactivates tow away protection 70 A Rear view mirror 98 Function Page B ê Deactivates the inte rior motion sensor 70 C Spectacles compartment 269 D 3 Opens closes the panorama sliding sunroof with roller sunblinds 87 E c Switches the front interior lighting on 112 F p Switches the left hand reading lamp on off 111 36 Overhead control panel At a glance ...

Page 39: ...ior mirror settings 101 Adjusts the seats electri cally 94 A 7Zö Adjusts and folds the exte rior mirrors in out electri cally 99 Function Page B W Opens closes the side windows 84 C n Activates deacti vates the override feature for the side windows in the rear compartment 61 Door control panel 37 At a glance ...

Page 40: ...38 ...

Page 41: ...Useful information 40 Occupant safety 40 Children in the vehicle 50 Driving safety systems 61 Anti theft systems 69 39 Safety ...

Page 42: ...tronic components or their software The seat belts together with SRS Supple mental Restraint System are complemen tary co ordinated restraint systems Y page 41 They reduce the risk of injury in specific pre defined types of accident sit uations and thereby increase occupant safety However seat belts and airbags gen erally do not protect against objects pene trating the vehicle from the outside To ...

Page 43: ... belt tensioners and air bags During the first stage of a collision the airbag control unit evaluates important physical data relating to vehicle deceleration or accel eration such as Rduration Rdirection Rmagnitude Based on the evaluation of this data the air bag control unit pre emptively triggers the belt tensioners in the first stage If there is an even higher rate of vehicle decel eration or ...

Page 44: ...Ralways secure children less than 1 50 m tall or under 12 years of age in suit able child restraint systems Rall vehicle occupants must select a seat position that is as far away from the airbag as possible The driver s seat position must allow the vehicle to be driven safely The driver s chest should be as far away from the centre of the driver s airbag cover as possible Rmove the front passenger...

Page 45: ...rtment G WARNING When an airbag deploys a small amount of powder is released The powder may cause short term breathing difficulties to persons suffering from asthma or other pulmonary conditions In order to prevent potential breathing diffi culties you should leave the vehicle as soon as it is safe to do so You can also open the window to allow fresh air to enter the vehicle interior The powder do...

Page 46: ...ight up Y page 52 If a child restraint system is fitted to the front passenger seat and the PASSENGER AIRBAG OFF 4 indicator lamp on the centre con sole is not on Ra child restraint system without a trans ponder for automatic child seat recognition has been fitted or Ra child restraint system with a transponder has been fitted incorrectly Driver s kneebag Driver s kneebag deploys under the steer i...

Page 47: ...determines that sidebag deployment can offer additional protection to that provided by the seat belt Windowbags Windowbags enhance the level of protec tion for the head but not chest or arms of the vehicle occupants on the side of the vehi cle on which the impact occurs Windowbags are integrated into the side of the roof frame and deployed in the area from the A pillar to the C pillar Windowbags a...

Page 48: ...ar pregnant women wear their seat belts correctly at all times RThe seat belt must fit snugly on your body and must not be twisted Therefore avoid wearing bulky clothing e g a winter coat The shoulder section of the belt must be routed across the centre of your shoulder on no account across your neck or under your arm and pulled tight against your upper body The lap belt must always pass across yo...

Page 49: ...ercedes Benz recom mends that you only use seat belts which have been approved by Mercedes Benz for your vehicle Seat belts are the most effective means of restraining the movement of vehicle occu pants in the event of an accident This reduces the risk of vehicle occupants coming into contact with parts of the vehicle interior Fastening seat belts X Adjust the seat and move the backrest to an almo...

Page 50: ...press and hold belt sash guide release X Slide the belt sash guide downwards X Let go of belt sash guide release and make sure that the belt sash guide has engaged Releasing the seat belts Make sure that the seat belt is fully rolled up Otherwise the seat belt or belt tongue will be trapped in the door or in the seat mechanism This could damage the door the door trim panel and the seat belt Dam ag...

Page 51: ...lt tensioners which have been trig gered replaced at a qualified specialist work shop Comply with safety regulations when dispos ing of belt tensioners Any Mercedes Benz Service Centre can provide details of these regulations If the front passenger seat is not occu pied do not engage the seat belt tongue in the buckle on the front passenger seat Otherwise the belt tensioner could be trig gered in ...

Page 52: ...n Rif you secure a forward facing child restraint system to the front passenger seat you must move the front passenger seat as far back as possible Rchildren must never travel sitting on the lap of another occupant Due to the forces which occur in the event of a sudden change of direction heavy braking or an accident it would not be possible to restrain the child The child could be thrown against ...

Page 53: ...ion about this at any Mercedes Benz Service Centre Child restraint system on the front passenger seat G WARNING If the front passenger airbag is not disabled Ra child secured in a child restraint system on the front passenger seat could be seri ously and even fatally injured by the front passenger airbag deploying This is espe cially a risk if the child is in the immediate vicinity of the front pa...

Page 54: ...matic child seat rec ognition on the front passenger seat func tions communicates correctly never place objects e g a cushion under the child restraint system The entire base of the child restraint system must always rest on the seat cushion An incorrectly fitted child restraint system cannot perform its intended protec tive function in the event of an accident and could lead to injuries G WARNING...

Page 55: ...ild seat securing system does not provide sufficient protection for children weighing more than 22 kg For this reason do not secure children weighing more than 22 kg in a child restraint system secured by the ISOFIX child seat securing system If the child weighs more than 22 kg secure the child restraint system with the vehicle seat belt as well In addition when fitting a child restraint system be...

Page 56: ...er s instruc tions when installing the ISOFIX child restraint system ISOFIX is a standardised securing system for specially designed child restraint systems on the rear seats Securing rings for two ISO FIX child restraint systems are fitted on the left and right of the rear seats Top Tether Important safety notes G WARNING Make sure that the rear seat backrest is fully locked When the red lock ver...

Page 57: ...er anchorage as shown RTop Tether belt is not twisted RTop Tether belt is routed between rear seat backrest and luggage compartment cover if luggage compartment cover is fitted X Vehicles with adjustable head restraints move the head restraint back down slightly again if necessary Y page 96 Make sure that you do not interfere with the correct routing of Top Tether belt X Fit the ISOFIX child restr...

Page 58: ...ou switch the ignition on There is a risk of injury X Remove electronic equipment from the front passenger seat e g RLaptop RMobile phone RCards with transponders such as ski passes or access cards If the 45 indicator lamp remains lit X Visit a qualified specialist workshop Suitable positioning of the child restraint systems Key to the letters used in the table X Seat which is unsuitable for child...

Page 59: ...ystem 1 If you use a category 0 or 0 baby car seat on a rear seat you must adjust the driver s or front passenger seat so that the seat does not come in contact with the baby car seat 2 Vehicles with automatic child seat recognition in the front passenger seat a child restraint system of the Universal category with a transponder for automatic child seat recognition must be fitted The 45 indicator ...

Page 60: ... cot F ISO L1 X G ISO L2 X 0 up to 10 kg up to approximately 6 months E ISO R1 IL 0 up to 13 kg up to approximately 15 months E ISO R1 IL D ISO R2 IL C ISO R3 IL I 9 to 18 kg between approx imately 9 months and 4 years D ISO R2 IL4 5 C ISO R3 IL B ISO F2 IUF4 5 B1 ISO F2X IUF A ISO F3 IUF Recommended child restraint systems When installing a child restraint system without a transponder for automat...

Page 61: ...approximately 9 months and 4 years Britax Römer DUO PLUS 03 301133 04 301133 970 11 00 Yes 970 16 00 No Group II III 15 to 36 kg between approximately 4and 12 years Britax Römer KIDFIX 04 301198 970 18 00 Yes 970 19 00 No Suggested Universal Semi Universal category ISOFIX child restraint systems Weight catego ries Size cate gory Manufac turer Type Approval number E1 Order number6 Auto matic child ...

Page 62: ...red in a child restraint system They could injure them selves on parts of the vehicle They could also be seriously or even fatally injured by pro longed exposure to extreme heat or cold Do not expose the child restraint system to direct sunlight Parts of the child restraint sys tem could heat up and the child could burn herself himself on them If a child opens a door the child or other per sons co...

Page 63: ...ROL Y page 69 Important safety notes If you fail to adapt your driving style or if you are inattentive the driving safety systems can neither reduce the risk of accident nor over ride the laws of physics Driving safety sys tems are merely aids designed to assist driv ing You are responsible for the distance to the vehicle in front for vehicle speed and for braking in good time Always adapt your dr...

Page 64: ...sating brake pedal can be an indica tion of hazardous road conditions and func tions as a reminder to take extra care while driving BAS Brake Assist i Observe the Important safety notes sec tion Y page 61 G WARNING If BAS is malfunctioning the braking distance in an emergency braking situation is increased There is a risk of accident In an emergency braking situation depress the brake pedal with f...

Page 65: ...then lights up in the instrument cluster Rof around 7 km h or higher if you very quickly approach a vehicle in front An intermittent warning tone will then sound and the distance warning lamp will light up in the instrument cluster X Brake immediately in order to increase the distance from the vehicle in front or X Take evasive action provided it is safe to do so Due to the nature of the system pa...

Page 66: ...ke pedal depressed until the emergency braking situation is over ABS prevents the wheels from locking The brakes will work normally again if Ryou release the brake pedal Rthere is no longer any danger of a collision Rno obstacle is detected in front of your vehicle Adaptive Brake Assist is then deactivated Vehicles with PRE SAFE if adaptive Brake Assist requires particularly high brake pres sure p...

Page 67: ... part of ESP ETS brakes the drive wheels individually if they spin This enables you to pull away and accelerate on slippery surfaces for example if the road surface is slippery on one side In addition more drive torque is transferred to the wheel or wheels with traction ETS remains active when you deactivate ESP Important safety notes G WARNING If ESP is malfunctioning ESP is unable to stabilise t...

Page 68: ... deactivated when the engine is switched on again The ECO start stop function switches the engine off automatically if the vehicle stops moving When pulling away again the engine starts automatically ESP remains in its pre viously selected status Example if ESP was deactivated before the engine was switched off ESP remains deactivated when the engine is switched on again Deactivating activating ES...

Page 69: ...ited degree When SPORT handling mode is activated RESP only improves driving stability to a limited degree Rtraction control is still activated Rengine torque is restricted to a limited degree and the drive wheels are able to spin The spinning of the wheels results in a cut ting action for better traction on loose sur faces RESP still provides support when you brake Characteristics when ESP is dea...

Page 70: ...ons ESP will not stabilise the vehicle If you deactivate ESP RESP no longer improves driving stability Rengine torque is no longer limited and the drive wheels are able to spin The spinning of the wheels results in a cut ting action for better traction on loose sur faces Rtraction control is still activated RESP still provides support when you brake ESP trailer stabilisation General notes If your ...

Page 71: ... you by transmitting a noticeable steering force to the steering wheel in the direction required for vehicle stabilisation This steering support is provided in particular if Rboth right wheels or both left wheels are on a wet or slippery road surface when you brake Rthe vehicle starts to skid If there is an ESP malfunction you will not receive any steering support from STEER CONTROL Power steering...

Page 72: ...ion is primed after approximately 60 seconds Deactivating X Unlock the vehicle with the key or X Insert the key into the ignition lock Tow away protection is switched off auto matically Deactivating X Remove the key from the ignition lock X Press button Indicator lamp lights up briefly X Lock the vehicle with the key Tow away protection is deactivated Tow away protection remains deactivated until ...

Page 73: ...s button Indicator lamp flashes briefly X Lock the vehicle with the key The interior motion sensor is deactivated The interior motion sensor remains deactiva ted until Rthe vehicle is unlocked again Ra door is opened and closed again Rthe vehicle is locked again To prevent a false alarm deactivate the inte rior motion sensor if you lock your vehicle and Rpeople or animals remain in the vehicle Rth...

Page 74: ...72 ...

Page 75: ...Useful information 74 Key 74 Doors 79 Luggage compartment 82 Side windows 83 Panorama sliding sunroof 86 73 Opening and closing ...

Page 76: ...ch heavy or large objects to the key the key could be unintentionally turned in the ignition lock This could cause the engine to be switched off There is a risk of an accident Do not attach any heavy or large objects to the key Remove any bulky keyrings before inserting the key into the ignition lock Keep the key away from strong magnetic fields Otherwise the remote control func tion could be affe...

Page 77: ...is unlocked This is useful if you fre quently travel on your own X To change the setting press and hold down the and buttons simulta neously for approximately six seconds until battery check lamp Y page 76 flashes twice i If the setting of the locking system is changed within the signal range of the vehi cle pressing the or button Rlocks or Runlocks the vehicle The key now functions as follows X T...

Page 78: ... of them with the household rubbish They must be collected sep arately and disposed of in an environmentally responsible recycling system Dispose of batteries in an environmentally responsible manner Take discharged batteries to a qualified spe cialist workshop or to a col lection point for used batter ies Mercedes Benz recommends that you have the batteries replaced at a qualified specialist work...

Page 79: ... the key against your palm until battery falls out X Insert the new battery with the positive ter minal facing upwards Use a lint free cloth to do so X Make sure that the surface of the battery is free from lint grease and all other forms of contamination X Insert the front tabs of battery tray cover and then press to close it X Insert the emergency key element into the key X Check the function of...

Page 80: ...terference from a powerful source of radio waves X Try again to lock unlock the vehicle using the remote control function of the key Point the tip of the key at the driver s door handle from close range and press the button The key is faulty X Lock Y page 81 or unlock Y page 81 the vehicle using the emergency key element X Have the key checked at a qualified specialist workshop You have lost a key...

Page 81: ...n into neutral Rstart the engine There is a risk of an accident and injury When leaving the vehicle always take the key with you and lock the vehicle Never leave children or animals unattended in the vehicle Always keep the key out of reach of children G WARNING If persons particularly children are exposed to heat or cold for a prolonged period there is a risk of serious or even fatal injuries Nev...

Page 82: ...de Switch off the alarm Y page 69 Centrally locking and unlocking the vehicle from the inside You can centrally lock or unlock the vehicle from the inside This can be useful if you wish to lock the vehicle before pulling away for example X To unlock press button X To lock press button If all the doors and the tailgate are closed the vehicle locks This does not lock or unlock the fuel filler flap Y...

Page 83: ... being tested on a dynamom eter You can also switch the automatic locking function on and off using the on board com puter Y page 223 Unlocking the driver s door emer gency key element If the vehicle can no longer be unlocked with the key use the emergency key element If you use the emergency key element to unlock and open the driver s door the anti theft alarm system will be triggered Y page 69 X...

Page 84: ... is moving exhaust fumes could enter the passenger compartment There is a risk of poisoning Turn off the engine before opening the tail gate Never drive with the tailgate open G WARNING If persons particularly children are exposed to heat or cold for a prolonged period there is a risk of serious or even fatal injuries Never leave persons particularly children unatten ded in the vehicle The tailgat...

Page 85: ...y Y page 75 X Insert emergency key element into the opening in trim X Turn emergency key element 90 clock wise X Push emergency key element in the direction of the arrow and open the tail gate Side windows Important safety notes G WARNING While opening the side windows body parts in the closing area could become trapped There is a risk of injury Make sure that no body parts are in close proximity ...

Page 86: ...n the driver s door There is also a switch on each door for the corresponding side window The switches on the driver s door take prec edence Front left Front right Rear right Rear left i The side windows cannot be operated from the rear when the override feature for the side windows is activated Y page 61 X Turn the key to position 1 or 2 in the ignition lock X To open press the corresponding swit...

Page 87: ...indows Rclose the panorama sliding sunroof On vehicles with a panorama sliding sunroof you can then close the roller sunblinds i The key must be close to the driver s door handle X Point the tip of the key at the driver s door handle X Press and hold the button until the side windows and the panorama sliding sunroof are fully closed X Make sure that all the side windows and the panorama sliding su...

Page 88: ...unroof G WARNING While opening and closing the sliding sunroof body parts in close proximity could become trapped There is a risk of injury Make sure that no body parts are in close proximity during the opening and closing pro cedures If somebody becomes trapped Rrelease the switch immediately or Rduring automatic operation push the switch briefly in any direction The opening or closing procedure ...

Page 89: ...pped Rrelease the switch immediately or Rpress the switch in any direction during the automatic closing process The closing process is stopped Operating the sliding sunroof Opening and closing Overhead control panel To raise To open To close lower X Turn the key to position 1 or 2 in the ignition lock X Press or pull the 3 switch in the corre sponding direction i If you press the 3 switch beyond t...

Page 90: ...sliding sunroof There is a risk of injury When opening or closing make sure that no parts of the body are in the sweep of the roller sunblind If someone is trapped Rrelease the switch immediately or Rpress the switch in any direction during the automatic opening closing process The opening closing process is stopped The roller sunblinds shield the vehicle interior from sunlight The two roller sunb...

Page 91: ...ge 87 and the roller sunblinds Y page 89 can be fully opened and closed again X If this is not the case repeat the steps above again Problems with the sliding sunroof G WARNING If you do not reset the sliding sunroof after a malfunction or voltage supply interruption then the reversing function will malfunction or not work The sliding sunroof closes with increased or maximum force Parts of the bod...

Page 92: ...90 ...

Page 93: ...Useful information 92 Correct driver s seat position 92 Seats 93 Steering wheel 98 Mirrors 98 Memory functions 101 91 Seats steering wheel and mirrors ...

Page 94: ...ly X Check whether the head restraint is adjus ted properly Y page 94 When doing so make sure that you have adjusted the head restraint so that the back of your head is supported at eye level by the centre of the head restraint Observe the safety guidelines on steering wheel adjustment Y page 98 X Make sure that steering wheel is adjus ted correctly Adjusting the steering wheel Y page 98 When adju...

Page 95: ... or in the event of an accident you could slide underneath the seat belt and sustain abdomen or neck inju ries for example This poses an increased risk of injury or even fatal injury Adjust the seat properly before beginning your journey Always make sure that the seat is in the upright position G WARNING The head restraints cannot provide the inten ded protection unless they are fitted and adjuste...

Page 96: ...t down repeatedly until the seat has reached the desired height Seat cushion angle Adjust the angle so that your thighs are lightly supported X Turn handwheel forwards or backwards Adjusting the seats electrically Head restraint height8 Seat cushion angle Seat height Seat fore and aft adjustment A Backrest angle i You can store the seat settings using the memory function Y page 101 Adjusting the h...

Page 97: ...ed position X To lower press release catch in the direction of the arrow and push the head restraint down to the desired position Adjusting the head restraint fore and aft position This function allows you to adjust the dis tance between the head restraint and the back of the head X To move forwards pull the head restraint forwards in the direction of the arrow until it engages There are a number ...

Page 98: ...forwards in order to remove the head restraint Y page 272 X To remove pull the head restraint up to the stop X Press release catch and pull the head restraint out of the guides X To refit insert the head restraint so that the notches on the bar are on the left when viewed in the direction of travel X Push the head restraint down until you hear it engage in position Adjusting the 4 way lumbar suppo...

Page 99: ...ndicator lamps go out i If the battery voltage is too low the seat heating may switch off Problems with the seat heating The seat heating has switched off prema turely or cannot be switched on The vehicle s electrical system voltage is too low because too many electrical consumers are switched on X Switch off electrical consumers that you do not need such as the rear window heating or interior lig...

Page 100: ...n unattended in the vehicle Adjusting the steering wheel G WARNING The steering wheel may move unexpectedly if you adjust it while driving This could cause you to lose control of the vehicle There is a risk of an accident Make sure that the steering wheel is locked before driving off Never unlock the steering wheel when the vehicle is in motion Release lever To adjust the steering wheel height To ...

Page 101: ... traffic conditions The convex exterior mirrors provide a larger field of vision After the engine has been started the exte rior mirrors are automatically heated if the rear window heating is switched on and the outside temperature is low Heating takes a maximum of 10 minutes i The exterior mirrors can also be heated manually by switching on the rear window heating Folding the exterior mirrors in ...

Page 102: ...e driver s side automatically go into anti dazzle mode if Rthe ignition is switched on and Rincident light from headlamps strikes the sensor in the rear view mirror The mirrors do not go into anti dazzle mode if reverse gear is engaged or if the interior light ing is switched on Parking position of the exterior mirror on the front passenger side General notes The Parking position for the exterior ...

Page 103: ...u have disen gaged reverse gear Rif you press button for the exterior mir ror on the driver s side Memory functions Storing settings G WARNING If you use the memory function on the driver s side while driving the adjustments could cause you to lose control of the vehicle There is a risk of an accident Only use the memory function on the driver s side while the vehicle is stationary G WARNING If th...

Page 104: ...tings are stored in the selected pre set position A tone sounds when the set tings have been completed Calling up a stored setting X Press and hold the relevant storage posi tion button 1 2 or 3 until the seat and exterior mirrors are in the stored position i The setting procedure is interrupted as soon as you release the storage position button 102 Memory functions Seats steering wheel and mirror...

Page 105: ...Useful information 104 Exterior lighting 104 Interior lighting 111 Replacing bulbs 112 Windscreen wipers 117 103 Lights and windscreen wipers ...

Page 106: ...ghts do not illuminate as large an area of the edge of the carriageway Vehicles with halogen headlamps X Affix special masking sheets on the head lamps i You can obtain these special stickers from a qualified specialist workshop Mercedes Benz recommends that you only use genuine Mercedes Benz masking tape Your headlamps could otherwise be damaged Remove the masking tape when you are once again dri...

Page 107: ...o L The automatic headlamp feature is only an aid The driver is responsible for the vehicle s lighting at all times à is the preferred light switch setting The light setting is automatically selected accord ing to the brightness of the ambient light exception poor visibility due to weather con ditions such as fog snow or spray RKey in position 1 in the ignition lock the side lamps are switched on ...

Page 108: ...ar foglamp turn the key in the ignition lock to position 2 or start the engine X Turn the light switch to L or à X Press the R button The yellow R indicator lamp in the instrument cluster lights up X To switch off the rear foglamp press the R button The yellow R indicator lamp in the instrument cluster goes out i Vehicles with bi xenon headlamps or the Intelligent Light System when the rear fog la...

Page 109: ... the load in your vehicle Combination switch Turn signals Main beam headlamps Turn signal right Headlamp flasher Turn signal left X To indicate briefly press the combination switch briefly to the pressure point in the direction of arrow or The corresponding turn signal flashes three times X To indicate press the combination switch beyond the pressure point in the direction of arrow or Main beam he...

Page 110: ...ash X To switch off the hazard warning lamps press button The hazard warning lamps switch off auto matically if the vehicle reaches a speed of over 10 km h again after a full brake appli cation i The hazard warning lamps still operate if the ignition is switched off Headlamp cleaning system If the Wipe with washer fluid function is operated five times Y page 117 while the lights are on and the eng...

Page 111: ... the turn signal is activated or the steering wheel is turned Rif you are driving at speeds between 40 km h and 70 km h and turn the steer ing wheel Not active if you are driving at speeds above 40 km h or switch off the turn signal or turn the steering wheel to the straight ahead posi tion The cornering lamp may remain lit for a short time but is automatically switched off after no more than thre...

Page 112: ...s from main beam to dipped beam The system automatically adapts the dipped beam headlamp range depending on the dis tance to the other vehicle Once the system no longer detects any other vehicles it reac tivates the main beam headlamps The system s optical sensor is located behind the windscreen near the overhead control panel X To activate activate the Adaptive High beam Assist function using the...

Page 113: ... rear interior lighting on off To switch the front interior lighting automatic interior lighting control off A p To switch the right hand front read ing lamp on off B To switch the automatic interior lighting control on Rear compartment overhead control panel p To switch the left hand reading lamp on off p To switch the right hand reading lamp on off Interior lighting control Important notes In or...

Page 114: ...g the cone of light from the xenon bulbs moves from the top to the bottom and back again when you start the engine For this to be observed the lights must be switched on before starting the engine Bulbs and lamps are an important aspect of vehicle safety You must therefore make sure that these function correctly at all times Have the headlamp setting checked regularly Other bulbs G WARNING Bulbs l...

Page 115: ...dlamps Reversing lamp W 16 W Turn signal lamp PY 21 W Tail lamp brake lamp W 16 W Rear foglamp W 16 W A Tail lamp W 16 W Replacing the front bulbs Fitting removing the cover on the front wheel arch You must remove the cover from the front wheel housing before you can change the front bulbs X To remove switch off the lights X Turn the front wheels inwards X Turn rotary knob through 90 Cover is rele...

Page 116: ...turn it clockwise X Align housing cover and turn it clock wise until it engages X Replace the cover in the front wheel arch Y page 113 Main beam headlamps and side lamps parking lamps vehicles with halogen headlamps G WARNING These bulbs are pressurised They can explode when being changed if Rthey are still hot Rthey hit an object when being removed Rthey are dropped There is a risk of injury You ...

Page 117: ...ion and clean gloves when you are changing a bulb If nec essary have bulbs changed at a qualified spe cialist workshop X Switch off the lights X Open the bonnet X Turn housing cover anti clockwise and pull it out X Turn bulb holder anti clockwise and pull it out X Take the bulb out of bulb holder X Insert the new bulb into bulb holder X Insert bulb holder into the lamp and turn it clockwise X Alig...

Page 118: ...d remove the lamp cluster Lamp cluster X Remove plastic nut using a suitable item e g a coin X Release attachments X Remove the bulb holder from the lamp clus ter Bulb holder A Tail lamp brake lamp B Reversing lamp C Rear foglamp D Tail lamp E Turn signals X Tail lamp brake lamp rear foglamp reversing lamp remove the correspond ing bulb from the bulb holder X Insert the new bulb into the bulb hold...

Page 119: ...creen wipers off 2 Ä Intermittent wipe low rain sensor set to low sensitivity 3 Å Intermittent wipe high rain sensor set to high sensitivity 4 Continuous wipe slow 5 Continuous wipe fast B í Single wipe î to wipe the wind screen using washer fluid X Turn the key to position 1 or 2 in the ignition lock X Turn the combination switch to the corre sponding position Vehicles with a rain sensor if the w...

Page 120: ...r blades make sure that you touch only the wiper arm of the windscreen wiper Never open the bonnet tailgate if a wiper arm is folded away from the windscreen rear window Never fold a windscreen wiper arm without a wiper blade back onto the windscreen rear window Hold the windscreen wiper arm firmly when you change the wiper blade If you release the wiper arm without a wiper blade and it falls onto...

Page 121: ...lock X Fold wiper arm away from the rear win dow until it engages X Position wiper blade at a right angle to wiper arm X Hold wiper arm and press wiper blade in the direction of the arrow until it releases X Remove wiper blade Fitting the wiper blades X Place new wiper blade onto wiper arm X Hold wiper arm and press wiper blade in the opposite direction to the arrow until it engages X Make sure th...

Page 122: ...uction X Switch the windscreen wipers back on The windscreen wipers fail completely The windscreen wiper drive is malfunctioning X Select another wiper speed on the combination switch X Have the windscreen wipers checked at a qualified specialist workshop The spray nozzles are misaligned The windscreen washer fluid from the spray nozzles no longer hits the centre of the windscreen The spray nozzle...

Page 123: ...Useful information 122 Overview of climate control sys tems 122 Operating the climate control sys tem 126 Adjusting the air vents 139 121 Climate control ...

Page 124: ...matic climate control THERMOTRONIC automatic climate control is only operational when the engine is running Optimum operation is only achieved with the side windows and panorama sliding sunroof closed The residual heat function can only be acti vated or deactivated with the ignition switched off Y page 133 i Ventilate the vehicle for a brief period during warm weather e g using the con venience op...

Page 125: ...e temperature to 22 RRecommendation to avoid misting of the windows in the event of low outside temperatures or rain switch on the air distribution and if possible switch off P and O Y page 129 Deactivate air recirculation mode d Y page 132 Set airflow control A to a setting between 3 and 6 Y page 129 RRecommendation for rapid cooling or heating of the vehicle interior briefly set airflow control ...

Page 126: ...reen in the COMAND display See also the separate COMAND Online operat ing instructions9 You will see the current settings of the various climate control func tions ECO start stop function During automatic engine switch off the cli mate control only operates at a reduced capa city If you require the full climate control out put you can switch off the ECO start stop function by pressing the ECO butt...

Page 127: ...6 H To reduce the airflow Y page 129 I To switch the rear window heating on off Y page 131 J To switch the ZONE function on off Y page 129 Notes on using THERMOTRONIC auto matic climate control Automatic climate control The following contains instructions and rec ommendations to enable you to get the most out of your THERMOTRONIC automatic cli mate control RActivate climate control using the à and...

Page 128: ...23 X To switch off turn control A anti clock wise to position 0 Y page 123 THERMOTRONIC automatic climate control X Turn the key to position 2 in the ignition lock Y page 143 X To activate press the à button The indicator lamp in the à button lights up Airflow and air distribution are set to automatic mode or X Press the button The indicator lamp in the button goes out The previous settings are re...

Page 129: ...e indicator lamp in the button lights up X To deactivate press the button The indicator lamp in the button goes out The Cooling with air dehumidification function has a delayed switch off feature Operating the climate control system 127 Climate control ...

Page 130: ...not be dehumidified either The windows can mist up more quickly Therefore only switch off the Cool ing with air dehumidification function briefly X Turn the key to position 2 in the ignition lock Y page 143 X Set the desired temperature X To activate press the à button The indicator lamp in the à button lights up Automatic air distribution and airflow are activated X To switch to manual operation ...

Page 131: ...is ter vents10 a Directs the airflow through the foot well and demister vents i Regardless of the air distribution setting airflow is always directed through the side air vents The side air vents can only be closed if the adjusters are turned clockwise until they engage Setting the air distribution X Turn the key to position 2 in the ignition lock Y page 143 X Press the É or Ë button until the des...

Page 132: ...3 RTHERMOTRONIC automatic climate control press the ó or ô button X To deactivate press the button The indicator lamp in the button goes out The previous settings are reactivated Air recirculation mode remains deactiva ted or X Press the à button11 The indicator lamp in the button goes out Airflow and air distribution are set to automatic mode or X THERMATIC automatic climate control turn temperat...

Page 133: ...ow heating has a high current draw You should therefore switch it off as soon as the window is clear It otherwise switches off automatically after several minutes If the battery voltage is too low the rear win dow heating may switch off X Turn the key to position 2 in the ignition lock Y page 143 X Press the button The indicator lamp in the button lights up or goes out Operating the climate contro...

Page 134: ...n mode is activated automatically the indicator lamp in the e button is not lit Outside air is added after about 30 minutes X To deactivate press the e button The indicator lamp in the e button goes out i Air recirculation mode deactivates auto matically Rafter approximately five minutes at out side temperatures below approximately 5 Rafter approximately five minutes if the Cooling with air dehumi...

Page 135: ...he indicator lamp in the e button goes out Air recirculation mode is deactivated i If you open the side windows or the pan orama sliding sunroof manually after clos ing with the convenience closing feature they will remain in this position when opened using the convenience opening fea ture Activating deactivating the residual heat function The residual heat function is only available with THERMOTR...

Page 136: ...es The auxiliary heating heats the air in the vehi cle interior to the set temperature This occurs without using the heat of the running engine The auxiliary heating is operated directly using the vehicle s fuel For this rea son the fuel tank must be at least full to ensure that the auxiliary heating functions The auxiliary heating ventilation automati cally adjusts to changes in temperature and w...

Page 137: ...is reduced by Rsources of radio interference Rsolid objects between the remote control and the vehicle Rthe remote control being in an unfavoura ble position in relation to the vehicle Rtransmitting from an enclosed space i The optimum range can be achieved if you hold the remote control vertically pointing upwards when you press one of the but tons i A battery symbol appears in the display when t...

Page 138: ... The Î symbol in the remote control dis play flashes X Press the or button to set the desired departure time i The longer you press the or button the faster the time changes X Press the u and buttons simulta neously The new departure time is stored Activating the set departure time X Press the or button repeatedly until the desired departure time appears in the display X Press the u button The Í s...

Page 139: ...a qualified spe cialist workshop or to a col lection point for used batter ies One 6 V pin battery type 2CR11108 is required X Prise apart the side arms of battery cover and pull off battery cover X Remove old battery X Insert the new battery Observe the polarity signs on the back of the remote control when doing so X Slide battery cover back onto the remote control X Use the remote control to che...

Page 140: ...remote control The auxiliary heating is faulty X Have the auxiliary heating checked at a qualified specialist workshop FAIL The auxiliary heating cannot be switched on or has switched itself off The auxiliary heating was started more than twice when the engine was switched off X Switch on the engine and let it run for more than ten seconds X Make another attempt to switch on the auxiliary heating ...

Page 141: ...ways maintain a sufficient distance to the air out lets If necessary redirect the airflow to another area of the vehicle interior In order to ensure the direct flow of fresh air through the air vents into the vehicle interior please observe the following notes Rkeep the air inlet between the windscreen and the bonnet free of blockages such as ice snow or leaves Rnever cover the vents or ventilatio...

Page 142: ... anti clockwise X To close a side air vent turn the adjuster in side air vent clockwise until it engages Setting the rear compartment air vents Rear compartment air vent left Rear compartment air vent right Rear compartment air vent thumbwheel X To open close turn thumbwheel up or down 140 Adjusting the air vents Climate control ...

Page 143: ...information 142 Running in notes 142 Driving 142 Manual transmission 150 Automatic transmission 151 Refuelling 159 Parking 162 Driving tips 165 Driving systems 168 Towing a trailer 201 141 Driving and parking ...

Page 144: ...t of resistance kick down After 1 500 km you may gradually bring the vehicle up to full road and engine speeds Additional running in notes for AMG vehicles RDo not drive at speeds above 140 km h for the first 1 500 km ROnly allow the engine to reach a maximum engine speed of 4 500 rpm briefly i You should also observe these notes on running in if the engine or parts of the drive train on your vehi...

Page 145: ...engine Vehicles with manual transmission the steering is locked when the key is taken out of the ignition lock i If the key does not belong to the vehicle it can still be turned in the ignition lock However the ignition will not be switched on The engine cannot be started Starting the engine Important safety notes G WARNING Combustion engines emit poisonous exhaust gases such as carbon monoxide In...

Page 146: ...ess the clutch pedal fully X Shift to either first gear or reverse gear R X Release the electric parking brake Y page 163 X Release the brake pedal X Slowly release the clutch pedal and gently depress the accelerator pedal i Follow the shift recommendations in the multifunction display for an economical driving style Y page 151 i The vehicle locks centrally once you have pulled away The locking kn...

Page 147: ... could roll away There is a risk of an accident and injury Therefore quickly move your foot from the brake pedal to the accelerator pedal Never leave the vehicle when it is held by hill start assist Hill start assist helps you when pulling away forwards or in reverse on an uphill gradient It holds the vehicle for a short time after you have removed your foot from the brake pedal This gives you eno...

Page 148: ...e is within the range that is suitable for the system Rthe engine is at normal operating temper ature Rthe set temperature for the vehicle interior has been reached Rthe battery is sufficiently charged Rthe system detects that the windscreen is not misted up when the air conditioning system is switched on Rthe bonnet is closed Rthe driver s door is closed and the driver s seat belt is fastened If ...

Page 149: ...ion Only engage gear when the clutch pedal is depressed The engine is started automatically if you Rdepress the clutch pedal fully Rdepress the accelerator pedal Vehicles with automatic transmission The engine is started automatically if you Rrelease the brake pedal when HOLD is not activated and the transmission is in posi tion D or N Rdepress the accelerator pedal Rmove the transmission out of p...

Page 150: ... lamp is off the ECO start stop function has been deactivated man ually or as the result of a malfunction The engine will then not be switched off auto matically when the vehicle stops 148 Driving Driving and parking ...

Page 151: ... engine does not start after several attempts X Consult a qualified specialist workshop The engine does not start The starter motor can be heard The reserve fuel warning lamp is lit and the fuel gauge display shows 0 The fuel tank is empty X Refuel the vehicle The engine does not start You cannot hear the starter motor The on board voltage is too low because the battery is too weak or discharged X...

Page 152: ...nd the engine is no longer being cooled sufficiently X If the coolant temperature is below 120 you can continue driving to the nearest qualified specialist workshop X Avoid heavy loads on the engine as you do so e g driving in mountainous terrain and stop start traffic Manual transmission Gear lever Only engage gear when the clutch pedal is depressed When shifting to 5th and 6th gear you must pres...

Page 153: ...vehicle could pull away suddenly There is a risk of an accident When engaging transmission position D or R always firmly depress the brake pedal and do not simultaneously accelerate G WARNING The automatic transmission switches to neu tral position N when you switch off the engine The vehicle may roll away There is a risk of an accident After switching off the engine always switch to parking posit...

Page 154: ...on display i When you engage park position P make sure that the transmission position display shows P in the multifunction display i You can only engage park position P when the vehicle is stationary i The automatic transmission shifts into park position P automatically Rif you open the driver s door while the vehicle is stationary in transmission posi tion D or R Rif you open the door while trave...

Page 155: ...e DIRECT SELECT lever down past the first point of resistance Selector lever Selector lever in AMG vehicles with P button j Park position with parking lock k Reverse gear i Neutral h Drive Transmission position and drive pro gram display Example Transmission position display Drive program display The current transmission position and drive program appear in the multifunction display Engaging park ...

Page 156: ...Never hold the vehicle stationary on uphill gradients by depressing the accelerator The clutch may overheat if you hold the vehi cle stationary on uphill gradients by depress ing the accelerator pedal If the clutch over heats a warning tone sounds All vehicles except AMG vehicles the Stop vehicle Shift to P Leave engine running display message appears in the mul tifunction display You will only be...

Page 157: ...al Manual gearshifting X Press program selector button repeat edly until the letter for the desired gearshift program appears in the multifunction dis play i The automatic transmission switches to automatic drive program E each time the engine is started i For further information on the automatic drive program see Y page 156 AMG vehicles C Controlled Efficiency Comfortable economical driving S Spo...

Page 158: ...el consumption resulting from the automatic transmission shifting up sooner Rthe vehicle pulling away more gently in forward and reverse gears unless the accel erator pedal is depressed fully Rincreased sensitivity This improves driving stability on slippery road surfaces for example Rthe automatic transmission shifting up sooner This results in the vehicle being driven at lower engine speeds and ...

Page 159: ...s the temporarily active manual drive program M will only be deactivated if the accelerator pedal is depressed while the vehicle is rolling downhill Shifting up X Pull the right hand steering wheel gearshift paddle Y page 156 The automatic transmission shifts up to the next gear i All vehicles except AMG vehicles in order to prevent engine damage the auto matic transmission automatically shifts up...

Page 160: ...gram M X Depress the accelerator pedal beyond the pressure point The transmission shifts to a lower gear depending on the engine speed X Shift back up once the desired speed is reached i During kickdown you cannot shift gears using the steering wheel gearshift paddles i If you apply full throttle the automatic transmission shifts up to the next gear when the maximum engine speed is reached This pr...

Page 161: ... with skin eyes or clothing Do not inhale fuel vapours Keep fuels out of the reach of chil dren If you or others come into contact with fuel observe the following RWash the fuel off any affected areas of skin with water and soap immediately RIf you get fuel in your eyes rinse them thor oughly with clean water immediately Seek immediate medical attention RIf fuel is swallowed seek immediate medi ca...

Page 162: ...uel filler flap To open the fuel filler flap Tyre pressure table To insert the fuel filler cap Fuel type to be refuelled The fuel filler flap is unlocked or locked auto matically when you open or close the vehicle with the key The position of the fuel filler cap is displayed æ in the instrument cluster The arrow next to the filling pump indicates the side of the vehicle Opening X Switch off the en...

Page 163: ...with at least 5 litres of diesel X Turn the ignition on for approximately ten seconds Y page 143 X Start the engine continuously for a maximum of ten seconds until it runs smoothly or X Start the engine using the touch start function To do this turn the key to position 3 in the ignition lock and then release it immediately Y page 143 If the engine does not start X Turn the ignition on again a maxi...

Page 164: ... into neutral Rstart the engine In addition they may operate vehicle equip ment and become trapped There is a risk of an accident and injury When leaving the vehicle always take the key with you and lock the vehicle Never leave children unattended in the vehicle Always secure the vehicle correctly against rolling away Otherwise the vehicle or its drivetrain could be damaged To ensure that the vehi...

Page 165: ...hift the automatic transmission to N before switching off the engine the auto matic transmission remains in N even if a door is opened Electric parking brake General notes G WARNING If you leave children unattended in the vehi cle they could set the vehicle in motion by for example Rreleasing the parking brake Rshifting an automatic transmission out of parking position P Rshifting a manual transmi...

Page 166: ...e seat belt is fastened Ryou depress the accelerator pedal If the transmission is in positionR the tailgate must be closed If your seat belt is not fastened the following conditions must be fulfilled to automatically release the electric parking brake Rthe driver s door is closed Ryou have shifted out of transmission posi tion P or you have previously driven faster than 3 km h Emergency braking Th...

Page 167: ...fected by many other factors such as Rload Rtyre pressure Rcold start Rchoice of route Rthe use of electrical consumers These factors are not included in the ECO dis play The evaluation of your driving style takes the following three categories into consideration RAcceleration evaluation of all accelera tion processes The bar fills up moderate acceleration especially at higher speeds The bar empti...

Page 168: ... drive program E or S The automatic transmission may shift to a higher gear This can reduce the engine s braking effect Heavy and light loads G WARNING The braking system can overheat if you leave your foot on the brake pedal while driving This increases the braking distance and could even cause the braking system to fail There is a risk of an accident Never use the brake pedal as a footrest Do no...

Page 169: ...e adequate tread depth For this reason do not drive in tyre ruts and brake carefully Driving on flooded roads Bear in mind that vehicles travelling in front or in the opposite direction create waves This may cause the maximum per missible water depth to be exceeded These notes must be observed under all circumstances You could otherwise dam age the engine the electronics or the trans mission If yo...

Page 170: ...on on driving with snow chains see Y page 321 Driving systems Cruise control Important safety notes If you fail to adapt your driving style cruise control can neither reduce the risk of an acci dent nor override the laws of physics Cruise control cannot take into account road weather or traffic conditions Cruise control is only an aid You are responsible for the dis tance to the vehicle in front f...

Page 171: ...ver must be in position D Ron vehicles with manual transmission a gear must be engaged Rcruise control must be selected X To select cruise control check whether LIM indicator lamp is on or off If it is off cruise control is already selected X If it is not press the cruise control lever in the direction of arrow A LIM indicator lamp in the cruise control lever goes out Cruise control is selected St...

Page 172: ...h increments press the cruise control lever briefly up or down beyond the pres sure point The last stored speed increases or decrea ses in 10 km h increments i Cruise control is not deactivated if you depress the accelerator pedal For exam ple if you accelerate briefly to overtake cruise control adjusts the vehicle s speed to the last speed stored after you have fin ished overtaking Deactivating c...

Page 173: ...e g when driving with winter tyres fitted Y page 172 i The speed indicated in the speedometer may differ slightly from the limit speed stored Variable SPEEDTRONIC General notes With the cruise control lever you can operate cruise control or DISTRONIC PLUS and vari able SPEEDTRONIC The LIM indicator lamp on the cruise control lever indicates which system you have selec ted RLIM indicator lamp off c...

Page 174: ... adjust the set speed in 10 km h increments briefly press the cruise con trol lever up past the pressure point for a higher speed or down for a lower speed or X Keep the cruise control lever pressed beyond the pressure point until the desired speed is set Press the cruise control lever up for a higher speed or down for a lower speed Deactivating variable SPEEDTRONIC It is not possible to deactivat...

Page 175: ...on If DISTRONIC PLUS or the HOLD function is activated the vehicle brakes automati cally in certain situations To prevent dam age to the vehicle deactivate DISTRONIC PLUS and the HOLD function in the follow ing or other similar situations Rwhen towing the vehicle Rin the car wash If you fail to adapt your driving style DIS TRONIC PLUS can neither reduce the risk of an accident nor override the law...

Page 176: ...mp will light up in the instrument cluster Brake immediately to increase the distance to the vehicle driving in front or take evasive action provided it is safe to do so The radar sensor system is switched off auto matically in the vicinity of radio telescope facilities Y page 350 For DISTRONIC PLUS to assist you when driv ing the radar sensor system must be Ractivated Y page 223 Roperational i In...

Page 177: ... selected with the cruise control lever Y page 175 Activating To activate while driving you can only acti vate DISTRONIC PLUS at speeds below 20 km h if the vehicle in front is detected and shown in the multifunction display If the vehi cle in front is no longer detected and dis played DISTRONIC PLUS switches off and you will hear a tone X Briefly pull the cruise control lever towards you or press...

Page 178: ...erent from the current speed the vehicle accelerates or brakes If you do not know what the stored speed is the vehicle may accelerate or brake unexpectedly There is a risk of an accident Take the traffic conditions into account before calling up the stored speed If you do not know what the stored speed is store the desired speed again X Briefly pull the cruise control lever Y page 174 towards you ...

Page 179: ...function display Y page 175 i Make sure that you maintain the mini mum distance to the vehicle in front as required by law Adjust the distance to the vehicle in front if necessary X To increase turn control in direc tion DISTRONIC PLUS then maintains a greater distance between your vehicle and the vehicle in front X To decrease turn control in direc tion DISTRONIC PLUS then maintains a shorter dis...

Page 180: ...sistance menu Y page 217 of the on board computer you can select the assis tance graphic Vehicle in front if detected Distance indicator current distance to the vehicle in front Specified minimum distance to the vehi cle in front adjustable Own vehicle X Select the Distance display function using the on board computer Y page 217 Tips for driving with DISTRONIC PLUS General notes The following cont...

Page 181: ...US may detect vehicles that are crossing your lane by mistake Activating DISTRONIC PLUS at traffic lights with cross ing traffic for example could cause your vehi cle to pull away unintentionally HOLD function Important safety notes G WARNING When leaving the vehicle it can still roll away despite being braked by the HOLD function if Rthere is a malfunction in the system or in the voltage supply R...

Page 182: ... parking brake is released Rthe transmission is in position D R or N on vehicles with automatic transmission RDISTRONIC PLUS is deactivated Activating the HOLD function Example vehicles with colour multifunction display X Make sure that the activation conditions are met X Depress the brake pedal X Quickly depress the brake pedal further until appears in the multifunction dis play The HOLD function...

Page 183: ...es RACE START enables optimum acceleration from a standing start The precondition for this is a suitable high grip road surface Only activate RACE START on dedicated race circuits i RACE START is only available in AMG vehi cles Activation conditions You can activate RACE START if Rthe doors the bonnet and the tailgate are closed Rthe engine is running and the transmission traction control and engi...

Page 184: ...educe the risk of accident nor override the laws of physics 4MATIC cannot take account of road weather and traffic con ditions 4MATIC is only an aid You are responsible for the distance to the vehicle in front for vehicle speed for braking in good time and for staying in the lane If a drive wheel spins due to insufficient grip Rwhen pulling away only depress the accel erator pedal as far as is nec...

Page 185: ... General notes PARKTRONIC does not take into account obstacles located Rbelow the detection range e g persons animals or objects Rabove the detection range e g overhang ing loads tail sections or loading ramps of goods vehicles Example sensors in the front bumper left hand side Side view Top view The sensors must be free of dirt ice and slush Otherwise they may not function cor rectly Clean the se...

Page 186: ...ransmission and the direction in which the vehicle is rolling determine which warning display is active when the engine is running Manual transmission Gear lever posi tion Warning display Forwards gear or Neutral Front area activated Reverse gear or the vehicle is rolling backwards Rear and front areas activated Automatic transmission Transmission position Warning display D Front area activated R ...

Page 187: ...the key to position 2 in the ignition lock Towing a trailer Fold in the ball coupling if the trailer tow hitch is not required PARKTRONIC meas ures the minimum detection range to an obstacle from the bumper not the ball cou pling PARKTRONIC is deactivated for the rear area when you establish an electrical connection between your vehicle and a trailer Driving systems 185 Driving and parking Z ...

Page 188: ...sibility for safe manoeuvring and parking remains with you Make sure that there are no persons animals or objects in range while manoeuvring and parking G WARNING The vehicle will veer out when parking and can take you onto sections of the oncoming lane As a result you may collide with other road users There is a risk of an accident When parking pay attention to other road users Stop the vehicle i...

Page 189: ...ehicles G WARNING If objects are located above the detection range Active Parking Assist may start to steer into the parking space too soon As a result you could cause a collision There is a risk of an accident If objects are located above the detection range stop the vehicle and switch Active Parking Assist off For further information on the detection range Y page 183 Active Parking Assist does n...

Page 190: ...rument cluster X Vehicles with manual transmission shift to reverse gear Vehicles with automatic transmission shift into position R The Start Park Assist Yes OK No message appears in the multifunction display X To cancel the procedure press the button on the multifunction steering wheel or pull away or X To park using Active Parking Assist press the a button on the multifunction steering wheel The...

Page 191: ...ith Active Park ing Assist Ryou can also engage forward gear prema turely The vehicle redirects and does not drive as far into the parking space Should a gear be changed too early the parking procedure will be cancelled A sensible parking position can no longer be achieved from this position Exiting a parking space In order that Active Parking Assist can sup port you when you exit the parking spac...

Page 192: ...celling Active Parking Assist You can cancel Active Parking Assist at any time X Stop the movement of the multifunction steering wheel or steer yourself Active Parking Assist will be cancelled at once The Park Assist cancelled mes sage appears in the multifunction display or X Press the PARKTRONIC button on the centre console Y page 185 PARKTRONIC is switched off and Active Parking Assist is immed...

Page 193: ...era is in the boot lid handle The reversing camera extends when it is acti vated The reversing camera is an optical parking and manoeuvring aid It uses guide lines to show the area behind your vehicle in the Audio COMAND display The area behind the vehicle is displayed as a mirror image as in the rear view mirror i The text of messages shown in the COMAND display depends on the language setting Th...

Page 194: ...ts not at ground level may appear to be further away than they actually are e g Rthe bumper of a parked vehicle Rthe drawbar of a trailer Rthe ball coupling of a trailer tow hitch Rthe rear section of an HGV Ra slanted post Use the guidelines only for orientation Approach objects no further than the bot tom most guideline Lanes White guide line without turning the steer ing wheel vehicle width inc...

Page 195: ...operating instructions for the audio system COMAND Online The lane and the guide lines are shown Reversing straight into a parking space without turning the steering wheel White lane indicating the route the vehicle will take with the steering wheel straight Yellow guide line at a distance of approx imately 1 0 m from the rear of the vehicle Red guide line at a distance of approx imately 0 25 mfro...

Page 196: ... as close to parallel with the parking space marking as possi ble Driving to the final position White lane indicating the route the vehicle will take with the steering wheel in its cur rent position Parking space marking X Turn the steering wheel to the centre posi tion while the vehicle is stationary Red guide line at a distance of approx imately 0 25 mfrom the rear of the vehicle White lane indi...

Page 197: ...r drawbar touches red guide line X Couple up the trailer Y page 201 ATTENTION ASSIST General notes ATTENTION ASSIST helps you during long monotonous journeys such as on motorways and trunk roads It is active in the 80 km h to 180 km h range If ATTENTION ASSIST detects typical indica tors of fatigue or increasing lapses in con centration on the part of the driver it sug gests taking a break Importa...

Page 198: ...r journey if Ryou switch off the engine Ryou take off your seat belt and open the driver s door e g for a change of drivers or to take a break When ATTENTION ASSIST is deactivated the é symbol appears in the multifunction display in the assistance graphic display Speed Limit Assist General notes Speed Limit Assist shows you detected speed limits in the multifunction display Data from the navigatio...

Page 199: ... a speed limit or the end of a speed limit appears in the multi function display as soon as it is detected The traffic sign indicating a speed limit is generally displayed until Ra traffic sign indicating the end of the speed limit is detected Ryou make a turn Ryou leave or enter a town Rthe road type changes e g motorway country road Ryou have travelled a certain minimum dis tance without the tra...

Page 200: ...cycle or a bicycle Rvery wide lanes Rnarrow lanes Rvehicles not driving in the middle of their lane Rbarriers or other road boundaries Vehicles in the monitoring range are then not indicated Blind Spot Assist monitors the area up to 3 0 m behind your vehicle and directly next to your vehicle as shown in the diagram For this purpose Blind Spot Assist uses radar sensors in the rear bumper If the lan...

Page 201: ...f the turn signal remains on detected vehicles are indicated by the flashing of red warning lamp There are no further warning tones Activating Blind Spot Assist X Make sure that the radar sensor system Y page 223 and Blind Spot Assist Y page 219 are activated in the on board computer X Turn the key to position 2 in the ignition lock Warning lamps in the exterior mirrors light up red for approximat...

Page 202: ... for staying in the lane Lane Keeping Assist does not keep your vehi cle in its lane The system may be impaired or may not func tion if Rthere is poor visibility e g due to insuffi cient illumination of the road or due to snow rain fog or spray Rthere is glare e g from oncoming traffic the sun or reflection from other vehicles e g if the road surface is wet Rthe windscreen is dirty misted up dam a...

Page 203: ...ases the braking distance and could even cause the braking system to fail There is a risk of an accident Never use the brake pedal as a footrest Do not simultaneously depress both the brake pedal and the accelerator pedal while driving G WARNING You could lose control of the vehicle trailer combination if it begins to swerve The vehi cle trailer combination could even overturn There is a risk of a...

Page 204: ... handling characteristics will be different in comparison to when driving without a trailer The vehicle trailer combination Ris heavier Ris restricted in its acceleration and gradi ent climbing capability Rhas an increased braking distance Ris affected more by strong crosswinds Rdemands more sensitive steering Rhas a larger turning circle This can impair the vehicle s handling char acteristics Ada...

Page 205: ...ssing the accelerator pedal on downhill gradients while the manual drive program M is temporarily activated vehicles with automatic transmission the automatic transmission may switch back to the last active automatic drive program E or S The automatic transmission may shift to a higher gear This can reduce the engine s braking effect Driving tips If the trailer swings from side to side X Do not ac...

Page 206: ...overing from the ball coupling and store it in a safe place X Make sure that the ball of the ball coupling is clean and that it is either greased or dry grease free depending on the instruc tions for the trailer Coupling up a trailer X Make sure that the transmission is in posi tion P X Apply the electric parking brake X Position the trailer level behind the vehicle X Couple up the trailer X Estab...

Page 207: ...u release the ball coupling or it does not engage correctly when folding in it will swing out Within pivoting range of the ball coupling there is an increased risk of an accident and injury Only release the ball coupling if the pivoting range is unobstructed Always make sure that the ball coupling engages when folding in X Fold the ball coupling back in if you are not using the trailer tow hitch X...

Page 208: ...instal ling the trailer electrics at a qualified special ist workshop Bulb failure indicator for LED lamps i If LED lamps are fitted in the trailer an error message may appear in the multi function display even if there is no fault The reason for the error message could be that the current has fallen below the minimum of 50 mA To ensure reliable operation of the bulb failure indicator each LED cha...

Page 209: ... information 208 Important safety notes 208 Displays and operation 208 Menus and submenus 211 Display messages 229 Warning and indicator lamps in the instrument cluster 257 207 On board computer and displays ...

Page 210: ...The on board computer only shows messages or warnings from certain systems in the mul tifunction display You should therefore make sure your vehicle is operating safely at all times Otherwise a vehicle that is not oper ating safely may cause an accident For an overview see the instrument panel illustration Y page 30 Displays and operation Instrument cluster lighting The lighting in the instrument ...

Page 211: ...ated Y page 171 The segments light up from the start of the scale to the selected limit speed RDISTRONIC PLUS activated Y page 173 One or two segments in the set speed range light up RDISTRONIC PLUS detects a vehicle in front The segments between the speed of the vehicle in front and the stored speed light up Operating the on board computer Overview Multifunction display Switches on LINGUATRONIC s...

Page 212: ...phone book and starts dialling the selected number RIn the Audio menu stops the station search function at the desired station Right control panel RRejects or ends a call RExits telephone book redial memory 6 RMakes or accepts a call RSwitches to the redial memory W X RAdjusts the volume 8 RMute Back button Press briefly RBack RSwitches off LINGUATRONIC see the separate operating instructions RHid...

Page 213: ...or certain coun tries Menus and submenus Menu overview Operating the on board computer Y page 209 Depending on the equipment fitted in the vehicle you can call up the following menus RTrip menu Y page 211 RNavi menu navigation instructions Y page 213 RAudio menu Y page 214 RTel telephone menu Y page 215 RAssist Assistance menu Y page 217 RServ menu Y page 219 RSettings menu Y page 220 RAMG menu in...

Page 214: ...ched off for longer than four hours the ECO display will be auto matically reset For further information on the ECO display see Y page 165 Displaying the range and current fuel consumption X Press the or button on the steer ing wheel to select the Trip menu X Press the 9 or button to select current fuel consumption not for AMG vehicles and approximate range The approximate range that can be covere...

Page 215: ...ND Online see the separate operating instruc tions X Press the or button on the steer ing wheel to select the Navi menu In the Navi menu the multifunction display shows navigation instructions For more information see the separate operating instructions Route guidance not active Direction of travel Current road Activating route guidance No change of direction announced Distance to the destination ...

Page 216: ...ting route calculating a new route ROff map or Off road the vehicle position is outside the area of the digital map off map position RNo route no route could be calculated to the selected destination Audio menu Selecting a radio station Waveband Station frequency with memory position i The memory position is only displayed along with station if this has been stored X Switch on the audio system or ...

Page 217: ...e Auxiliary audio mode external audio source connected TV operation i If channel has been stored the system displays the associated preset as well X Switch on COMAND Online and select TV see the separate operating instructions X Press the or button on the steer ing wheel to select the Audio menu X To select a stored channel briefly press the 9 or button X To select a channel from the channel list ...

Page 218: ... has found a network and is ready to receive RTelephone No service there is no net work available or the mobile phone is searching for a network i You can obtain further information about suitable mobile phones and connecting mobile phones via Bluetooth Rfrom any Mercedes Benz Service Centre Ron the Internet at http www mercedes benz com connect Accepting a call Example incoming call X Press the 6...

Page 219: ... RActivating deactivating Blind Spot Assist RActivating deactivating Lane Keeping Assist Showing the assistance graphic X Press the or button on the steer ing wheel to select the Assist menu X Press the 9 or button to select Assistance graphic X Press the a button The multifunction display shows the DIS TRONIC PLUS distance display in the assis tance graphic Y page 175 The assistance graphic can d...

Page 220: ...ere is an increased risk of skidding and an accident Only deactivate ESP in the situations descri bed in the following It may be best to deactivate ESP in the fol lowing situations Rwhen using snow chains Rin deep snow Ron sand or gravel Deactivating activating ESP on AMG vehi cles Y page 66 For further information about ESP see Y page 65 X Start the engine X Press the or button on the steer ing w...

Page 221: ...ion about Blind Spot Assist see Y page 197 When the Blind Spot Assist Sensors deactivated message is shown the radar sensors are deactivated X Switch on the radar sensor system Y page 223 Activating deactivating Lane Keeping Assist X Press the or button on the steer ing wheel to select the Assist menu X Press the 9 or button to select Lane Keeping Assist X Press the a button The current selection ...

Page 222: ... instructions in the Navi menu Rcruise control RSPEEDTRONIC RDISTRONIC PLUS RASSYST PLUS service interval display Switching the additional speedometer on off Only vehicles with manual transmission have this function X Press the or button on the steer ing wheel to select the Settings menu X Press the or 9 button to select the Inst cluster submenu X Press a to confirm X Press or 9 to select the Dig ...

Page 223: ... System function you activate the following functions Rmotorway mode Ractive light function Rcornering light function Rextended range foglamps If you set the dipped beam headlamps for driving on the right left the multifunction display shows the Intell Light System system inoperative Inactive for left side traffic or Intell Light System System inoperative Inactive for right side traffic display me...

Page 224: ...et to à the following functions are activated when it is dark Rsurround lighting the exterior lighting remains lit for 40 seconds after unlocking with the key If you start the engine the surround lighting is switched off and auto matic headlamp mode is activated Y page 105 Rexterior lighting delayed switch off the exterior lighting remains lit for 60 seconds after the engine is switched off If you...

Page 225: ...tyres function you can set permanent SPEED TRONIC Y page 172 Switching the automatic locking feature on off X Press the or button on the steer ing wheel to select the Settings menu X Press the or 9 button to select the Vehicle submenu X Press a to confirm X Press the or 9 button to select the Automatic door locks function When the Automatic door locks func tion is activated the vehicle doors are d...

Page 226: ...e is selected the yellow indicator lamp lights up on the auxiliary heating button Changing the departure time Only vehicles with auxiliary heating Y page 134 have this function In the Heating submenu you can select a stored departure time or change a departure time The auxiliary heating timer function calcu lates the switch on time according to the out side temperature so that the vehicle is pre h...

Page 227: ...is locked When you unlock the vehicle and then open a door the exterior mirrors fold out again If you have switched on the Auto fold in mirrors function and you fold in the exterior mirrors using the button on the door Y page 99 they will not fold out automati cally The exterior mirrors can then only be folded out using the button on the door X Press the or button on the steer ing wheel to select ...

Page 228: ...put of the engine dur ing this time SETUP Drive program C S M ESP mode ON OFF or SPORT handling mode SPORT SETUP shows the drive program the ESP Electronic Stability Program mode and the SPORT handling mode X Press the or button on the steer ing wheel to select the AMG menu X Press the 9 button repeatedly until SETUP is displayed RACETIMER Displaying and starting the RACETIMER The RACETIMER is onl...

Page 229: ...t Reset Lap X Press a to reset the lap time to 0 Deleting all laps If you switch off the engine the RACETIMER is reset to 0 after 30 seconds All laps are deleted You cannot delete individual stored laps If you have stopped 16 laps the current lap does not have to be reset X Reset the current lap X Press a to confirm Reset Reset Race Timer appears in the multi function display X Press the button to...

Page 230: ...stopped the RACETIMER X Press the or button on the steer ing wheel to select the AMG menu X Press the 9 button repeatedly until the lap evaluation is shown Each lap is shown in a separate submenu The fastest lap is indicated by flashing sym bol X Press the 9 or button to select a different lap evaluation 228 Menus and submenus On board computer and displays ...

Page 231: ...erve the notes on the HOLD function Y page 179 and parking Y page 162 Hiding display messages X Press the a or button on the steering wheel to hide the display message The display message is cleared The multifunction display shows high priority display messages in red Some high priority dis play messages cannot be hidden The multifunction display shows these messages continuously until the causes ...

Page 232: ...y and braking characteristics may be severely affec ted The braking distance may increase in an emergency braking situation If ESP is not operational ESP is unable to stabilise the vehicle There is an increased danger of skidding and risk of an accident X Carefully drive on a suitable stretch of road making slight steer ing movements at a speed above 20 km h If the display message disappears the f...

Page 233: ...lable The adaptive brake lights and COLLISION PREVENTION ASSIST may also have failed In addition the and å warning lamps light up in the instrument cluster ATTENTION ASSIST is deactivated The self diagnosis function for example may not be complete G WARNING The brake system continues to function normally but without the functions listed above The braking distance may thus increase in an emergency ...

Page 234: ...rative See Owner s Manual EBD electronic brake force distribution ABS ESP BAS PRE SAFE the HOLD function hill start assist and ESP trailer stabi lisation are unavailable due to a malfunction The adaptive brake lights and COLLISION PREVENTION ASSIST may also have failed In addition the å and warning lamps light up in the instrument cluster and a warning tone sounds ATTENTION ASSIST is deactivated G...

Page 235: ... parking brake handle for at least ten seconds X Vehicles with manual transmission engage first gear X Vehicles with automatic transmission shift the transmission to P X Consult a qualified specialist workshop The yellow warning lamp and the red indicator lamp are lit The electric parking brake is malfunctioning To release X Switch off the ignition and turn it back on X Release the electric parkin...

Page 236: ...dicator lamp flashes for about ten seconds after the electric parking brake has been applied or released It then goes out or remains lit The electric parking brake is malfunctioning X Switch off the ignition and turn it back on X Apply the electric parking brake If it is not possible to apply the electric parking brake X Vehicles with manual transmission engage first gear X Vehicles with automatic...

Page 237: ...rvoltage e g by charging the battery or restarting the engine X Apply or release the electric parking brake If it remains impossible to apply or release the electric parking brake X Switch off the ignition and turn it back on X Apply or release the electric parking brake If the electric parking brake still cannot be released X Consult a qualified specialist workshop The display message is only sho...

Page 238: ...J warning lamp lights up in the instrument cluster and a warning tone sounds G WARNING The braking efficiency may be impaired There is a risk of an accident X Pull over and stop the vehicle safely as soon as possible paying attention to road and traffic conditions Do not continue driving under any circumstances X Secure the vehicle against rolling away Y page 162 X Consult a qualified specialist w...

Page 239: ... vehicle against rolling away Y page 162 X Clean the radar sensor cover in the radiator grille Y page 294 X Restart the engine X AMG vehicles reactivate ESP Y page 66 PRE SAFE Functions limited See Owner s Manual Adaptive Brake Assist is faulty The distance warning signal may also have failed X Visit a qualified specialist workshop ü If the symbol appears in the multifunction display a seat belt t...

Page 240: ...as malfunctioned at the front on the left or right The 6 warning lamp also lights up in the instrument cluster G WARNING The airbags or belt tensioners may either be triggered uninten tionally or in the event of an accident may not be triggered This poses an increased risk of injury X Visit a qualified specialist workshop 6 Rear left malfunc tion Consult work shop or Rear right malfunction Con sul...

Page 241: ...nt may not be triggered This poses an increased risk of injury X Visit a qualified specialist workshop Lights i Display messages about LEDs This display message will only appear if all the LEDs have failed Display messages Possible causes consequences and M Solutions b Left cornering light or Right cor nering light The left or right hand cornering light is faulty X Check whether you are permitted ...

Page 242: ...t indica tor or Front right indicator The front left hand or front right hand turn signal is faulty X Check whether you are permitted to replace the bulb yourself Y page 112 or X Visit a qualified specialist workshop b Left mirror indica tor or Right mir ror indicator The turn signal in the left hand or right hand exterior mirror is faulty X Check whether you are permitted to replace the bulb your...

Page 243: ... X Visit a qualified specialist workshop b Front foglamp left or Front foglamp right The left hand or right hand front foglamp is faulty X Check whether you are permitted to replace the bulb yourself Y page 112 or X Visit a qualified specialist workshop b Rear fog lamp The rear foglamp is faulty X Check whether you are permitted to replace the bulb yourself Y page 112 or X Visit a qualified specia...

Page 244: ...tem is faulty The lights remain available without the Intelligent Light System X Visit a qualified specialist workshop b Malfunction See Owner s Manual The exterior lighting is faulty X Visit a qualified specialist workshop Vehicles with trailer tow hitch a fuse may have blown X Check the fuses Y page 314 X If necessary replace the blown fuse Observe the warning notes as you do so If the display m...

Page 245: ...daptive Highbeam Assist is operational again Engine Display messages Possible causes consequences and M Solutions Top up coolant See Owner s Manual The coolant level is too low Avoid making long journeys with too little coolant in the engine cooling system The engine will otherwise be damaged X Top up the coolant observing the warning notes before doing so Y page 288 X If the coolant needs topping...

Page 246: ...tart the engine again until the display message goes out and the coolant temperature is below 120 The engine may otherwise be damaged X Pay attention to the coolant temperature display X If the temperature increases again visit a qualified specialist workshop immediately Under normal operating conditions and with the specified coolant level the coolant temperature may rise to 120 The battery is no...

Page 247: ...ace air cleaner Vehicles with a diesel engine the engine air filter is dirty and must be replaced X Visit a qualified specialist workshop i This message does not appear for the 180 CDI BlueEFFI CIENCY manual transmission model A Clean the fuel fil ter Vehicles with a diesel engine there is water in the fuel filter The water must be drained off X Visit a qualified specialist workshop Driving system...

Page 248: ...ning tone also sounds X Reactivate the HOLD function later Y page 179 The HOLD function is deactivated When the brake pedal is firmly depressed an activation condition is not fulfilled A warning tone also sounds X Check the activation conditions for the HOLD function Y page 179 Radar sensor deac tivated See Own er s Manual The radar sensor system is deactivated X Check whether or not the radar sen...

Page 249: ...overed e g by dirt or snow Once the causes listed above no longer apply the display message goes out Lane Keeping Assist is operational again If the display message does not disappear X Pull over and stop the vehicle safely as soon as possible paying attention to road and traffic conditions X Secure the vehicle against rolling away Y page 162 X Clean the windscreen Lane Keeping Assist inoperative ...

Page 250: ... vehicle safely as soon as possible paying attention to road and traffic conditions X Secure the vehicle against rolling away Y page 162 X Clean the sensors Y page 294 X Restart the engine Blind Spot Assist inoperative Blind Spot Assist is faulty The yellow 9 indicator lamps also light up in the exterior mir rors X Visit a qualified specialist workshop Park Assist cancel led The driver s door is o...

Page 251: ...le You can now reactivate DISTRONIC PLUS Y page 173 DISTRONIC PLUS cur rently unavailable See Owner s Manual DISTRONIC PLUS is temporarily inoperative Possible causes Rthe function is impaired due to heavy rain or snow Rthe sensors in the radiator trim are dirty Rthe radar sensor system is temporarily inoperative e g due to electromagnetic radiation emitted by nearby TV or radio sta tions or other...

Page 252: ...warning tone also sounds X Visit a qualified specialist workshop Cruise control and SPEEDTRONIC inop erative SPEEDTRONIC and cruise control are malfunctioning A warning tone also sounds X Visit a qualified specialist workshop Limit km h While depressing the accelerator pedal beyond the pressure point kickdown SPEEDTRONIC cannot be activated Cruise control km h A condition for activating cruise con...

Page 253: ...ring or braking manoeuvres Pay attention to the traffic conditions as you do so X Secure the vehicle against rolling away Y page 162 X Check the tyres and if necessary follow the instructions for a flat tyre Y page 300 X Check the tyre pressures and if necessary correct the tyre pressure X Restart the tyre pressure loss warning system when the tyre pressure is correct Y page 323 Check tyre pres su...

Page 254: ...t the transmission to position R or D without starting the engine X Start the engine X Depress the brake pedal i It is only possible to shift the transmission from position P to the desired position if you depress the brake pedal Only then can the parking lock be deactivated If you do not depress the brake pedal the DIRECT SELECT lever can still be moved but the parking lock remains engaged i At t...

Page 255: ...ified specialist workshop Transmission Mal function The automatic transmission is malfunctioning X Visit a qualified specialist workshop Transmission mal function Stop The automatic transmission is malfunctioning X Pull over and stop the vehicle safely as soon as possible paying attention to road and traffic conditions X Secure the vehicle against rolling away Y page 162 X Consult a qualified spec...

Page 256: ...nt wheels X Visit a qualified specialist workshop A The tailgate is open G WARNING When the engine is running exhaust gases can enter the vehicle interior if the tailgate is open There is a risk of poisoning X Close the tailgate The bonnet is open A warning tone also sounds G WARNING The open bonnet may then block your view when the vehicle is in motion There is a risk of an accident X Pull over a...

Page 257: ... carefully drive on to a qualified specialist workshop X If you are unable to steer safely do not drive on Contact the nearest qualified specialist workshop inoperative Bat tery low You have attempted to switch on the auxiliary heating or to acti vate a departure time using the on board computer after operating the auxiliary heating twice X Let the engine run for 10 seconds The auxiliary heating i...

Page 258: ...he washer fluid level in the washer fluid reservoir has dropped below the minimum i If during the winter months you do not add antifreeze to the washer fluid it may freeze in the washer fluid container In this case the Top up washer fluid display message may appear in the multifunction display X Top up the washer fluid Y page 289 Wiper malfunction ing The windscreen wipers are defective X Visit a ...

Page 259: ...not fastened their seat belt X Fasten your seat belt Y page 46 The warning lamp goes out There are objects on the front passenger seat X Remove the objects from the front passenger seat and stow them in a secure place The warning lamp goes out ü The red seat belt warn ing lamp flashes and an intermittent audible warning sounds The driver or front passenger has not fastened their seat belt At the s...

Page 260: ...OLLISION PREVENTION ASSIST ESP Elec tronic Stability Program PRE SAFE the HOLD function hill start assist the adaptive brake lights and ESP trailer stabilisation are also therefore deactivated for example ATTENTION ASSIST is deactivated G WARNING The brake system continues to function normally but without the functions listed above The wheels could therefore lock if you brake hard for example The ...

Page 261: ...ctions listed above The front and rear wheels could therefore lock for example if you brake hard The steerability and braking characteristics may be severely affec ted The braking distance may increase in an emergency braking situation If ESP is not operational ESP is unable to stabilise the vehicle There is a risk of an accident X Carefully drive on a suitable stretch of road making slight steer ...

Page 262: ... carefully X Visit a qualified specialist workshop J å The red brake warning lamp the yellow ESP and ESP OFF warning lamps and the yellow ABS warning lamp are lit while the engine is running ABS and ESP are malfunctioning Therefore BAS COLLISION PREVENTION ASSIST EBD PRE SAFE the HOLD function hill start assist the adaptive brake lights and ESP trailer stabilisa tion for example are not available ...

Page 263: ...P will not stabilise the vehicle if it starts to skid or if a wheel starts to spin G WARNING If ESP is deactivated ESP is unable to stabilise the vehicle There is an increased danger of skidding and risk of an accident X Reactivate ESP For exceptions see Y page 65 X Adapt your driving style to suit the road and weather conditions If ESP cannot be activated X Have ESP checked at a qualified special...

Page 264: ...while the engine is running ESP BAS PRE SAFE the HOLD function hill start assist and ESP trailer stabilisation are temporarily unavailable The adaptive brake lights and COLLISION PREVENTION ASSIST may also have failed ATTENTION ASSIST is deactivated Self diagnosis is not yet complete G WARNING The brake system continues to function normally but without the functions listed above The braking distan...

Page 265: ...ngine is running There is a malfunction in the SRS Supplemental Restraint Sys tem G WARNING The airbags or belt tensioners may either be triggered uninten tionally or in the event of an accident may not be triggered This poses an increased risk of injury X Drive on carefully X Have SRS checked at a qualified specialist workshop immedi ately For further information about the Supplemental Restraint ...

Page 266: ...ot be checked æ The yellow reserve fuel warning lamp lights up while the engine is run ning The fuel level has dropped into the reserve range Operation of the auxiliary heating is deactivated when the fuel level drops into the reserve range X Refuel at the nearest filling station The red coolant warn ing lamp lights up while the engine is running and the coolant tem perature gauge is at the start ...

Page 267: ...Do not start the engine again until the coolant temperature is below 120 The engine may otherwise be damaged X Drive to the nearest qualified specialist workshop X Avoid heavy loads on the engine as you do so e g driving in mountainous terrain and stop start traffic The red coolant warn ing lamp comes on while the engine is run ning A warning tone also sounds The coolant temperature has exceeded 1...

Page 268: ...avy loads on the engine as you do so e g driving in mountainous terrain and stop start traffic Driving systems Problem Possible causes consequences and M Solutions The red distance warn ing lamp lights up while the vehicle is in motion The distance to the vehicle in front is too small for the speed selected X Increase the distance The red distance warn ing lamp lights up while the vehicle is in mo...

Page 269: ...Useful information 268 Loading guidelines 268 Stowage areas 269 Features 275 267 Stowing and features ...

Page 270: ...wing notes when transporting a load Rwhen transporting a load never exceed the maximum permissible gross vehicle weight or the permissible axle loads for the vehicle including occupants Rthe luggage compartment is the preferred place to carry objects Rposition heavy loads as far forwards as pos sible and as low down in the luggage com partment as possible Rthe load must not protrude above the uppe...

Page 271: ...that are heavy hard pointy sharp edged fragile or too large in the luggage compartment Observe the loading guidelines Y page 268 Front stowage compartments Glove compartment X To open pull handle and open glove compartment flap X To close fold glove compartment flap upwards until it engages i There is a pen holder at the top of the glove compartment flap Spectacles compartment X To open press mark...

Page 272: ...r an iPod or MP3 player see the sepa rate Audio or COMAND Online operating instructions Stowage compartment under the driver s and front passenger seat G WARNING If you exceed the maximum permitted load of the stowage compartment the cover is unable to restrain the objects Objects may be thrown out of the stowage compartment and hit vehicle occupants as a result There is a risk of injury particula...

Page 273: ... compartment Observe the loading guidelines Y page 268 and the safety notes regarding stowage spaces Y page 269 Through loading facility in the rear compartment Observe the loading guidelines Y page 268 X To open fold down seat armrest X Pull the cover which can now be seen for wards by the grip until it lies on arm rest X Pull the centre head restraint on the rear bench seat into the uppermost po...

Page 274: ...mrest and the cupholder are folded in They may other wise be damaged Observe the loading guidelines Y page 268 Folding the rear seat backrest forwards and back Folding the rear seat backrest forward The left hand and right hand rear seat backr ests can be folded forwards separately to increase the luggage compartment capacity X Fully insert the backrest head restraints Y page 96 X Move the driver ...

Page 275: ...268 Rsecure the load using the lashing eyelets Rdistribute the load on the lashing eyelets evenly Rdo not use elastic straps or nets to secure a load as these are only intended as an anti slip protection for light loads Rdo not route lashing materials across sharp edges or corners Rpad sharp edges for protection There are four lashing eyelets in the luggage compartment Lashing eyelets Bag hook G W...

Page 276: ...e compart ment floor X To open open the tailgate X Press down handle on ribbing Handle folds upwards X Swing the luggage compartment floor upwards using handle until it rests against the luggage compartment cover X If the rear shelf is fitted hook the loop on the luggage compartment floor into the hook on the underside of the rear shelf X If the rear shelf is not fitted fold out hook on the unders...

Page 277: ...rama sliding sun roof if a roof carrier is fitted the panorama sliding sunroof cannot be opened In order to allow ventilation of the vehicle interior you can raise the panorama sliding sunroof If a roof carrier approved by Mercedes Benz makes contact with the panorama sliding sunroof the sunroof will lower slightly but remain raised in the rear Attaching the roof carrier X Open covers carefully in...

Page 278: ...in holders and a card holder can be found in the cup holder The cup holder and the rubber mat under neath can be removed for cleaning Clean them with clean lukewarm water only X To remove Lift the cup holder up and out with a brief tug X To fit insert the cup holder into lateral curved sections in the stowage com partment Simultaneously insert the cup holder in such a way that the wedge of the upp...

Page 279: ...bracket X Swing the sun visor to the side X Vehicles with mirror lights slide the sun visor horizontally as desired Ashtray Front ashtray The stowage space under the ashtray is not heat resistant Before placing lit ciga rettes in the ashtray make sure that the ashtray is properly engaged Otherwise the stowage space could be damaged Example vehicles with a stowage compartment cover X To open push t...

Page 280: ... the traffic conditions Only use the cigarette lighter when road and traffic conditions per mit Example vehicles with a stowage compartment cover X Turn the key to position 2 in the ignition lock Y page 143 X To open push the lower section of cover The stowage compartment opens X Press in cigarette lighter Cigarette lighter will pop out automati cally when the heating element is red hot 12 V socke...

Page 281: ...nditions This could also cause you to lose control of the vehicle There is a risk of an accident Use this device only when the vehicle is sta tionary i You must observe the legal requirements for the country in which you are currently driving when operating mobile communi cations equipment in the vehicle If it is permitted by law to operate commu nications equipment while the vehicle is in motion ...

Page 282: ...the mobile phone is inserted in the mobile phone bracket you can speak to the person you are calling using the hands free system X Open the telephone compartment Y page 270 X Place the mobile phone bracket into the pre installed fitting see the separate installation instructions for the mobile phone fitting X Insert the mobile phone into the mobile phone bracket see the separate installa tion inst...

Page 283: ... side G WARNING Objects in the driver s footwell can restrict the pedal travel or obstruct a depressed pedal The operating and road safety of the vehicle is jeopardised There is a risk of an accident Make sure that all objects in the vehicle are stowed correctly and that they cannot enter the driver s footwell Fit the floormats securely and as specified in order to ensure sufficient clearance for ...

Page 284: ...282 ...

Page 285: ...Useful information 284 Engine compartment 284 Service 289 Care 290 283 Maintenance and care ...

Page 286: ...act with hot gases or other leaking service products There is a danger of injury Allow an overheating engine to cool down before opening the bonnet If there is a fire in the engine compartment leave the bonnet closed and notify the fire brigade G WARNING There are parts in the engine compartment that move Certain components may continue to run even if the ignition is switched off or may suddenly s...

Page 287: ...des arrows until you feel it engage If you can raise the active bonnet slightly in the area around the hinges it is not engaged correctly Repeat the step If the bonnet can then still be raised drive directly to a qualified specialist workshop Do not drive faster than 100 km h Opening the bonnet G WARNING When the bonnet is open and the windscreen wipers are set in motion you can be injured by the ...

Page 288: ... and close it with a little more force Engine oil General notes Depending on your driving style the vehicle consumes up to 0 8 l of oil per 1 000 km The oil consumption may be higher than this when the vehicle is new or if you frequently drive at high engine speeds Depending on the engine the oil dipstick may be installed at a different location When checking the oil level Rpark the vehicle on a l...

Page 289: ...isk of fire and injury Make sure that engine oil does not spill out over the filler neck Allow the engine to cool down and thoroughly clean the components that have come into contact with engine oil before you start the engine H Environmental note When topping up the oil take care not to spill any If oil enters the soil or waterways it is harmful to the environment Only use engine oils and oil fil...

Page 290: ...e The coolant level must only be checked and corrected when the engine has cooled down coolant temperature under 40 Checking the coolant level when the cool ant temperature is over 40 can lead to damage to the engine or engine cooling system Example X Park the vehicle on a level surface Only check the coolant level if the vehicle is on a level surface and the engine has cooled down X Turn the key ...

Page 291: ...n from any Mercedes Benz Service Centre i The ASSYST PLUS service interval display does not show any information on the engine oil level Observe the notes on the engine oil level Y page 286 The multifunction display shows a service message for a few seconds e g RNext service A in days RService A due RService A overdue by days Depending on the operating conditions of the vehicle the remaining time ...

Page 292: ...dling for long peri ods In these or similar operating conditions have the air filter engine oil and oil filter for exam ple changed more frequently The tyres must be checked more frequently if the vehicle is operated under increased loads Further information can be obtained at a qualified specialist workshop e g a Mercedes Benz Service Centre Driving abroad An extensive Mercedes Benz Service netwo...

Page 293: ...ng the vehi cle in an automatic car wash After using an automatic car wash wipe off wax from the windscreen and the wiper blades This will prevent smears and reduce wiping noises caused by residue on the wind screen Washing by hand In some countries washing by hand is only allowed at wash bays that are specially designed for this purpose Observe the legal requirements for each individual country X...

Page 294: ... possible whilst avoiding rubbing too hard X Soak insect remains with insect remover and rinse off the treated areas afterwards X Soak bird droppings with water and rinse off the treated areas afterwards X Remove coolant brake fluid tree resin oils fuels and greases by rubbing gently with a cloth soaked in petroleum ether or lighter fluid X Use tar remover to remove tar stains X Use silicone remov...

Page 295: ...rosion damage and damage to electronic components X Clean the inside and outside of the win dows with a damp cloth and a cleaning agent that is recommended and approved by Mercedes Benz Cleaning the wiper blades G WARNING If the windscreen wipers are set in motion when cleaning the windscreen or wiper blades you could become trapped There is a danger of injury Always switch off the windscreen wipe...

Page 296: ...ear water and a soft cloth to clean camera lens Cleaning the exhaust tail pipes Impurities combined with the effects of road grit and corrosive environmental factors may cause flash rust to form on the surface You can restore the original shine of the exhaust pipe by cleaning it regularly especially in win ter and after washing Do not clean the exhaust pipe with acid based cleaning agents such as ...

Page 297: ...ing agents containing solvents can cause surfaces in the cockpit to become porous This could result in plastic parts breaking away when the airbags are deployed There is a danger of injury Do not use care products and cleaning agents containing solvents to clean the cockpit Do not affix the following to plastic surfa ces Rstickers Rfilms Rscented oil bottles or similar items You could otherwise da...

Page 298: ... fied specialist workshop Seat covers of other materials Observe the following when cleaning RClean artificial leather covers with a cloth moistened with a solution containing 1 detergent e g washing up liquid RClean cloth covers with a microfibre cloth moistened with a solution contain ing 1 detergent e g washing up liquid Rub carefully and always wipe entire seat sections to avoid leaving visibl...

Page 299: ...Useful information 298 Where will I find 298 Flat tyre 300 Battery vehicle 304 Jump starting 308 Towing and tow starting 310 Electrical fuses 314 297 Breakdown assistance ...

Page 300: ... Removing replacing the warning trian gle X To remove open the tailgate X Swing the luggage compartment floor upwards Y page 274 X To loosen warning triangle push back the retainers on the bracket X Remove warning triangle from the bracket X To replace place warning triangle back into the bracket and push down to secure Setting up the warning triangle X Fold feet down and out to the side X Fold si...

Page 301: ...s with an emergency spare wheel see Removing the emergency spare wheel Y page 332 i Apart from some country specific var iants vehicles are not equipped with tyre changing tools Some tools for changing a wheel are specific to the vehicle For more information on which tools are required and approved to perform a wheel change on your vehicle consult a qualified specialist workshop Necessary tyre cha...

Page 302: ...commended that you addi tionally equip your vehicle with a TIREFIT kit if you fit tyres that do not feature run flat characteristics e g winter tyres A TIREFIT kit can be obtained from a qualified spe cialist workshop MOExtended tyres tyres with run flat characteristics General notes With MOExtended tyres tyres with run flat characteristics you can continue to drive your vehicle even if there is a...

Page 303: ...ee smoke and smell rubber RESP is intervening constantly Rthere are tears in the sidewalls of the tyre After driving in emergency mode have the wheel rims checked at a qualified specialist workshop with regard to their further use The faulty tyre must be replaced TIREFIT kit Important safety notes G WARNING In the following situations the tyre sealant is unable to provide sufficient breakdown assi...

Page 304: ...nt bottle until the plug engages X With the sealing rings in front slide yellow cap A of tyre sealant bottle into the mounting of tyre inflation compressor until the cap and both hooks engage X Remove the cap from valve C on the faulty tyre X Screw filler hose D onto valve X Insert plug into the socket of the ciga rette lighter Y page 278 or into a 12 V power socket in your vehicle Y page 278 X Tu...

Page 305: ...ING A tyre temporarily sealed with tyre sealant impairs the driving characteristics and is not suitable for higher speeds There is a risk of accident You should therefore adapt your driving style accordingly and drive carefully Do not exceed the specified maximum speed with a tyre that has been repaired using tyre sealant After use excess tyre sealant may run out of the filler hose This could caus...

Page 306: ...ealant bottle and the filler hose replaced as soon as possible at a qualified specialist workshop X Have the tyre sealant bottle replaced every four years at a qualified specialist work shop Battery vehicle Important safety notes Work on the battery e g removing or instal ling requires specialist knowledge and the use of special tools Therefore always have work on the battery carried out at a qual...

Page 307: ...ith the skin eyes or clothing Do not inhale any battery gases Do not lean over the battery Keep children away from batteries Wash battery acid immediately with water and seek medical attention H Environmental note Batteries contain pollutants It is illegal to dispose of them with the household rubbish They must be collected sep arately and disposed of in an environmentally responsible recycling sy...

Page 308: ...recommended by Mercedes Benz For more information please contact a quali fied specialist workshop Have the battery charge checked more fre quently if you use the vehicle mainly for short trips or if you leave it standing idle for a lengthy period Consult a qualified specialist workshop if you wish to leave your vehicle parked up for a long period of time i When you park the vehicle remove the key ...

Page 309: ...rning lamps do not light up at low temperatures it is very likely that the discharged battery has frozen In this case you may neither jump start the vehicle nor charge the battery The service life of a bat tery that has been thawed could be reduced The starting characteristics may be impaired especially at low temperatures Have the thawed battery checked at a qualified spe cialist workshop Only ch...

Page 310: ...tant that you observe the described order of the battery terminals when connecting and disconnecting a battery RWhen jump starting make sure that the battery poles with identical polarity are connected RIt is particularly important to observe the described order when connecting and disconnecting the jump leads RNever connect or disconnect the battery terminals while the engine is running G WARNING...

Page 311: ...ROnly use jump leads that have a sufficient cross section and insulated terminal clamps RIf the battery is fully discharged leave the battery that is being used to jump start connected for a few minutes before attempting to start This charges the empty battery a little RMake sure that the two vehicles do not touch Make sure that Rthe jump leads are not damaged Rbare parts of the terminal clamp do ...

Page 312: ... can be obtained at any qualified specialist workshop Towing and tow starting Important safety notes G WARNING Safety relevant functions are restricted or not available if Rthe engine is not running Rthe brake system or the power steering is malfunctioning Rthe voltage supply or the vehicle s electrical system is malfunctioning If your vehicle is towed significantly greater force may be required t...

Page 313: ...imum of 50km A towing speed of 50 km h must not be exceeded For towing distances over 50 km the front axle or the entire vehicle must be raised and transported Vehicles with automatic transmission must not be tow started The transmission may otherwise be damaged Observe the legal requirements for the rele vant countries when towing and tow starting It is better to have the vehicle transported than...

Page 314: ...t axle raised Intervention by ESP could other wise damage the brake system X Turn the key to position 2 in the ignition lock X When the vehicle is stationary depress the brake pedal and keep it depressed X Vehicles with manual transmission depress the clutch pedal fully and shift to neutral or X Vehicles with automatic transmission shift the automatic transmission to posi tion P X Release the brak...

Page 315: ...ft to neutral X Vehicles with automatic transmission turn the key to position 2 in the ignition lock X Move the transmission to position N As soon as the vehicle is loaded X Prevent the vehicle from rolling away by applying the electric parking brake X Vehicles with manual transmission engage first or reverse gear X Vehicles with automatic transmission shift the transmission to position P X Turn t...

Page 316: ...e bridge or replace a faulty fuse with a fuse of a higher amperage the electric cables could be overloaded This may result in a fire There is a risk of an accident and injury Always replace faulty fuses with specified new fuses of the correct amperage Only use fuses that have been approved for Mercedes Benz vehicles and which have the correct fuse rating for the system concerned Only use fuses mar...

Page 317: ...rectly on the fuse box Moisture seeping in or dirt could otherwise impair the operation of the fuses X Open the bonnet X Remove any existing moisture from the fuse box using a dry cloth X To open open clamps X Fold cover up in the direction of the arrow and remove it X To close check whether the seal is lying correctly in cover X Insert cover at the back into openings on the fuse box X Fold down c...

Page 318: ... forwards i Fuse allocation chart is located on the lower right hand side of cover X To close insert cover on the left hand side of the fuse box into the retainer Cover engages in the retainers X Fold down cover until clamps lock audibly X Fold back perforated floor covering 316 Electrical fuses Breakdown assistance ...

Page 319: ...Useful information 318 Important safety notes 318 Operation 318 Winter operation 320 Tyre pressure 321 Changing a wheel 324 Wheel and tyre combinations 329 Emergency spare wheel 332 317 Wheels and tyres ...

Page 320: ...tics Rpay attention to the information and warn ing notices on MOExtended tyres tyres with run flat characteristics Accessories that are not approved for your vehicle by Mercedes Benz or that are not being used correctly can impair the operating safety Before purchasing and using non approved accessories visit a qualified specialist work shop and enquire about Rsuitability Rlegal stipulations Rfac...

Page 321: ...sture Do not fit anything onto the valve other than the stand ard valve cap or other valve caps approved by Mercedes Benz for your vehicle Do not fit any other valve caps or systems e g tyre pres sure monitoring systems Regularly check the pressure of all the tyres particularly prior to long trips Adjust the tyre pressure as necessary Y page 321 Observe the notes on the emergency spare wheel Y pag...

Page 322: ... At temperatures below 7 summer tyres lose elasticity and therefore traction and braking power Change the tyres on your vehi cle to M S tyres Using summer tyres at very cold temperatures could cause tears to form thereby damaging the tyres permanently Mercedes Benz cannot accept responsibility for this type of damage M S tyres G WARNING M S tyres with a tyre tread depth of less than 4 mm are not s...

Page 323: ...when the road sur face is completely snow covered Remove the snow chains as soon as possible when you come to a road that is not snow cov ered Rlocal regulations may restrict the use of snow chains Observe the appropriate reg ulations if you wish to fit snow chains Rdo not exceed the maximum permissible speed of 50 km h Rwhen snow chains are fitted never use Active Parking Assist Y page 186 i You ...

Page 324: ...tions These are defined in the table as different numbers of passengers and amounts of lug gage The actual number of seats may vary for more information please refer to the vehi cle s registration documents If tyre sizes are not specified the tyre pres sures stated on the tyre pressure information label apply for all tyres approved for this vehi cle If a tyre size precedes a tyre pressure the foll...

Page 325: ...delayed if Rsnow chains are fitted to your vehicle s tyres Rroad conditions are wintry Ryou are driving on sand or gravel Ryou adopt a very sporty driving style cor nering at high speeds or driving with high rates of acceleration Ryou are towing a very heavy or large trailer Ryou are driving with a heavy load in the vehicle or on the roof Restarting the tyre pressure loss warn ing system Restart t...

Page 326: ... to the instructions and safety notes when changing a wheel Y page 324 The wear patterns on the front and rear tyres differ depending on the operating conditions Interchange the wheels before a clear wear pattern has formed on the tyres Front tyres typically wear more on the shoulders and the rear tyres in the centre On vehicles that have the same size front and rear wheels you can interchange the...

Page 327: ...way i Apart from certain country specific varia tions vehicles are not equipped with a tyre change tool kit For information on which tools are required to perform a wheel change on your vehicle consult a Mercedes Benz Service Centre Necessary wheel changing tools can include for example RJack RWheel chock RWheel wrench Securing the vehicle against rolling away If your vehicle is equipped with a wh...

Page 328: ... the vehicle secure it from rolling away by applying the parking brake and positioning wheel chocks Never release the parking brake while the vehicle is raised Rthe jack must be placed on a firm flat and non slip surface On a loose surface a large load bearing underlay must be used On a slippery surface a non slip underlay must be used e g rubber mats Rdo not use wooden blocks or similar objects a...

Page 329: ...full turn Do not unscrew the bolts com pletely The jacking points are located just behind the front wheel arches and just in front of the rear wheel arches arrows Covers front example vehicles with AMG equip ment AMG vehicles and vehicles with AMG equipment the vehicle has covers fitted next to the jacking points on the outer sills to pro tect the vehicle body X AMG vehicles and vehicles with AMG ...

Page 330: ...le driving There is a risk of accident Never oil or grease wheel bolts In the event of damage to the threads contact a qualified specialist workshop immediately Have the damaged wheel bolts or hub threads replaced renewed Do not continue driving G WARNING If you tighten the wheel bolts or wheel nuts when the vehicle is raised the jack could tip over There is a risk of injury Only tighten the wheel...

Page 331: ...le These are specially adapted to the control systems such as ABS or ESP and are marked as follows RMO Mercedes Benz Original RMOE Mercedes Benz Original Extended tyres featuring run flat characteristics RMO1 Mercedes Benz Original only cer tain AMG tyres Mercedes Benz Original Extended tyres may only be used on wheels that have been specifically approved by Mercedes Benz Only use tyres wheels or ...

Page 332: ... same type of tyres at a given time summer tyres winter tyres MOExtended tyres Exception it is permissible to fit a different type or make in the event of a flat tyre Observe the MOExtended tyres tyres with run flat characteristics section Y page 300 Vehicles with MOExtended tyres are not equipped with a TIREFIT kit at the factory It is therefore recommended that you addition ally equip your vehic...

Page 333: ...V 2 V 3 V 4 V 5 V 6 V 7 BA 195 65 R15 91 T M Si13 6 5 J x 15 H2 ET 47 BA 205 55 R16 91 H M Si14 6 5 J x 16 H2 ET 49 BA 205 55 R16 91 H M SiMOExtended14 15 6 5 J x 16 H2 ET 49 BA 205 50 R17 93 H XL M Si 6 5 J x 17 H2 ET 49 BA 205 50 R17 93 H XL M SiMOExtended14 15 6 5 J x 17 H2 ET 49 13 A 180 BlueEFFICIENCY only for vehicles with 15 tyres fitted at the factory 14 A 250 BlueEFFICIENCY not in conjunc...

Page 334: ...re dimensions and tyre type are correct When using an emergency spare wheel or spare wheel of a different size you must not exceed the maximum speed of 80 km h Snow chains must not be fitted to emergency spare wheels General notes You should regularly check the pressure of the emergency spare wheel particularly prior to long trips and correct the pressure as nec essary Y page 321 The value on the ...

Page 335: ... bag with the Minispare emergency spare wheel For further information on changing and fit ting a wheel see Y page 325 Technical data Minispare emer gency spare wheel Tyres Steel wheel T 125 80 R17 99 M Tyre pressure 420 kPa 4 2 bar 61 psi 3 5 B x 17 H2 ET 19 5 Emergency spare wheel 333 Wheels and tyres Z ...

Page 336: ...334 ...

Page 337: ...nformation on technical data 336 Vehicle electronics 336 Identification plates 338 Service products and capacities 338 Vehicle data 346 Trailer tow hitch 348 24 GHz radar sensor system coun try overview 350 335 Technical data ...

Page 338: ... tampered with or not properly retrofitted the electromagnetic radi ation they emit can interfere with the vehicle electronics This may jeopardise the opera tional safety of the vehicle There is a risk of an accident You should have all work on electrical and electronic components carried out at a quali fied specialist workshop G WARNING If you use the RF transmitter in the vehicle in an improper ...

Page 339: ...nufacturer s additional instructions when installing Deviations with respect to wavebands maxi mum transmission outputs or aerial positions must be approved by Mercedes Benz The maximum transmission output PEAK at the base of the aerial must not exceed the following values Waveband Maximum transmission output Short wave 3 54 MHz 100 W 4 m waveband 68 87 5 MHz 30 W 2 m waveband 144 174 MHz 50 W Tru...

Page 340: ...ou can find the data applicable to your vehicle on the vehi cle s identification plate VIN X Slide the right hand front seat to its rear most position X Fold up floor covering in front of the right hand front seat You will see VIN The VIN can also be found on the vehicle identification plate Y page 338 Engine number The engine number is stamped onto the crankcase More information can be obtained f...

Page 341: ...ble If you handle fuel incorrectly there is a risk of fire and explo sion You must avoid fire naked flames creating sparks and smoking Switch off the engine and if applicable the auxiliary heating before refuelling G WARNING Fuels are poisonous and hazardous to health There is a danger of injury Do not swallow fuel or let it come into contact with skin eyes or clothing Do not inhale fuel vapours K...

Page 342: ...to the fuel system and the engine Notify a qualified specialist workshop and have the fuel tank and fuel lines drained completely Only refuel using premium grade unlea ded petrol with at least 95 ROZ 85 MOZ that conforms to European standard EN 228 or E DIN 51626 1 or an equivalent specification Fuel of this specification can contain up to 10 ethanol Fuel that does not conform to EN 228 or E DIN 5...

Page 343: ... deposits These will form especially on the inlet valves and in the combustion chamber This could lead to engine running problems e g Rlonger engine warm up phase Runeven idle Rengine noise Rmisfiring Rloss of power In areas where petrol with the required addi tives is not available carbon deposits can build up In this case Mercedes Benz recom mends the use of additives that have been approved for...

Page 344: ...dingly diesel fuel from warmer areas may not be suitable for opera tion in colder climatic conditions i Further information on country specific fuel properties can be obtained from oil companies e g at filling stations Fuel consumption information H Environmental note CO2 carbon dioxide is the gas which scien tists believe to be principally responsible for global warming the greenhouse effect Your...

Page 345: ...ows which engine oils have been approved for your vehicle Missing values were not available at the time of going to print Petrol engines MB Approval All models 229 5 Diesel engines with a diesel particle filter MB Approval A 180 CDI BlueEFFI CIENCY manual trans mission A 180 CDI BlueEFFI CIENCY automatic transmission A 200 CDI BlueEFFI CIENCY A 220 CDI BlueEFFI CIENCY 228 51 229 31 229 51 Diesel e...

Page 346: ...cation Brake fluid G WARNING The brake fluid continuously absorbs mois ture from the air This results in the boiling point of the brake fluid lowering If the boiling point of the brake fluid is too low vapour pockets may form when the brakes are sub jected to a heavy load This would impair brak ing efficiency There is a risk of an accident Have the brake fluid renewed at the prescri bed intervals ...

Page 347: ...tem against freezing down to approximately 37 Rnot exceed 55 antifreeze protection down to 45 Heat will otherwise not be dissipated as effectively If the vehicle has lost coolant top it up with equal amounts of water and antifreeze cor rosion inhibitor Mercedes Benz recommends an antifreeze corrosion inhibitor concentrate in accord ance with MB Specifications for Service Prod ucts 310 1 The coolan...

Page 348: ...ecified may vary as a result of tyres load condition of the suspension optional equipment Ritems of optional equipment increase the unladen weight and reduce the maximum payload The unladen weight is specified in accordance with EC directives and includes driver 68 kg luggage 7 kg all fluids fuel tank 90 full Rvehicle specific weight information can be found on the vehicle identification plate Y p...

Page 349: ...g Unladen weight automatic transmis sion 1395 kg A 250 BlueEFFICIENCY Vehicle height 1438 mm Unladen weight 1445 kg A 180 CDI BlueEFFICIENCY Vehicle height 1433 mm Unladen weight manual transmis sion 1395 kg Unladen weight automatic transmis sion 1475 kg A 200 CDI BlueEFFICIENCY Vehicle height 1434 mm Unladen weight manual transmis sion 1445 kg Unladen weight automatic transmis sion 1475 kg A 220 ...

Page 350: ...bserve the anchorage points on the chas sis Trailer towing is not permissible on the fol lowing models RA 45 AMG 4MATIC RVehicles with the AMG Sports package Example anchorage points for the trailer tow hitch Anchorage points Overhang dimension Rear axle centre line For trailer tow hitches fitted at the factory the overhang dimension including protective cov ering is 794 mm 348 Trailer tow hitch T...

Page 351: ...lue can be found on the trailer tow hitch or trailer identification plates The lowest weight applies You can attach carrier systems e g bicycle racks or load bearing implements on the ball coupling The maximum noseweight of 75 kg applies when using carrier systems on the ball coupling Vehicles with automatic transmission Use a drawbar noseweight as close as possible to the maximum permissible nose...

Page 352: ...ich the radar sensor system is not approved you must deactivate the system using the on board computer Y page 223 The current country overview can be obtained from a Mercedes Benz Service Centre or on the Internet at http www mercedes benz de betriebsanleitung Vehicles with a navigation system the radar sensor system is deactivated automatically near radio telescope facilities A display message ap...

Page 353: ...351 ...

Page 354: ...352 ...

Page 355: ...om Editorial office You are welcome to forward any queries or suggestions you may have regarding this Owner s Manual to the technical documenta tion team at the following address Daimler AG HPC CAC Customer Service 70546 Stuttgart Germany Daimler AG not to be reprinted translated or otherwise reproduced in whole or in part without written permission from Daimler AG As at 13 12 2012 ...

Page 356: ...Order no 65155008 02 Part no 1765841400Z102 Edition NA 2012 09d É1765841400Z102iËÍ 1765841400Z102 Nur für internen Gebrauch For internal use only ...

Reviews: