


45
DVD BASIC OPERATION (GENERAL) (CONTINUED)
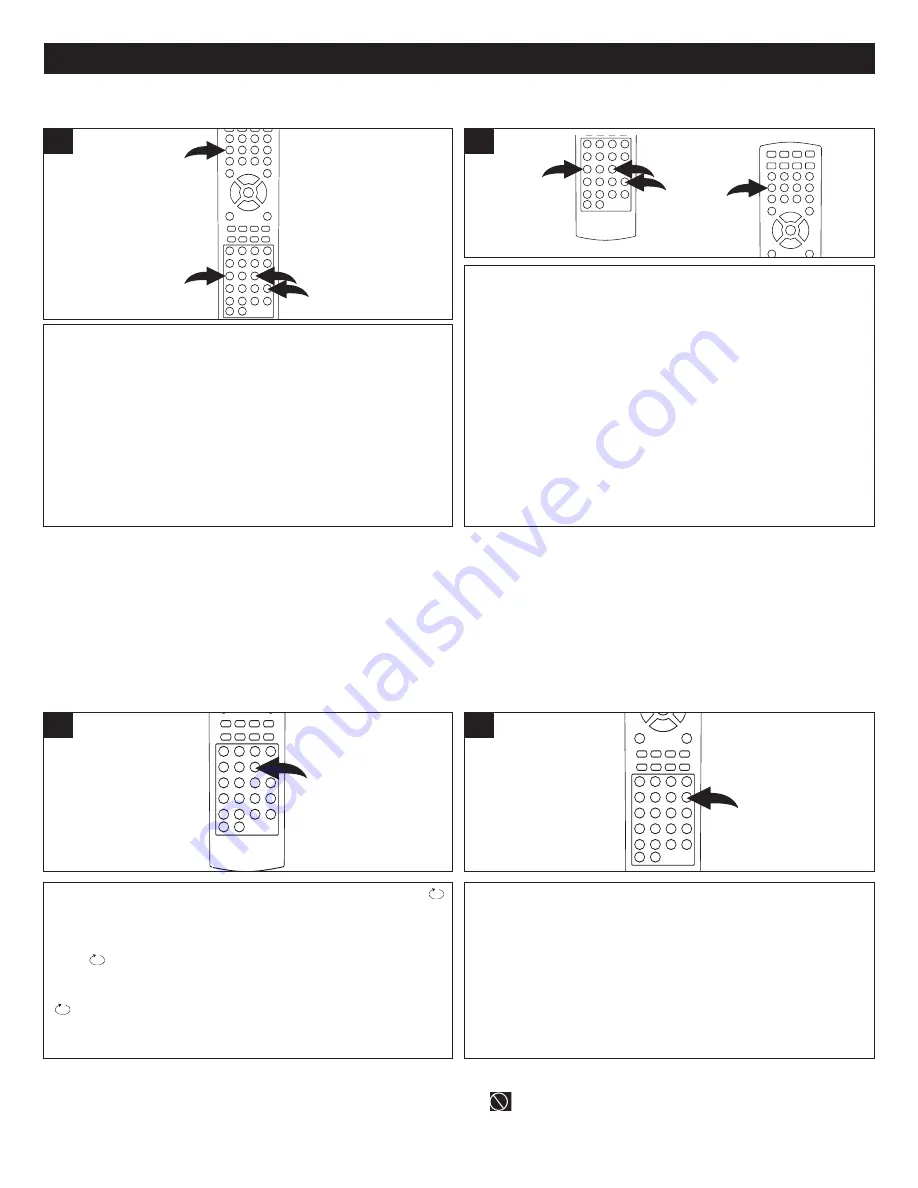
Press the SEARCH button
1
once. Press the Navigation
(
√
,
®
) buttons
2
to select the Title, then use the Direct
Channel Selection/Number buttons (0-9)
3
to select the
desired title number. Playback will start immediately.
OR
Press the Navigation (
√
,
®
) buttons
2
to select the
Chapter, then use the Direct Channel Selection/Number
buttons (0-9)
3
to select the desired chapter number.
Playback will start immediately.
1
2
2
3
1
Press the SEARCH button
1
twice. Press the Navigation (
√
,
®
)
buttons
2
to select the Title, then use the Direct Channel
Selection/Number buttons (0-9)
3
to select the desired title number.
Playback will start immediately.
OR
Press the Navigation (
√
,
®
) buttons
2
to select the Time, then use the
Direct Channel Selection/Number buttons (0-9)
3
to select the desired
Title Time (Hour/Minutes/Seconds); playback will start immediately.
Press the SEARCH button
1
a third time. Press the Navigation (
√
,
®
)
buttons
2
to select the chapter, then use the Direct Channel
Selection/Number buttons (0-9)
3
to select the desired chapter
number. Playback will start immediately.
OR
Press the Navigation (
√
,
®
) buttons
2
to select the Chapter Time, then
use the Direct Channel Selection/Number buttons (0-9)
3
to select the
desired chapter time (Hour/Minutes/Seconds); playback will start
immediately.
1
2
3
1
TITLE/CHAPTER SEARCH
Use this feature to directly go to a specific title and/or chapter.
TITLE/CHAPTER/TIME SEARCH
Use this feature to directly go to a specific title and/or time.
While in the Playback mode, press the REPEAT button once; “
CHAPTER” will appear on the TV screen and the currently playing
Chapter will repeat continuously.
While in the Playback mode, press the REPEAT button a second
time; “
TITLE” will appear on the TV screen and the currently
playing Title will repeat continuously.
While in the Playback mode, press the REPEAT button a third time;
“
ALL” will appear on the TV screen and the complete disc will
repeat continuously. Press the REPEAT button once more to
cancel Repeat mode.
1
While in the Playback mode, press the Repeat A-B button to
define where you want the section to start. Press the Repeat
A-B button again to define where you would like the section
to end, the unit will then play the selected area continuously.
Press the Repeat A-B button again to cancel A-B Repeat
mode.
1
REPEAT PLAYBACK
While playing back a DVD, this unit can repeatedly play
back a chapter or title.
A-B REPEAT PLAYBACK
While playing back a DVD, this unit can repeatedly play
back a specific section.
NOTE:
• If you enter a time that exceeds the time limit of the DVD, then “
” will appear, and you must try again.
• Repeat may not work properly with some discs.
To enter a title or chapter number larger than 9, press the 10+ button to enter the first digit (i.e. for Title/Chapter 15, press
the 10+ button once "1-" will appear, then press the Number 5 button; for Title/Chapter 22, press the 10+ button twice follow
by press the Number 2 button, etc.).
1
2
2
3


