background image

6

GB

• Keep children away from the construction area  
  while assembling the product.
• Dispose of the packaging materials in accor- 
  dance with regulations.
• Caution! Keep away from fire. Do not stand  
  the product close to a fire or other source of  
  heat, e.g. radiators.
• Do not use with lit candles!
• The product is not a climbing frame or a toy.
• Only stand the product on a smooth, horizon- 
  tal surface. Otherwise there is a risk that it  
  could tip over. 

Caution – may cause damage to 

property!

• Only use the article indoors. The product may  
  fly away if used outdoors. 

Assembly

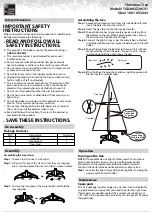
Step 1

Unfold the legs on the Christmas tree stand at a 
90° angle to one another and screw the wing 
screws loosely into the correct drill holes (figure 
B).

Step 2

Insert the lower trunk section into the tree stand 
and tighten the screws and then insert the upper 
trunk section into the opening on the lower trunk 
section (figure C). 

Step 3

Hook the branches onto the trunk. Begin at the 
top and work downwards: 6 x (A) red; 6 x (B) 
yellow; 6 x (C) green; 6 x (D) blue; 6 x (E) grey; 
6 x (F) black (figure D). 

Step 4

Insert the crown of the tree into the opening on 
the upper trunk section (figure E). 

Step 5

Bend the branches into the desired position. 
Now you can decorate the tree with decorations 
and fairy lights (figure F). 

Cleaning, care

• If the product becomes a little dusty clean the  
  branches with a dry cloth. Never clean it with  
  harsh cleaning materials! 

  Congratulations!

With your purchase you have decided on a 
high-quality product. Get to know the product 
before you start to use it. 

Carefully read the 

following operating instructions. 

Use the 

product only as described and only for the given 
areas of application. Keep these instructions 
safe. When passing the product on to a third 
party, always make sure that the documentation 
is included. 

Parts list and scope of  

delivery (Figure A)

36 x Hook-on branches
  6 x (A) Red
  6 x (B) Yellow
  6 x (C) Green
  6 x (D) Blue
  6 x (E) Grey
  6 x (F) Black
1 x (G) Lower trunk
1 x (H) Upper trunk
1 x (I) Crown of the tree
1 x (J) Tree stand
3 x (K) Wing screws
1 x Instructions for use

Technical data

Size: approx. H 180 x Ø 110cm
Material: metal, PVC

Correct use

This product is designed as an artificial Christ-
mas tree for private, indoor use. 

Safety notes


Risk of injury!

WARNING!

• Risk of suffocation for children! Do not allow  
  children to play with the packaging material  
  without supervision. 
• The scope of delivery includes some small  
  parts. They can endanger life if swallowed or  
  inhaled. 

Summary of Contents for 275724

Page 1: ...odprite stran s slikami in se seznanite z vsemi funkcijami naprave P ed ten m si nejd ve vyklopte str nku s obr zky a seznamte se se v emi funkcemi p stroje Sk r ne za nete n vod ta si ho otvorte na...

Page 2: ...K H G H G G J C I H I E A 6x B 6x C 6x D 6x E 6x F 6x D A B C D E F G H I J K A K J B F...

Page 3: ...zpe nostn pokyny 14 Mont 14 istenie o etrovanie 14 Skladovanie 15 Pokyny k likvid cii 15 3 roky z ruka 15 Alkatr szek list ja s a csomag tartalma 8 M szaki adatok 8 Rendeltet sszer haszn lat 8 Biztons...

Page 4: ...tion figure E Step 5 Bend the branches into the desired position Now you can decorate the tree with decorations and fairy lights figure F Cleaning care If the product becomes a little dusty clean the...

Page 5: ...l amenity Be sure to comply with the current valid regulations 3 Years Warranty The product was produced with great care and under constant supervision You receive a three year warranty for this produ...

Page 6: ...ekor tartsa t vol a fel ll t s hely t l a gyermekeket A csomagol st az el r soknak megfelel en t vol tsa el Figyelem T zt l tartsa t vol Ne ll tsa fel t z vagy m s h forr s p ld ul radi tor k ze l ben...

Page 7: ...garancia Ezen term k gy rt sa nagy gondoss ggal s folyamatos ellen rz s mellett t rt nt n a term kre h rom v garanci t kap a v s r l s id pontj t l K rj k rizze meg a p nzt rb lokkot A garancia csak a...

Page 8: ...elka ne dovolite otrokom v bli ino mesta sestavljanja Embala ni material zavrzite v skladu s predpi si Pozor Izdelek hranite stran od ognja Izdelka tudi ne postavljajte v bli ino ognja ali drugih viro...

Page 9: ...odatki za uveljavljanje garancije se nahajajo na dveh lo enih dokumentih garancijski list ra un 11 Ta garancija proizvajalca ne izklju uje pravic potro nika ki izhajajo iz odgovornosti prodajalca za n...

Page 10: ...ku dr te d ti z dosahu m sta sestavov n Obalov materi l likvidujte do odpadu podle p edpis Pozor Udr ujte z dosahu ohn Nestavte v robek do bl zkosti ohn nebo jin ch tepeln ch zdroj jako nap topn ch t...

Page 11: ...ediska Dodr ujte aktu ln platn p edpisy 3 roky zaruka Produkt byl vyroben s velkou pe livost a byl pr b n kontrolovan ve v robn procesu Na tento produkt obdr te t ro n z ruku ode dne zakoupen Uschove...

Page 12: ...zdr iavali v bl zkosti miesta mont e Obalov materi l zlikvidujte v s lade s pred pismi Pozor Chr ni pred oh om Nein talujte v bl zkosti oh a alebo in ch tepeln ch zdrojov ako napr pec radi tor Nepou...

Page 13: ...vajte aktu lne platn predpisy 3 roky z ruka Produkt bol vyroben s maxim lnou zodpovednos ou a v priebehu v roby bol neus t le kontrolovan Na tento produkt m te tri roky z ruku od d tumu k py produktu...

Page 14: ...Halten Sie Kinder w hrend der Montage des Produkts vom Aufbauort fern Entsorgen Sie das Verpackungsmaterial vorschriftsm ig Achtung Von Feuer fernhalten Nicht in der N he von Feuer oder anderen W rme...

Page 15: ...ockenen Platz Hinweise zur Entsorgung Verpackung und Artikel bitte umweltgerecht und sortenrein entsorgen Entsorgen Sie den Artikel ber einen zugelassenen Entsorgungsbetrieb oder ber Ihre kommunale Ge...

Page 16: ...18...

Page 17: ...19...

Page 18: ...20...

Reviews: