background image

Operation Software


System Requirement and Precautions 

1. The EX-G053B provides a software control program which runs under Microsoft Windows 98, 

2000, XP through the interface of RS-232 serial control. 

2. Before you click on the icon of the software, make sure you have secured the connection between 

your computer COM port and the EX-G053B and switched on the EX-G053B with green LED light.   

3. The EX-G053B has remote control and software control. To make sure all information shown in 

the software is synchronized with those in the device, please click “Connect” to acquire the latest 

data from the EX-G053B after you press any key on the remote control. 


Instruction of Software Connection


1. Power up the EX-G053B and you can see both red and green LEDs on the front panel blink. Make 

sure the serial port (RS-232) connection secure. 

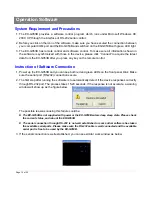
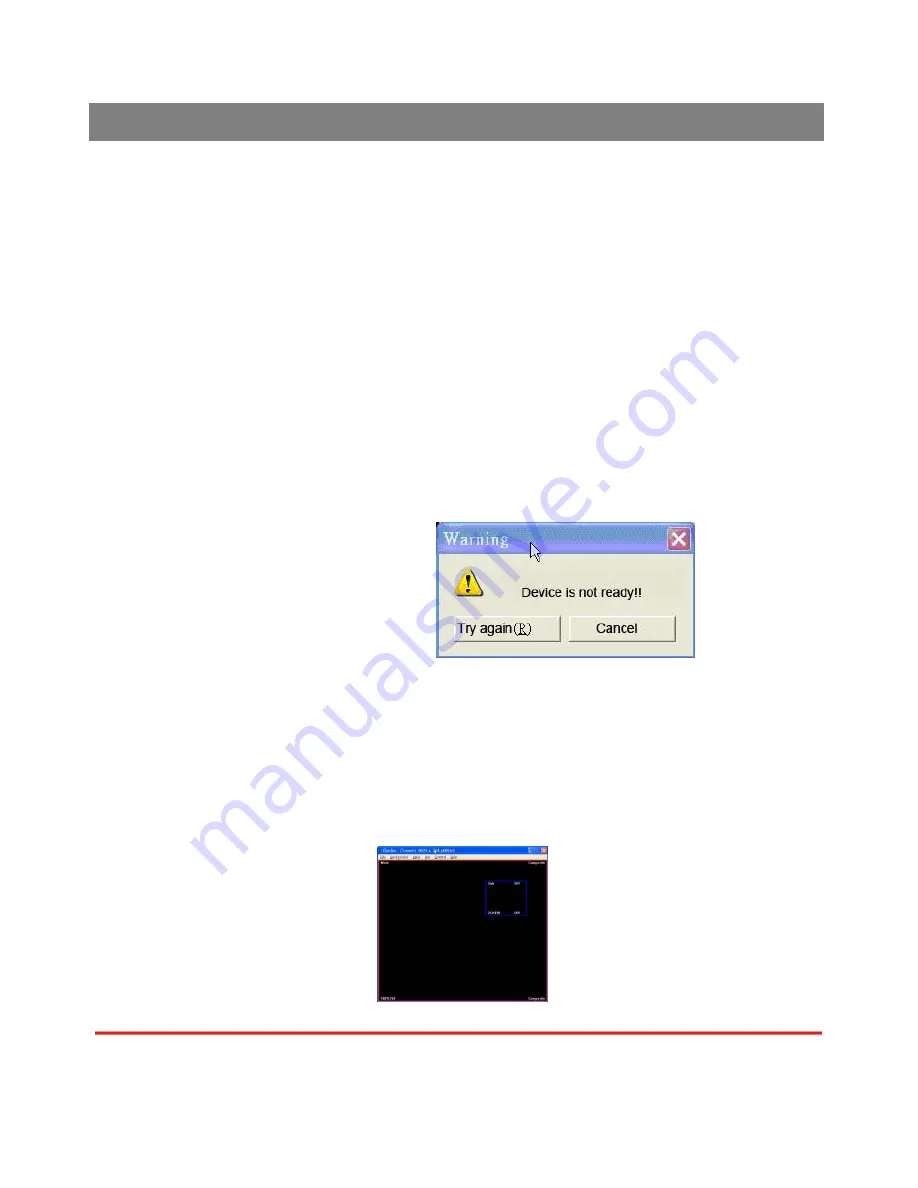
2. The first step after running the software is to automatically detect if the device responses correctly 

through RS-232 port. The process takes 15-20 seconds. If the response is not accurate, a warning 

window will show up as the figure below. 


The possible reasons causing this failure could be: 

z


The EX-G053B is not supplied with power or the EX-G053B enters deep sleep state. Please check 

the current status, and reboot the EX-G053B 

z


The serial connection through RS-232 is not well established or some other software has taken 

the available serial ports. Please make sure the RS-232 cable is well connected and the available 

serial port is free to be used by the EX-G053B. 

3. If the serial connection is well established, you can see similar work window as below. 


Page 1

4

 of 

24

Summary of Contents for EX-G053A

Page 1: ...EX G053B http www meicheng com tw Meicheng Meicheng R...

Page 2: ...damage to the unit z Follow all instructions and warnings marked on this unit z Do not attempt to service this unit yourself except where explained in this manual z Provide proper ventilation and air...

Page 3: ...Installation 9 Safety Precautions 9 Installation Procedures 9 IR Remote Control 11 On Screen Display Menu 12 Chapter 3 Software Operation 14 System Requirement and Precautions 14 Instruction of Softwa...

Page 4: ......

Page 5: ...e parameters and layouts are automatically saved in flash memory and can be recalled for later use z Several Image parameters and layouts can be saved in computers and can be loaded for later use z Vi...

Page 6: ...control Electro optical characteristics 25 Carrier frequency 38kHz DVI connector DVI I 29 pin female digital only VGA connector HD 15 15 pin D sub female RS 232 connector DE 9 9 pin D sub female RCA...

Page 7: ...s 1 EX G053B 2 DVI to DVI VGA breakout cable DDVY01 3 VGA to YPbPr breakout cable VYPBA01 4 DVI to VGA adapter DVA01 5 5V DC power adapter 6 IR remote controller 7 Installation software CD 8 User Manu...

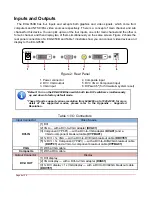
Page 8: ...the EX G053B then switch both two DIP switchers simultaneously up and down to factory default mode These IO ports support various resolution from 640x480 up to 1920x1200 for more detail of the suppor...

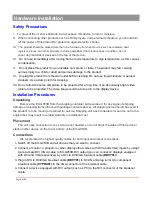
Page 9: ...image could be burned in to the display device Installation Procedures Unpacking Remove the EX G053B from the shipping container and examine it for any signs of shipping damage or missing items check...

Page 10: ......

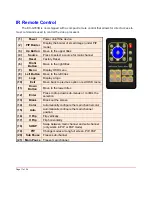
Page 11: ...nu 8 Left Button Move to the left titles 9 Logo Display a logo 10 Exit Move back to previous option or exit OSD menu 11 Down Button Move to the lower titles 12 Enter Press to drop down sub menus or co...

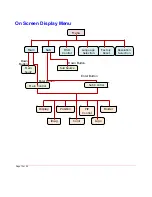
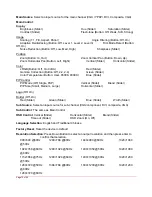
Page 12: ...Control OSD Control Language Selection Main Sourc Enter Button Down Button Factory Reset Main Sub Resolution Selection Sub Source Enter Button Down Button Sub Control Position Borde Display Imag Color...

Page 13: ...00K Blue Slider PIP Control PIP Mode Off Single PAP Vertical Slider Blend Slider PIP Size Small Medium Large Horizontal Slider Logo Off On Border Off On Red Slider Green Slider Blue Slider Width Slide...

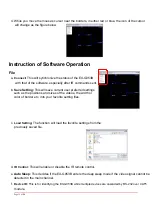
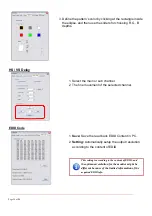
Page 14: ...EX G053B and you can see both red and green LEDs on the front panel blink Make sure the serial port RS 232 connection secure 2 The first step after running the software is to automatically detect if t...

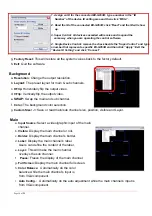
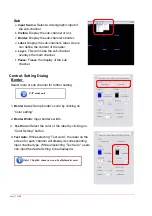
Page 15: ...erred settings such as the positions and sizes of the videos the width or color of border etc into your favorite setting files c Load Setting The function will load the favorite settings from the prev...

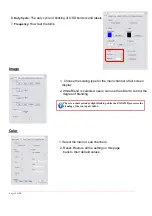
Page 16: ...out for main sub channels c HFlip Horizontally flip the output video d VFlip Vertically flip the output video e SWAP Swap the main and sub channel f Color The background color selection g Custom Size...

Page 17: ...ontrol Setting Dialog Border Select main or sub channel for further setting PAP mode only 1 Border Color Setup border s color by clicking on Color setting 2 Border Width Input border s width 3 Text Co...

Page 18: ...el at full screen display 2 While Blend is selected users can use the slider to control the degree of blending There is a short period of slight blinking while the EX G053B processes the blending of t...

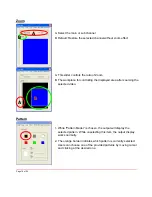
Page 19: ...e displayed area after zooming the selected video B A Pattern 1 While Pattern Model is chosen the output will display the selected pattern While unselecting this item the output display works normally...

Page 20: ...l 2 The fine movement of the selected channel EDID Code 1 Save Save the read back EDID Content in PC 2 Setting Automatically setup the output resolution according to the content of EDID This setting i...

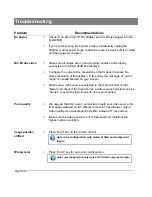
Page 21: ...d on your screen 9 Make sure a video source is selected to the main channel press Menu and check if the first item has a video source selected or press Source to select a video source for the main cha...

Page 22: ...l of which are expressly disclaimed Proof of sale may be required in order to claim warranty Customers outside Taiwan are responsible for shipping charges to and from the SELLER Cables are limited to...

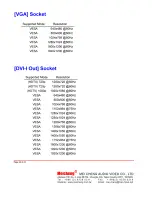
Page 23: ...0 70Hz VESA 640x480 60Hz MAC 640x480 67Hz VESA 640x480 72Hz VESA 640x480 75Hz VESA 640x480 85Hz VESA 800x600 56Hz VESA 800x600 60Hz VESA 800x600 72Hz VESA 800x600 75Hz VESA 800x600 85Hz Supported Mode...

Page 24: ...ddress 13F No 2 Jian 8th Rd Jhonghe City Taipei County 23511 TAIWAN Website www meicheng com tw Email mei cheng msa hinet net Te l 8 8 6 2 8 2 2 8 0 3 11 F a x 8 8 6 2 8 2 2 8 0 3 1 9 MEI CHENG AUDIO...

Reviews: