


www.megger.com
DLRO10 and DLRO10X
10
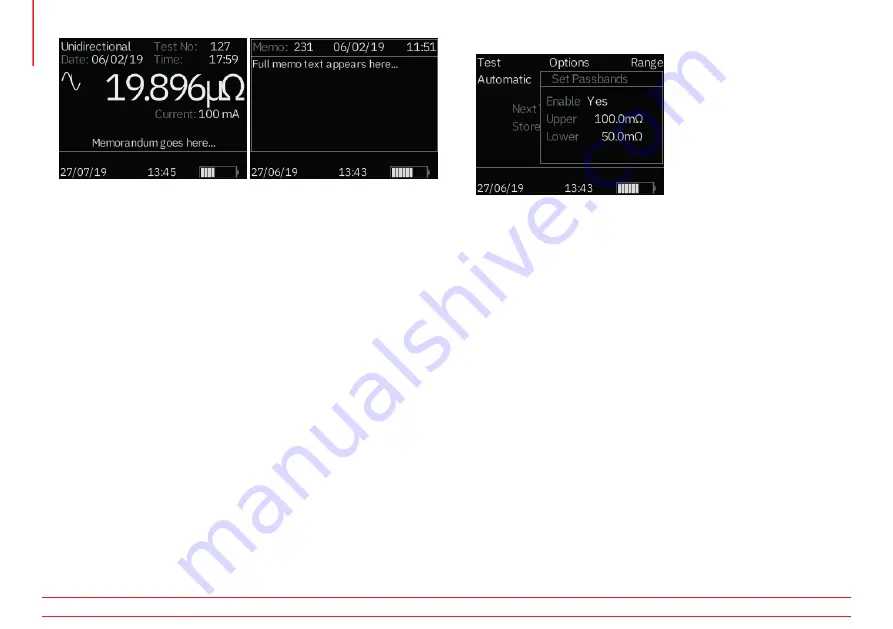
At the bottom of the test screen a memo will display for one associated with the test
otherwise the test will display “memorandum goes here...” which means that there
are no notes attached to this result.
Press the right cursor control to view any available notes.
4.7.2 Download
Causes the entire contents of the data store to be output to the RS232 port to the left
of the display. A copy of AVO Download Manager, which facilitates downloading and
formats the data, is supplied.
Downloading data does not cause the stored data to be erased from memory. To clear
data from memory see “Delete Data” below.
Please note - DLRO10X also makes data available via the RS232 Port in real
time and is suitable for printing on a self-powered serial printer.
The output has the following form:
TEST NUMBER
TEST TYPE
DD MM YY HH MM
01/01/00 00:33
FORWARD RESISTANCE
REVERSE RESISTANCE
AVERAGE RESISTANCE
SELECTED CURRENT
UPPER LIMIT *
LOWER LIMIT *
PASS/FAIL *
*The last three lines will only appear if passbands have been set
4.8 Passbands
This option allows you to set upper and lower limits between which the test result
average must fall if it is to be signalled as a Pass (GREEN). Readings outside these
limits will be signalled as a Fail (RED).
Set the passbands to ENABLE to yes to allow the upper and lower passbands to be
set.
Values are entered via the keypad complete with decimal points, where applicable,
and including µ or m (See section on the Alphanumeric Keypad). Repeatedly pressing
the blue 9/A button cycles between ohms, milliohms, microohms. It is not necessary
to enter the Ω symbol. The upper limit must be less than or equal to 2000.0 Ω and
the lower limit must be less than the upper limit.
During entry of the upper limit DLRO10X will check validity of the entered values and
beep to advise if above accepted limits. After completing the upper limit use the right
cursor key to move to the lower limit. Enter the lower limit then press Enter.
You will now return to the Main Menu screen.
Note: Passbands will remain enabled or disabled until you enter this screen
and change the selection. If all that is required is to change Passbands from
ENABLED to DISABLE or vice versa, enter the PASSBAND screen and press
Enter until the ENABLED / DISABLED choice is shown at which time you may
change the selection.


