background image

EN

11

•  Do not leave the product unattended or 

on a flammable surface before it has 
cooled. 

•  Risk of eye damage. Wear safety glasses 

when working with melted solder.

•  Risk of damage to lungs and respiratory 

tracts. Avoid inhalation of fumes and 
smoke from soldering. Only solder in a 
well ventilated area.

•  Risk of serious burn injury. The soldering 

tip gets very hot when in use – do not 
touch the soldering tip.

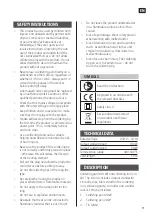
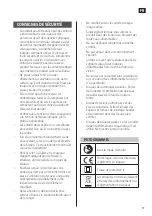
SYMBOLS

Read the instructions.

Approved in accordance with 
the relevant directives.

Safety class II 

Recycle discarded product 
in accordance with local 
regulations.

TECHNICAL DATA

Rated voltage 

230 V ~ 50 Hz

Output soldering gun 

100 W

Output soldering pen 

30 W

Temperature range 

400-500°C

Cord length 

1.2 m

DESCRIPTION

Soldering gun (100 W) and soldering iron (30 
W). The kit also includes a repair stand with 
crocodile clips, table stand for the soldering 
iron, soldering paste, tin solder and a solder 
sucker. Extra tip included.

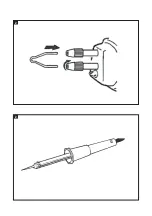
1.  Soldering gun 100 W
2.  Soldering pen 30 W
3.  Tin solder

SAFETY INSTRUCTIONS

•  This product can be used by children from 

8 years and upwards and by persons with 
physical, sensorial or mental disabilities, 
or persons who lack experience or 
knowledge, if they are supervised or 
receive instructions concerning the safe 
use of the product and understand the 
risks involved with its use. Do not allow 
children to play with the product. Do not 
allow children to clean or maintain the 
product without supervision.

•  Never place a soldering pen directly on a 

workbench or other surface, regardless of 
whether it is hot or cold – always put it in 
a stand during pauses in the work or 
before putting it away.

•  A damaged cord or plug must be replaced 

by an authorised service centre or other 
qualified personnel to ensure safe use.

•  Check that the mains voltage corresponds 

with the rated voltage on the type plate. 

•  Keep children under supervision to make 

sure they do not play with the product.

•  Smoke will develop from the soldering tip 

the first time the product is connected to a 
power point. This is completely normal 
and soon stops.

•  Use a soldering stand and a suitable 

helping hand device to minimise the risk 
of burn injuries.

•  Never use the product if the soldering tip 

is not correctly and firmly pressed in place 
– otherwise this will reduce the life span 
of the heating element.

•  Pull out the plug and allow the product to 

cool after use before putting it away.

•  Do not file soldering tips of the long-life 

type.

•  Be careful when using the product in 

places where there is flammable material.

•  Do not apply to the same point for too 

long.

•  Do not use in explosive environments.
•  Be aware that heat can be conducted to 

flammable material that is out of sight.

Summary of Contents for 019114

Page 1: ...inal bruksanvisning MODE D EMPLOI Important Lisez attentivement le mode d emploi avant la mise en service Conservez le Traduction des instructions originales OPERATING INSTRUCTIONS Important Read the user instructions carefully before use Save them for future reference Translation of the original in structions BEDIENUNGSANLEITUNG Wichtig Die Bedienungsanleitung vor der Verwendung bitte sorgfältig ...

Page 2: ...ges For latest version of operating instructions see www jula com Änderungen vorbehalten Die aktuellste Version der Bedienungsanleitung finden Sie auf www jula de Pidätämme oikeuden muutoksiin Katso käyttöohjeiden uusin versio täältä www jula fi Nous nous réservons le droit d apporter des modifications Pour la dernière version du manuel utilisateur voir www jula fr Wijzigingen voorbehouden Voor de...

Page 3: ...1 ...

Page 4: ...2 2 ...

Page 5: ...dledning eller får instruktioner angående en säker användning av produkten och förstår de risker som är förknippade med användningen Barn får inte leka med produkten Låt inte barn rengöra eller underhålla produkten utan övervakning Lägg aldrig en lödpenna direkt på en arbetsbänk eller annan yta oavsett om lödpennan är varm eller kall placera den alltid i ett lödställ under pauser i arbetet eller n...

Page 6: ...a spetsen och sätt i en ny 3 Tryck in spetsen så långt det går och dra åt skruvarna 4 Om skruvarna inte är korrekt åtdragna försämras värmeöverföringen BILD 2 LÖDPENNA 30 W 1 Kontrollera att lödspetsen är korrekt monterad och låsskruven åtdragen 2 Sätt i sladden 3 Låt inte lödpennan hettas upp utan monterad lödspets 4 Kontrollera att produkten har tillräcklig effekt för att värma de delar som ska ...

Page 7: ... om produktet hvis de får veiledning eller instruksjoner om sikker bruk av produktet og forstår farene som er forbundet med bruken Barn skal ikke leke med produktet Ikke la barn rengjøre eller vedlikeholde produktet uten tilsyn Legg aldri en loddepenn rett på en arbeidsbenk eller en annen flate uansett om loddepennen er varm eller kald sett den alltid i et loddestativ når du tar pauser eller skal ...

Page 8: ...ny 3 Trykk spissen så langt inn som den går og stram skruene 4 Hvis skruene ikke er riktig strammet blir varmeoverføringen dårligere BILDE 2 LODDEPENN 30 W 1 Kontroller at loddespissen er riktig montert og låseskruen er strammet 2 Sett inn ledningen 3 Ikke la loddepennen varmes opp uten montert loddespiss 4 Kontroller at produktet har tilstrekkelig effekt for å varme opp de delene som skal loddes ...

Page 9: ...by które nie używały go wcześniej o ile uzyskają one pomoc lub wskazówki dotyczące bezpiecznego użytkowania produktu i rozumieją związane z tym zagrożenia Nie pozwalaj dzieciom bawić się produktem Nie pozwalaj dzieciom czyścić ani konserwować produktu bez nadzoru Bez względu na to czy produkt jest gorący czy zimny nigdy nie kładź lutownicy bezpośrednio na stole roboczym ani innej powierzchni w cza...

Page 10: ...czątku rozgrzej części które chcesz ze sobą połączyć i przyłóż cynę do miejsca lutowania Wymiana grota lutowniczego 1 Odkręć dwie śruby zabezpieczające 2 Wyjmij stary grot i załóż nowy 3 Wciśnij grot najdalej jak to możliwe a następnie dokręć śruby 4 Źle dokręcone śruby wpływają negatywnie na przewodzenie ciepła RYS 2 LUTOWNICA 30 W 1 Sprawdź czy grot jest prawidłowo zamontowany a śruby zabezpiecz...

Page 11: ...the safe use of the product and understand the risks involved with its use Do not allow children to play with the product Do not allow children to clean or maintain the product without supervision Never place a soldering pen directly on a workbench or other surface regardless of whether it is hot or cold always put it in a stand during pauses in the work or before putting it away A damaged cord or...

Page 12: ... it goes and tighten the screws 4 The transfer of heat will be reduced if the screws are not correctly tightened FIG 2 SOLDERING PEN 30 W 1 Check that the soldering tip is correctly in place and the retaining screws tightened 2 Plug in the power cord 3 Do not allow the soldering pen to heat up without a soldering tip 4 Check that the product has enough power to heat the parts to be joined 5 Clean ...

Page 13: ...ie sichere Verwendung des Produkts eingewiesen werden und die mit der Verwendung verbundenen Gefahren verstehen Das Produkt ist kein Spielzeug Kinder dürfen das Produkt nicht unbeaufsichtigt reinigen oder pflegen Legen Sie einen Lötstift niemals direkt auf eine Werkbank oder eine andere Oberfläche egal ob der Lötstift heiß oder kalt ist stellen Sie ihn während der Pausen während der Arbeit oder wä...

Page 14: ... 1 Lösen Sie die beiden Schrauben 2 Entfernen Sie die alte Spitze und setzen Sie eine neue ein 3 Drücken Sie die Spitze so weit wie möglich hinein und ziehen Sie die Schrauben fest 4 Wenn die Schrauben nicht richtig angezogen werden wird die Wärmeübertragung reduziert ABB 2 LÖTSTIFT 30 W 1 Überprüfen Sie ob die Lötspitze richtig angebracht ist und die Sicherungsschrauben festgezogen sind 2 Den Net...

Page 15: ...oa edellyttäen että heitä valvotaan tai opastetaan tuotteen turvallisessa käytössä ja että he ymmärtävät tuotteen käyttöön liittyvät riskit Älä anna lasten leikkiä tuotteella Lapset eivät saa puhdistaa tai huoltaa tuotetta valvomatta Älä koskaan aseta juotoskynää suoraan työpöydälle tai muulle pinnalle riippumatta siitä onko kynä kuuma vai kylmä aseta se aina juottotelineeseen työskentelyn tauoill...

Page 16: ...a uusi kärki 3 Työnnä kärki sisään niin pitkälle kuin se menee ja kiristä ruuvit 4 Jos ruuveja ei kiristetä oikein lämmönsiirto heikkenee KUVA 2 JUOTOSKYNÄ 30 W 1 Tarkista että juotoskärki on asennettu oikein ja lukitusruuvit on kiristetty 2 Kytke johto pistorasiaan 3 Älä anna juotoskynän kuumentua ilman juotoskärkeä 4 Tarkista että tuotteessa on riittävästi tehoa liitettävien osien lämmittämiseen...

Page 17: ...ites ou des personnes manquant d expérience et de connaissances à condition de leur indiquer comment utiliser le produit en toute sécurité et de leur faire comprendre les risques associés à l utilisation Les enfants ne doivent pas jouer avec le produit Ne laissez pas les enfants nettoyer ou entretenir le produit sans surveillance Ne posez jamais le fer à souder directement sur un établi ou une aut...

Page 18: ...fe et de dommages matériels graves 4 Commencez par chauffer les pièces à souder puis appuyez le fil de soudure contre l emplacement de soudage Remplacement de la panne 1 Desserrez les deux vis de blocage 2 Enlevez l ancienne panne et mettez une neuve 3 Appuyez sur la panne aussi loin que possible et serrez les vis 4 Si les vis ne sont pas correctement serrées la transmission thermique se fait moin...

Page 19: ...kennis of ervaring hebben mits toezicht of als er instructies worden gegeven voor het veilige gebruik van het product en zij de risico s begrijpen die samengaan met het gebruik Kinderen mogen niet met het product spelen Laat kinderen het product niet zonder toezicht schoonmaken of onderhouden Leg een soldeerpen nooit direct op de werkbank of een ander oppervlak of de soldeerpen nu warm of koud is ...

Page 20: ...en 1 Maak de twee borgschroeven los 2 Verwijder de oude pen en plaats een nieuwe 3 Druk de soldeerpen zo ver mogelijk in en draai de schroeven vast 4 Als de schroeven niet correct zijn vastgedraaid heeft dit een negatieve impact op de warmteoverdracht AFB 2 SOLDEERPEN 30 W 1 Controleer of de soldeerpen correct is gemonteerd en de borgschroeven zijn vastgedraaid 2 Steek de stekker in het stopcontac...

Reviews: