background image

AR-I-MREMSW-5 Avant REM Speech Training Manual 


Effective Date: 4/07/2014 


20 


Additional Tests & Features 

 
Real Ear to Coupler Difference (RECD) 

The Real Ear to Coupler Difference (RECD) is used to simulate real ear measurements by coupler 
measurements and is useful when fitting children or “difficult” to fit patients. 


The RECD values are used 

as a correction to coupler measures for that client’s hearing instruments. By performing all subsequent 
measures in the coupler and applying the RECD corrections to the coupler measures, the “real ear” 
factors are incorporated into the results. The resulting simulated measurements provide information to 
select and make adjustments to the hearing instrument and verify adjustments in the hearing instrument 
test box rather than in the uncooperative client’s ear. This is particularly important in the case of children, 
whose small volume ear canals enhance high frequency amplification more so than in average adults. 
This is an essential consideration in determining the maximum output of the hearing instrument. 

If RECD data is present, the software will display an option to choose between Ear or Coupler 
measurement on all Real Ear screens where measurements in a coupler are appropriate

There are two ways to measure the REAR response: using an insert headphone or a hearing instrument. 

If a hearing instrument is used, its volume control setting and other parameters should 

remain the same


for both REAR and coupler measurements. It is also recommended to set the volume control to 
moderate, and turn the compression and noise reduction circuits off. 

How to perform the RECD task


First, perform the REAR task to obtain a REAR curve.  This can be measured with a hearing instrument 
or an insert earphone. 

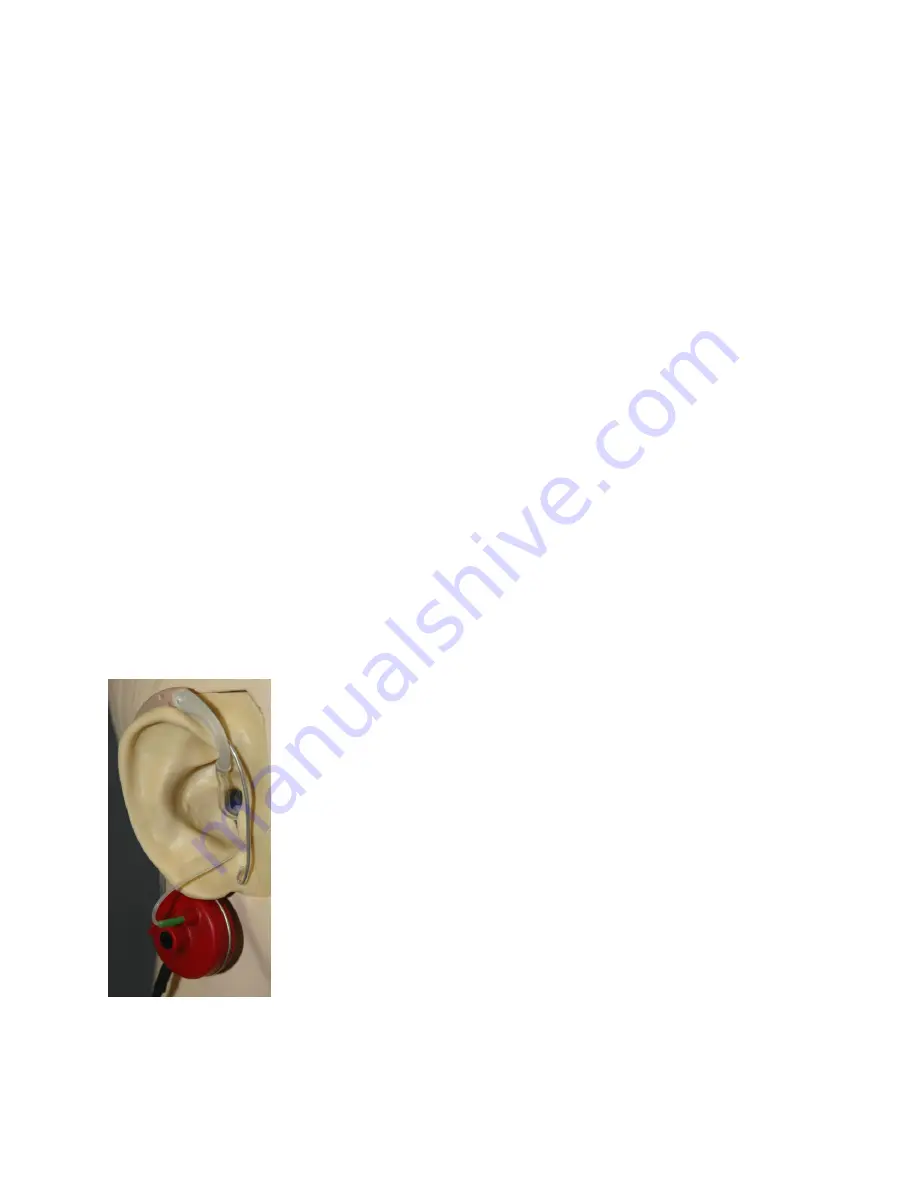
REAR with a hearing instrument


Adjust volume of the hearing instrument to comfortable listening level. 
It is also recommended to turn the compression and noise reduction 
circuits off.  


Position the client less than one meter from the speaker and facing 
the speaker.  


Place the hearing instrument and the probe microphone tube as for all 
REM measurements.  


Select 

START

 to open the measurement type selection screen.  


Choose the REAR with a Hearing Aid option.  


Select 

OK

 to begin the test and wait until it concludes. 


Summary of Contents for Avant REM Speech

Page 1: ...TRAINING MANUAL...

Page 2: ...AR I MREMSW 5 Avant REM Speech Training Manual Effective Date 4 07 2014 2 This Page Intentionally Left Blank...

Page 3: ...g 9 Live Speech Mapping 13 Real Ear Measurements 18 Additional Tests and Features 20 Printing 26 Limited Warranty 26 0086 www medrx usa com 1200 Starkey Rd 105 Largo FL 33771 U S A Toll Free 888 392 1...

Page 4: ...peech Mapping MedRx s in situ method for getting the fitting right the first time every time This manual assumes that the system hardware software and drivers are installed and working properly Please...

Page 5: ...ext sensitive interactive Help System To access this tool press the F1 key at any time or click the Help menu with your mouse This will display additional information and instructions for the specific...

Page 6: ...Speech main program by clicking on the Options text menu as shown below The software allows you to set several default options as described below The View tab allows you to set the default appearance...

Page 7: ...ok and behavior of the Master Hearing Aid and Hearing Loss Simulator If your system has a Tympanometer connected this tab will assist in configuring the look of the display NOTE Remember that more inf...

Page 8: ...tab are described below For more in depth information consult the interactive Help system within the software The General Tab configures the overall Avant REM Speech behavior with respect to other Wi...

Page 9: ...wn above The cables will only connect when the white mark on the cable connector aligns with the black mark on the main unit DO NOT force the connector on 1 Locate the Probe Microphone case 2 Carefull...

Page 10: ...ttaching the Probe Microphone Assembly to the Ear Hook 1 Hold the probe microphone assembly so that with the ear hook facing the front of the head the microphone ports face away from the patient 2 Car...

Page 11: ...Function Calibrate Probe Tube Position probe microphone between 19 and 39 inches from the loudspeaker and click Start The signal must be at least 70 dB to complete a valid calibration If the screen p...

Page 12: ...the larger hole with the ear canal and thread the probe tube through The black tube depth marker should rest just inside the larger hole Positioning the Speakers Proper positioning of the loudspeakers...

Page 13: ...ram was entered using another manufacturer s audiogram module If none of these have occurred you may manually enter the audiometric data into the AVANT REM Speech software as follows 1 Launch the audi...

Page 14: ...meet the needs of your practice Speech Mapping with Recorded Inputs For those who prefer a standard repeatable stimulus for Speech Mapping the software provides several digital audio files These are a...

Page 15: ...hese features please consult the Interactive Help system by pressing the F1 key or clicking the Help icon 1 Reference Microphone Level 2 Ear selection 3 Measurement type a Peaks b LTAS 4 Input Selecto...

Page 16: ...by opening the Avant REM Speech software from within NOAH as shown above From the Avant REM Speech main screen click the NOAH LSM button The REM Speech window will reduce in size and float on top of...

Page 17: ...g values b Pure Tone Air and Bone conduction thresholds c Narrow Band Noise or Pure Tone UCL at 500 2000 and 3000 Hz d Other tests if needed in your practice or jurisdiction 2 Complete a careful otosc...

Page 18: ...nerate targets The following rules are supported Gain POGO I POGO II Berger 1 3 Gain NAL RP FIG6 DSL NAL NL1 Real Ear Unaided Response Measures the additive effect of the ear canal s resonance to a st...

Page 19: ...n is useful in determining the acoustic seal of a hearing aid relative to a sound field outside the ear Some clients report they seem like they are speaking in a barrel or feel blocked up These are si...

Page 20: ...the hearing instrument If RECD data is present the software will display an option to choose between Ear or Coupler measurement on all Real Ear screens where measurements in a coupler are appropriate...

Page 21: ...aring instrument is used be sure to perform this measurement at the same volume control setting as the first measurement Select START to open the measurement type selection screen Choose the Coupler R...

Page 22: ...ve at 1 24 octave Using this information make any needed adjustments to the hearing instrument to reduce or remove the feedback Hearing Loss Simulator The Hearing Loss Simulator demonstrates the effec...

Page 23: ...al source and the task icons for Normal and Simulate The Master Hearing Aid applies gain separately for each ear If audiogram values are entered for the left and right ear the selected fitting rules w...

Page 24: ...odify the input signal according to the selected rule This selection allows the patient to hear the benefits of amplification Toggle between these two selections as necessary 6 If the simulated freque...

Page 25: ...nu click one of the following options Print Setup selects the printer you want the report to be sent to Avant REM Speech prints to any installed Windows printer Page Setup Allows you to set margin siz...

Page 26: ...as provided under this warranty is the sole and exclusive remedy of the purchaser MedRx shall not be liable for any consequential or incidental damages or for breach of any express or implied warrant...

Reviews: