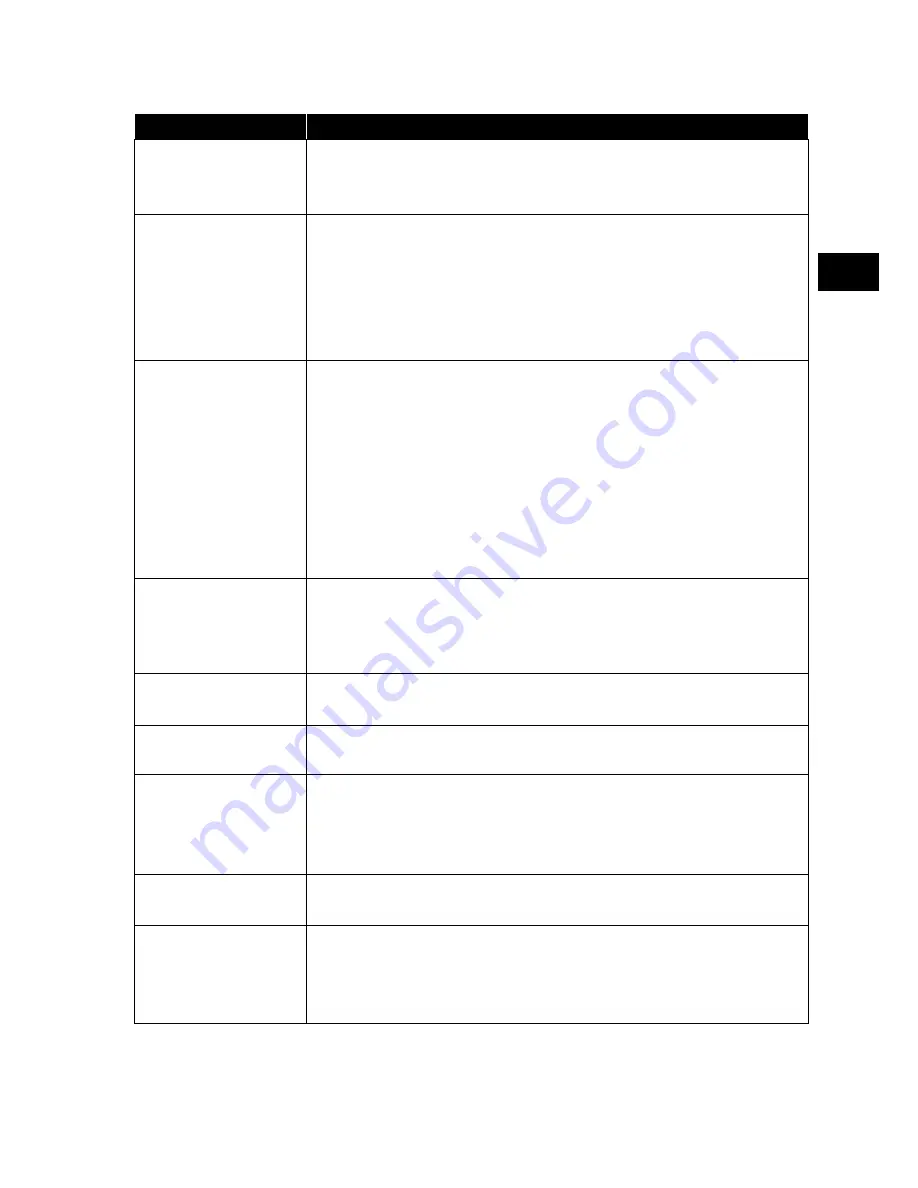
background image

61

EN

FR

IT

NL

DE

13. Troubleshooting


Problem

Corrective action

There is no picture 
and no sound.

• 

Check if the power cable is inserted in the socket proper-
ly.

• 

Check if the signal reception is set to 

TV

.

There is no AV pic-
ture.

• 

Check to ensure that the contrast and brightness settings 
are correct.

• 

Check to ensure that all external devices have been con-
nected properly.

• 

Check to ensure that you have selected the correct AV 
source.

There is no sound.

• 

Ensure that the volume has not been set to the minimum 
level.

• 

Ensure the mute setting is not active. Do this by pressing 
the button with the crossed out loudspeaker symbol on 
the top left of the remote control.

• 

Check whether headphones are connected.

• 

If you have connected a satellite receiver or DVD player to 
the television via a SCART cable, check whether the cable 
has been connected to the SCART socket properly.

There is no picture 
and no sound. I 
can hear noise, 
though.

• 

The reception might be poor. Check if the antenna is con-
nected properly.

The picture is not 
clear.

• 

The reception might be poor.

• 

Check if the antenna is connected properly.

The picture is too 
bright or too dark.

• 

Check the contrast and brightness settings.

The picture is not 
sharp.

• 

The reception might be poor.

• 

Check if the antenna is connected properly.

• 

Check the sharpness and noise reduction settings in the 

PICTURE

 menu.

There is a double/
triple picture.

• 

Check if the antenna is aligned properly.

• 

Waves might be reflected off buildings or hills.

The picture is pix-
elated.

• 

There might be interference from cars, trains, power lines, 
neon lights, etc.

• 

There might be interference between the antenna and 
power cables. Position the cables further apart.

Summary of Contents for LIFE S13203 LIFE S14304 LIFE S15005 LIFE S16506

Page 1: ...S13203 MD31303 S14304 MD 31304 S15005 MD 31305 S16506 MD 31306 LED Backlight TV MEDION LIFE User Manual...

Page 2: ...Inserting the batteries in the remote control 23 6 4 Connecting the antenna 24 6 5 Common Interface CI 24 6 6 Connecting the power supply 25 6 7 Switching the LCD TV on and off 25 6 8 Channel search...

Page 3: ...player 56 11 3 Displaying photos 57 11 4 Playing back music 58 11 5 Playing back videos 59 11 6 Displaying text 59 12 EPG programme guide 60 13 Troubleshooting 61 13 1 Do you need more help 62 13 2 LC...

Page 4: ...Explanation of symbols If a block of text is marked with one of the warning symbols listed below the hazard described in that text must be avoided to prevent the potential consequences de scribed ther...

Page 5: ...ca tions This device is used to receive and play back television programmes The range of different connections supplied makes it possible to expand the input and output sources receiver DVD player DVD...

Page 6: ...your product LED backlight TV Remote control RC1244 including 2 batteries 1 5 V AAA YUV adaptor AV adapter Stand including screws Wall mount including fastening materials Documentation DANGER Risk of...

Page 7: ...evice and have understood the dangers that result from it Children must not be allowed to play with the device Cleaning and user maintenance must not be carried out by children unless they are supervi...

Page 8: ...re is a risk of injury if the display is broken To avoid damaging the display do not touch it with fingers or sharp objects Pick up the shattered pieces wearing protective gloves Then wash your hands...

Page 9: ...nteract the smell We have taken ap propriate measures during the development of this device to ensure that levels are significantly below legal limits Keep your LCD TV and all connected appliances awa...

Page 10: ...set up your TV on a stable surface Televisions that tip over could cause serious injuries or death Lots of in juries especially to children can be avoided by observ ing the following safety precaution...

Page 11: ...e used The use of unsuitable replacement parts may damage the device and lead to a risk of fire 3 4 Environmental temperature The device can be operated at an ambient temperature of 5 C to 35 C with a...

Page 12: ...sources discon nect the device completely from the mains network Dis connect the mains plug from the mains socket for this pur pose DANGER Risk of electric shock There is a risk of death due to an el...

Page 13: ...data sheet All multimedia devices which are connected to the cor responding ports of the TV must comply with the re quirements of the Low Voltage Directive 3 6 Handling batteries WARNING Risk of expl...

Page 14: ...and old batteries or different types of batteries This could cause your device to malfunction In addition the weaker batteries would discharge too much Remove spent batteries from the device immediate...

Page 15: ...G hereby declares that this device conforms to all of the required regula tions in the EU and the fundamental requirements and the remaining relevant reg ulations of RE Directive 2014 53 EU Ecodesign...

Page 16: ...16 5 Device overview 5 1 Front MD 31303 7 6 1 2 3 4 5 MD 31304 MD 31305 7 6...

Page 17: ...enu 3 CH CH Select a program or navigate in the menu 4 MENU Call up the on screen menu to make settings on your device 5 SOURCE Change the input source 6 LCD screen 7 Operating light Shines red when t...

Page 18: ...via the supplied cinch adapter 6 SPDIF COAX OUT Digital audio output coaxial 7 HDMI3 HDMI port for devices with HDMI output HDMI 3 can be used for CEC 8 HDMI2 HDMI port for devices with HDMI output H...

Page 19: ...FR IT NL DE 5 3 Remote control 2 1 3 4 7 8 9 10 11 12 13 14 15 16 17 18 19 20 21 22 23 25 26 27 28 D MENU TITLE GOTO ANGLE REVEAL PROGRAM INTRO REPEAT A B D DISP SUB T LANG ZOOM INDEX AUDIO SIZE 6 29...

Page 20: ...unction 8 SLEEP Set automatic switch off function 9 FAV Call up favourites list 10 EPG Electronic television and radio programme guide broad caster specific 11 SOURCE Select input signal of connected...

Page 21: ...in page 24 SUB T Video text Open subpage DTV satellite media browser Subtitle function 25 Colour but tons RED PROGRAM Intended for use in certain menus GREEN INTRO Intended for use in certain menus YE...

Page 22: ...a long blade to open the box Completely remove the packaging material The box contains a number of small items including batteries Keep these out of the reach of children as they represent a choking...

Page 23: ...ttery compartment cover on the back of the remote control Insert two LR03 AAA 1 5 V batteries in the battery compartment of the remote control Check the battery polarity see label on the bottom of the...

Page 24: ...FACE You can then insert your provider s card in the CAM module 6 5 Common Interface CI If you want to watch subscription channels you must first register with the relevant provider You will receive a...

Page 25: ...e will be switched off but will continue to use power If the device is not receiving an input signal it will automatically switch to standby mode after five minutes A countdown timer will be dis playe...

Page 26: ...AN TYPE only in DVB C mode Set the search mode Leave the setting on NET WORK SCAN or FULL if you do not want to configure any special settings NETWORK ID only in DVB C mode Set the network ID The defa...

Page 27: ...will be carried out on the selected satellite based on the transponder list saved for this satellite This requires a little time NETWORK Activate deactivate the network scan BLIND SCAN A complete sea...

Page 28: ...arch DISH SETUP You can configure the same settings here as in the CHANNEL DISH SETUP menu option After you have configured all the settings press OK The channel search will then start Channel Tuning...

Page 29: ...on tacts the plug will only fit into the socket in one po sition 7 1 1 SCART The SCART connector simplifies connection of various video devices as it combines video and audio signals in a single multi...

Page 30: ...the TV set then works in both directions Vi deo and audio signals can be received from a video device and the audio signal of the TV can also be sent to the audio receiver via the audio return channe...

Page 31: ...onnect the VGA audio ports of the devices used with a stereo mini jack cable 7 1 11 LAN You have the possibility to connect the device to the Internet via the LAN connec tion and receive online conten...

Page 32: ...e supports DUAL mode e g for dual lan guage programmes you can select DUAL mode Use the S MODE button to switch between the following sound modes STANDARD MUSIC MOVIE SPORTS PERSONAL The PER SONAL set...

Page 33: ...through the channel information using the direction buttons 8 5 Opening the favourites list You can enter a list of your favourite channels in the CHANNEL PROGRAM EDIT menu Open the menu by pressing t...

Page 34: ...source selection list SATELLITE Digital satellite signal DTV Digital TV operation digital cable connection DVB T DVB T2 HD ATV Analogue TV operation analogue cable connection AV Audio Video input on t...

Page 35: ...e number buttons The selected page number is displayed in the top left corner of the screen The teletext counter searches as long as it takes to find the selected page number The direction buttons can...

Page 36: ...ch as the solu tions to competitions puzzles or quizzes Pressing the REVEAL button again hides the answers 9 3 3 SIZE This function displays the teletext information in double size Press the SIZE butt...

Page 37: ...enu has a submenu option You can use the direction buttons to enter a value or make another se lection The MENU button returns you to the previous menu at any time Close the menu with the EXIT button...

Page 38: ...e chan nel search TUNE TYPE Use the direction buttons to select the reception type ATV DTV search for analogue and digital TV channels ATV search for analogue TV chan nels DTV search for digital TV ch...

Page 39: ...ptions are available COUNTRY Select the desired country for the chan nel search SATELLITE Select the satellite on which the search will be started SCAN MODE Set the search mode DEFAULT A search will b...

Page 40: ...led channel list for the As tra 19 2E satellite is loaded This search mode takes the least time Select YES to load the channel list Select NO to start the channel search After you have configured all...

Page 41: ...ATA The number of data channels found is displayed DTV MANUAL TUNING only for DVB C You can programme individual channels in DVB C mode manually here if the input signal is received via cable This opt...

Page 42: ...ess the yellow button RE PEAT Use the buttons to move the channel to the desired position and press the yellow button REPEAT again The other channels will be rearranged according ly Alternatively you...

Page 43: ...First insert the CI module in the slot on the side of the LCD TV Then insert the card Please note that you may only insert or re move the CI module when the device has been disconnected from the mains...

Page 44: ...confirm them with the OK button Save the new name with the blue button LONGI TUDE DI RECTION Use the direction buttons to select the orbit position WEST or EAST LONGI TUDE ANGLE The number buttons can...

Page 45: ...wo searches are carried out with the blind scan The first search identi fies the transponders for the sat ellite while the second search lo cates the channels The blind scan takes the longest time CHA...

Page 46: ...ns SYMBOL KS S Enter the symbol rate using the number buttons POLAR ITY Select the polarity with DELETE Select the transponder that you want to delete from the list as described above and press the re...

Page 47: ...can set it to BURST A or B here DISEQC 1 0 1 1 If you have connected multiple LNBs or a DiSEqC switch to your satellite antenna set the desired LNB here MOTOR If your satellite antenna is controlled...

Page 48: ...r set tings CONTRAST Increase or decrease contrast on a scale of 0 100 BRIGHT NESS Increase or decrease brightness on a scale of 0 100 COLOUR Increase or decrease the colour on a scale of 0 100 TINT H...

Page 49: ...encies on a scale of 0 100 BASS Increase or decrease the high frequencies on a scale of 0 100 BALANCE Set the balance between the left and right speakers AUTO VOL UME LEVEL The AVL Automatic Volume Li...

Page 50: ...e here This option is only available in DTV mode SLEEP TIMER Select a time after which the device will switch off auto matically Select OFF to deactivate the function AUTO STANDBY Set a time here afte...

Page 51: ...ut field for entering the passwords will appear PLEASE EN TER OLD PASSWORD Use the number buttons to enter the existing password Factory setting 0000 PLEASE EN TER NEW PASSWORD Enter a new four digit...

Page 52: ...TT LANGUAGE Select the set of characters here for the teletext WEST EAST RUSSIAN ARABIC or FARSI AUDIO LANGUAGES If the current programme is transmitted in multiple lan guages you can set your prefer...

Page 53: ...rk using only one remote control All connected devices must support the CEC function Depending on device there may be functional limitations that cannot be chan ged CEC CONTROL Enable disable the CEC...

Page 54: ...start with this character will be automatically displayed Then choose the op tion OK and confirm with the OK button The de vice now switches to the first channel in the selec tion found Green but ton...

Page 55: ...ill be shown RADIO only the radio stations will be shown DATA only data will be shown HD only the HD channels will be shown FREE only the freely available channels will be shown SCRAMBLED only the enc...

Page 56: ...icular you should not plug in and unplug the USB device several times in quick succession 11 1 Accessing the media player Connect the USB data medium to the USB port on the side of the device Press th...

Page 57: ...to display the photo You can select from further options with the OK button Confirm each option by pressing OK PLAY PAUSE Start pause the slideshow for all photos PREV NEXT Display previous next phot...

Page 58: ...further options with the OK button Confirm each option by pressing OK PLAY PAUSE Start pause playback of the music track FB FF Fast forward rewind PREV NEXT Play previous next track STOP Stop playbac...

Page 59: ...displayed video file SLOW Slow motion function STEP Frame advance playback GOTO TIME Start the video at a particular time ZOOM IN OUT Enlarges reduces the size of the displayed image ASPECT RATIO Cha...

Page 60: ...has been reached the device will automatically switch to the relevant programme It is not possible to add a reminder for the cur rent programme Select here whether the re minder should be once A dail...

Page 61: ...e receiver or DVD player to the television via a SCART cable check whether the cable has been connected to the SCART socket properly There is no picture and no sound I can hear noise though The recept...

Page 62: ...activated under TIME Menu cannot be opened Check whether CEC is enabled In this case the menu cannot be opened This is not a defect In some cases the menu of the device connected via HDMI1 opens This...

Page 63: ...very high number of transistors and the extremely complex manufacturing process used in this context Pixel fault class Defect type 1 Continuously lit pixel Defect type 2 Continuously black pixel Defec...

Page 64: ...pe off the dust first or wipe the high gloss finish too vigorously you could scratch the high gloss finish Do not use solvents corrosive or gaseous cleaning agents Clean the screen with a soft lint fr...

Page 65: ...parating the materials in the de vice for the purpose of recycling and minimising the environmental im pact Take old devices to a collection point for electrical scrap or a recycling centre Before doi...

Page 66: ...name S14304 MD 31304 Screen size 108 cm 43 LCD 16 9 display Power consumption Max 80 W Power consumption in stand by mode 0 50 W Speaker output 2 x 8 W RMS Physical resolution 1920 x 1080 TV system P...

Page 67: ...s VHF Band I III UHF BAND U HYPERBAND CABLE TV S1 S20 S21 S41 DVB T DVB T2 HD H 265 DVB C DVB S2 Connections Antenna connection analogue TV DVB T or DVB C Satellite connection 1 x USB connection Commo...

Page 68: ...03 Dimensions without stand W x H x D Approx 738 x 445 x 92 mm Dimensions with stand W x H x D Approx 738 x 480 x 190 mm Weight without stand Approx 4 3 kg Weight with stand Approx 4 4 kg Mounting on...

Page 69: ...400 x 200 mm3 Dimensions weight S16506 MD 31306 Dimensions without stand W x H x D Approx 1458 x 844 x 95 mm Dimensions with stand W x H x D Approx 1458 x 878 x 272 mm Weight without stand Approx 20 4...

Page 70: ...A A A A Visible screen size diagonal size approx 80 cm 31 5 108 cm 43 125 7 cm 50 163 8 cm 65 Average power consump tion when switched on in watts 39 68 90 153 Annual power consump tion kWh year 57 9...

Page 71: ...act You can also contact our Service team via our hotline or by post Opening times Hotline number UK Mon Fri 08 00 20 00 Sat Sun 10 00 16 00 0333 3213106 Hotline number Ireland 1 800 992508 Service ad...

Page 72: ...Mechanical electronic and any other forms of reproduction are prohibited without the written permission of the manufacturer Copyright is owned by the distributing company MEDION AG Am Zehnthof 77 453...

Page 73: ...Malfunction 61 Media player 56 Menu Lock 51 Option 52 Picture 48 Sound 49 Time 50 Mounting 23 O Operation 32 P Package contents 6 Pixel faults 63 Power supply 12 Connecting the power supply 25 Problem...

Page 74: ......

Reviews: