Medialine M32LS User Manual Download Page 95

E

nglish

Appendix

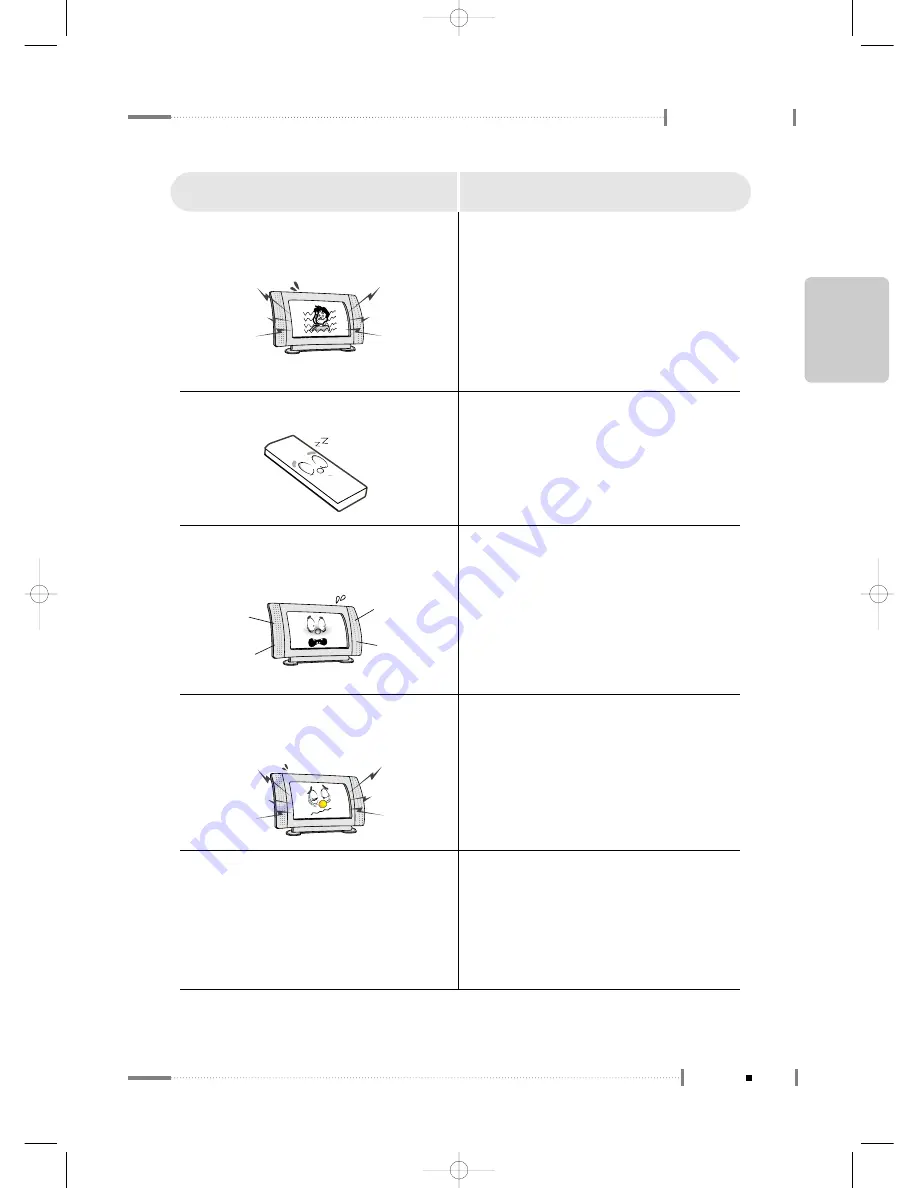
The picture shakes, lines appear, and
audio is unstable.

The remote controller does not work.

Check whether the TV signal is receiving
interference from other radio waves or
devices.
Check whether the TV signal is receiving
interference from automobiles, high-
voltage cables, airplanes, neon
signboards and so on. Change the
antenna direction if necessary.

Check whether the batteries are dead or
installed incorrectly.

Check whether the receiver on the LCD
TV unit is masked. Ensure it is facing in
the correct direction.

Symptoms

What to do

Stereo audio is unclear or discontinuous.

If the broadcasting station is too far away
or the TV is getting interference from other
radio waves, the stereo audio may not be
clear. In this case, press the <SSM>
button.

The LCD TV is making cracking
sounds.

When the LCD TV is turned on or off,
cracking sounds may be heard. This
happens because the cabinet contracts
or expands due to environmental factors,
including humidity and temperature.
There are no adverse effects on the TV’s
performance.

When playing VCR, there is no video.

Check whether the VCR is set to a
dedicated VCR channel (3 or 4), and the
input mode for the TV is set to video
mode.

Check the video cable connection
between the VCR and TV.

A-5

Appendix

(한라)TV매뉴얼32형부록_En  2006.3.29 2:20 PM  페이지A-5   syj_print PDF-IN 2540DPI 100LPI  T

Summary of Contents for M32LS

Page 1: ...1 Use only with the cart stand tripod bracket or table specified by the manufacturer or sold with the apparatus When a cart is used use caution when moving the cart apparatus combination to avoid inju...

Page 2: ...ated dangerous voltage within the product s casing that may be of sufficient magnitude to constitute a risk of electric shock RISK OF ELECTRIC SHOCK DO NOT OPEN CAUTION TO REDUCE THE RISK OF ELECTRIC...

Page 3: ...Select a cool dry area and protect the LCD display from extremes of temperature humidity dust and smoke Electric shock fire or failure may occur Place the apparatus at a proper distance over 10 cm aw...

Page 4: ...s A fire or electric shock may result Stop using the apparatus in case of smoke or abnormal odors Immediately turn off the power pull the power cord out of the wall and then contact your service cente...

Page 5: ...e product do not hold it by the speaker part Don t put pressure on the panel or scratch the surface with your hands or a sharp item such as a nail or pen Damage or failure of the panel may result Keep...

Page 6: ...hooting section in this User Manual before requesting assistance from a service center The information in this user manual is subject to change without notice If static images are displayed on the LCD...

Page 7: ...d contact your dealer immediately N O T E Shapes and colours of parts are subject to change without prior notice but their functions remain unchanged 7 32 LCD TV Remote Control Batteries 1 5V AAA type...

Page 8: ...work 1 14 Connecting VCR 1 16 Connecting a DVD Player Set Top Box Connecting to Y Pb Pr 1 18 Connecting to a digital AC3 amplifier 1 19 Connecting to HDMI 1 20 Connecting to a PC 1 21 LCDTVOverviewand...

Page 9: ...et the screen colour mode 2 23 To set the scren mode 2 24 To eliminate screen noise 2 25 To set the film mode 2 26 2 7 Adjusting the Sound 2 28 To set sound mode 2 28 To adjust the sound balance 2 29...

Page 10: ...e A 4 Troubleshooting A 7 Appendix A 3 1 Initial PC Mode Settings 3 2 3 2 PC Menu Components 3 4 3 3 Main Menu Settings 3 6 To set the Screen menu 3 6 To set the Audio menu 3 8 To set the Settings 3 1...

Page 11: ...Product Characteristics LCD Display Overview Remote Control Connecting the LCD TV and Peripheral Devices TV 32 1 _En 2006 3 29 2 13 PM 1 1 syj_print PDF IN 2540DPI 100LPI T...

Page 12: ...ovided high definition images and stereo sound output Supports Sound Status Memory SSM and Picture Status Memory PSM to enable customized sound setting for various programs including TV dramas music a...

Page 13: ...E nglish 1 3 Product Characteristics LCD TV Overview and Installation TV 32 1 _En 2006 3 29 2 13 PM 1 3 syj_print PDF IN 2540DPI 100LPI T...

Page 14: ...splays a menu of all of the available input sources TV AV 1 2 S VIDEO COMPONENT 1 2 HDMI PC Exit 3 Front View LCD Display Displays the current contents of the display 1 2 1 8 7 9 3 6 4 5 1 4 LCD Displ...

Page 15: ...is illuminated If the LCD Display power is turned on then the green light is illuminated 7 Remote Control Receiver Paint the remote control towards the Power Indication Lamp to receive the function of...

Page 16: ...onnects to the RGB connector for connecting to an external monitor on a PC 4 Up Grade Connect a Serial Cable to use 1 Digital Audio Optical Output jack Connects to digital audio devices 5 PC Voice Inp...

Page 17: ...ts to the audio input port on a DVD player or DTV 8 S Video Input jack Connects to the S Video input port of a laser disk player or S VHS player Gives better picture quality than a composite video 6 A...

Page 18: ...other batteries may result in battery leakage or corrosion Do not insert the batteries with the wrong polarity Do not put spent batteries in a fire Do not leave completely used batteries in the remote...

Page 19: ...hin 30 degrees N O T E S Do not subject the remote control to shock It may get damaged Be caregul not to let water get into the remote control It may cause damage Do not disassemble the remote control...

Page 20: ...and Installation Remote Control Button Functions 1 3 4 6 7 8 9 10 11 5 15 19 17 18 16 13 14 2 1 10 Remote Control not supported in the 32 model 12 TV 32 1 _En 2006 3 29 2 14 PM 1 10 syj_print PDF IN 2...

Page 21: ...in sub menus 7 NUMBER Buttons Direct channel select Direct page selection during Teletext display 2 Buttons Set a channel on the digital TV 3 PSM Picture Status Memory Button Recalls your preferred pi...

Page 22: ...Delete Button You can add delete the current channel to from the channel list 12 CAPTION Button Controls the caption decoder 11 ARC Aspect Ratio Control Button You can watch the LCD Display in various...

Page 23: ...t in the OSD menu or select the channel providing teletext service 15 MUTE Button Press to temporarily cut off the sound 16 EPG Electronic Program Guide Button View a program guide for the digital TV...

Page 24: ...ant factor for obtaining clean and sharp video quality Whenever possible use an external antenna in areas with weak signals 1 In the first three cases connect the aerial or network input cable to the...

Page 25: ...ntenna converter If the video is not clear because of weak signals install a signal amplifier to obtain clearer video An amplifier is often necessary when using an indoor antenna Remove the insulation...

Page 26: ...ifferent jacks at the rear N O T E S video and composite video signals share the audio signals 1 16 Connecting the LCD TV and Peripheral Devices VCR Composite Audio Video cable Optional Method 1 AV1 M...

Page 27: ...ferent jacks on the rear panel are used for different external devices Connect the external antenna cable to the VCR Connect the 75 coaxial cable to the VCR and TV Set the channel selection switch on...

Page 28: ...audio output port of a Set Top Box 1 Use the component cable to connect the TV component Y Pb Pr port to a DVD component video output port or to a Set Top Box video output port 2 Turn the TV on and pr...

Page 29: ...l AC3 amplifier Digital refers to surround sound technology for movie theatres used for the latest movies and it can be used at home to obtain realistic sound effects You can enjoy realistic sound eff...

Page 30: ...as a digital AC3 converter or processor Since the voice output from the product is broadband set the volume appropriately Otherwise the speakers may get damaged by sudden high pitched sounds Make sure...

Page 31: ...C and LCD TV power off Turn on the PC and check the settings Set the resolution to 1360x768 60Hz WXGA for optimum viewing Connect the LCD TV and the PC with an external monitor cable Connect an audio...

Page 32: ...Overview and Installation PC Audio cable optional HDMI Cable Optional 1 22 Connecting the LCD TV and Peripheral Devices Method 2 HDMI DVI TV 32 1 _En 2006 3 29 2 14 PM 1 22 syj_print PDF IN 2540DPI 10...

Page 33: ...Digital TV To configure the menu To Configure TV Channels To Select TV External Input Adjusting the Picture Adjusting the Sound To Configure the SET UP TV 32 2 _En 2006 3 29 2 15 PM 2 1 syj_print PDF...

Page 34: ...nel no 99 press the 9 button twice on the remote control 3 Press the button to adjust the volume 4 N O T E S To mute the LCD TV sound Press the MUTE button on the remote control once to mute the LCD T...

Page 35: ...E nglish 2 3 Watching TV Using the LCD TV TV 32 2 _En 2006 3 29 2 15 PM 2 3 syj_print PDF IN 2450DPI 100LPI T...

Page 36: ...TV does not receive signals check the antenna connection and then execute automatic channel setting 2 When selecting a channel the indication at the upper right hand corner of the screen will show wh...

Page 37: ...on on the current channel will be displayed on the screen 1 2 5 Watching Digital TV To view program guide for the digital TV Press the button Press this button while watching TV to see the program sch...

Page 38: ...off if programs previously produced for a normal screen 4 3 are converted for digital signals When the borders on the left right and center portions of the screen have been fixed for a prolonged time...

Page 39: ...E nglish Using the LCD TV 2 7 Watching Digital TV TV 32 2 _En 2006 3 29 2 16 PM 2 7 syj_print PDF IN 2450DPI 100LPI T...

Page 40: ...TV much easier Menu Settings Press the POWER button on the remote control 1 Press the MENU button on the remote control Press the button on the remote control to navigate to different menus 2 PICTURE...

Page 41: ...nd then press the button to select the item At this point select Manual from the Mode submenu 4 2 9 To configure the menu To adjust the selected item use the and buttons on the remote Use the buttons...

Page 42: ...r images Manual Contrast controls contrast between light and dark Brightness controls brightness Sharpness controls clarity of colour Colour controls intensity of colour Tint adds a green or red tint...

Page 43: ...ime Clock Can select Auto or Manual option Manual Clock Can set current time i e time date month year select Manual from Clock option to set current time Daylight Saving Can use Summertime function se...

Page 44: ...ff Enable or disable the caption function Analog Mode CC1 4 TEXT1 4 You can watch Analog Caption Digital Mode Digital Service1 8 You can watch Digital Caption Digital Font Option You can set the Digit...

Page 45: ...Using the LCD TV 2 13 To configure the menu E nglish TV 32 2 _En 2006 3 29 2 16 PM 2 13 syj_print PDF IN 2450DPI 100LPI T...

Page 46: ...We recommend setting TV channels during regular broadcasting hours Use Auto Memorizing to set channels automatically Saving channels automatically The Auto Memorizing function can only save local cabl...

Page 47: ...screen 4 2 15 To Configure TV Channels N O T E To stop Auto Memorizing press OK and confirm the message then press OK again N O T E S Verify the automatically saved channels Press the Channel button...

Page 48: ...Cable depending on the receiving method of the digital broadcasting signals Press the Menu button on the remote and then press to move to Channel 1 2 When the Select a broadcasting channel message app...

Page 49: ...channel number by pressing the number buttons on the remote E g 7 for channel 7 1 Press the Add button Confirm the message displayed press Yes to move to OK then press OK 2 Press the Add Delete butto...

Page 50: ...and then press the Delete button Press the button on the remote to select the Antenna submenu Press to move to Channel List and then press 2 To view the channel list Channel lists that are saved by Au...

Page 51: ...nel and its signal strength 2 Digital signal strength The signal strength status can be viewed if a given channel has a poorer quality image than other channels Press the Menu button on the remote and...

Page 52: ...ote control to select the external device connected to the LCD TV and press the OK button 2 LCD TV screen will be displayed when you play the external input device 3 N O T E Press the SOURCE button at...

Page 53: ...E nglish Using the LCD TV 2 21 To Select TV External Input TV 32 2 _En 2006 3 29 2 17 PM 2 21 syj_print PDF IN 2450DPI 100LPI T...

Page 54: ...size 2 22 Adjusting the Picture 16 9 16 9 ratio suitable for DVD or wide screen broadcasts Zoom1 Increases the width of the 4 3 ratio screen displaying the centre part Zoom2 Increases the size of the...

Page 55: ...mote to close the menu screen when done 4 To set the screen colour mode The colour mode for screen display can be set Select a Colour Temperature and then press the OK button 3 2 23 Adjusting the Pict...

Page 56: ...r images Manual for custom setting of contrast brightness vividness colours and intensity and other options 3 2 24 Adjusting the Picture Press the Menu button and then press to move to the Screen menu...

Page 57: ...Press the Menu button on the remote to close the menu screen when done 4 2 25 Adjusting the Picture Press the Menu button and then press to move to the Screen menu 1 Press the button on the remote an...

Page 58: ...then press to select the Film Mode submenu 2 To set the film mode Enables you to watch video or DVD movies in the optimum image quality Press the button and then press to move to the On option Press O...

Page 59: ...Using the LCD TV 2 27 Adjusting the Picture E nglish TV 32 2 _En 2006 3 29 2 17 PM 2 27 syj_print PDF IN 2450DPI 100LPI T...

Page 60: ...rams To feel the live action News for news programs To hear speech clearly Manual to custom set treble and bass 2 28 Adjusting the Sound Press the Menu button and then press to move to the Sound menu...

Page 61: ...te and then press to move to the Balance submenu 2 To adjust the sound balance The sound balance between the right and the left speakers can be adjusted To set the Manual mode press repeatedly until y...

Page 62: ...and then press to move to the Sound menu 1 Press the button on the remote and then press to move to the Auto Volume submenu 2 To adjust Auto Volume If different channels have different audio output l...

Page 63: ...en press to move to the Multi Track submenu 2 To set the Track If the broadcaster uses audio multiplex broadcasting users can select a language from the list of languages provided by the broadcaster P...

Page 64: ...en press to set if the internal speaker is to be used Press OK when done Off On 3 To set the Internal Speaker Select On for output to the internal speaker select Off for output to an external speaker...

Page 65: ...Using the LCD TV 2 33 Adjusting the Sound E nglish TV 32 2 _En 2006 3 29 2 17 PM 2 33 syj_print PDF IN 2450DPI 100LPI T...

Page 66: ...reen when done 3 To control the transparency of the menu screen The transparency level of the menu screen background can be set Opaque the menu background is not transparent and nothing can be seen un...

Page 67: ...ess the Menu button on the remote to close the menu screen when done 3 To set the Caption Subtitle Language Captions or subtitles can be displayed if the videotape DVD or other video input being playe...

Page 68: ...nu screen when done 4 Press the Menu button on the remote and then press to move to the Setup menu 1 Press the button on the remote to select the Time submenu Press again to display the Clock option 2...

Page 69: ...e Menu button to close the menu screen when all items are set 5 Press the Menu button on the remote and then press to move to the Setup menu Press the button on the remote to select the Time submenu P...

Page 70: ...imer function Once Use this option to turn it on once using the On Timer function Daily Use this option to turn it on daily using the On Timer function Press the Menu button on the remote to close the...

Page 71: ...s option to adjust each item Press to move to Repetition Number and then press to select Option Press Menu when done Off Use this option if you don t want to use the Off Timer function Once Use this o...

Page 72: ...to close the menu screen when done 3 Using the Parental V Chip The Parental feature automatically locks out programming that is deemed inappropriate for children The user must enter a PIN Personal ID...

Page 73: ...ll appear Press the button to select Change PIN Using the LCD TV 2 41 To Configure the SET UP E nglish N O T E The default PIN number for a new set is 1 1 1 1 3 4 5 Enter 4 digit PIN number 6 8 When y...

Page 74: ...l to navigate to the SET UP menu 3 Press the button on the remote control 4 Press the button on the remote control to navigate to the V Chip submenu 5 Press the button The Please Enter your PIN screen...

Page 75: ...en is displayed 8 Press the buttons to select particular MPAA category The buttons will cycle through the MPAA categories G General audience no restrictions PG Parental guidance suggested PG13 Parents...

Page 76: ...mber 1 Press the MENU button on the remote control 2 Press the button on the remote control to navigate to the SET UP menu 3 Press the button on the remote control 4 Press the button on the remote con...

Page 77: ...These categories consist of two separate groups TV Y and TV Y7 Young Children through age 7 and TV G through TV MA everybody else The restrictions for these two groups work independently If a househo...

Page 78: ...Initial PC Mode Settings PC Menu Components Main Menu Settings TV 32 3 _En 2006 3 29 2 19 PM 3 1 syj_print PDF IN 2540DPI 100LPI T...

Page 79: ...will be displayed 2 Check the type of cable that connects the LCD TV and the PC Press the button on the remote control to navigate to PC and press the OK button 3 The PC screen will be displayed If th...

Page 80: ...E nglish 3 3 Initial PC Mode Settings PC Mode Environment Settings TV 32 3 _En 2006 3 29 2 19 PM 3 3 syj_print PDF IN 2540DPI 100LPI T...

Page 81: ...sounds Balance Sound output of right left speaker can be balanced Auto Volume On Off Sound output differences between different channels can be evened out by selecting On Internal Speaker On Off Sele...

Page 82: ...nu Opaque OSD controls transparency of menu screen background Transparency Semi Opaque Transparent Semi Transparent V Chip Change PIN Pin number can be changed On Off V Chip function can be turned On...

Page 83: ...remote to close the menu screen when done To set the Screen Size 1 2 3 Press the Menu button and then press to move to the Screen menu To set the screen mode The screen image mode can be set 1 Press t...

Page 84: ...t Mild for smoother images Manual for custom setting of contrast brightness To select the Manual option keep pressing the button until the Manual option is displayed Press to move to the item you want...

Page 85: ...nu To set sound mode 1 Select Colour Temperature and then press OK 3 Press the Menu button on the remote to close the menu screen when done 4 Normal for vivid images Cool for gentle indigo hued images...

Page 86: ...the live action News for news programs To hear speech clearly Manual to custom set treble and bass To set the Manual mode press repeatedly until you get to the Manual option Press to move to Treble an...

Page 87: ...when done 3 Press the button and then press to move to the On option Press OK Press the Menu button and then press to move to the Sound menu Press the button on the remote and then press to move to th...

Page 88: ...er 1 2 Press the button and then press to set if the internal speaker is to be used Press OK when done Off On Press the Menu button on the remote to close the menu screen when done 4 3 On for output t...

Page 89: ...g can be seen under it Semi Opaque the menu background is still fairly opaque but a certain amount is visible under it Semi Trans the menu background is almost transparent and everything under it is v...

Page 90: ...sition Adjusts horizontal vertical image location Frequency Controls image quality by fine tuning the screen Phase Adjusts screen geometry e g adjusting a screen to eliminate noise or ghost images Aut...

Page 91: ...Appendix TV 32 _En 2006 3 29 2 20 PM A 1 syj_print PDF IN 2540DPI 100LPI T...

Page 92: ...0 6 mm RGB 1366 768 300 Max 500 typical 500 cd m2 Free View Angle R L 176 U D 176 Analog RGB 15 pin D Sub Input Composite Input S Video Input Component Input PC analog RGB Input HDMI Composite RCA L...

Page 93: ...5 75 0 49 5 DTV 1024 768 60 030 75 029 78 75 1360 768 47 700 60 0 80 136 720 480 15 735 59 94 13 500 SDTV DVD 480i HDTV 1080i 720 480 31 469 59 94 25 175 SDTV 480p 1280 720 44 964 59 94 74 176 HDTV 72...

Page 94: ...trol Try pressing the volume adjustment button Try pressing the MUTE button on the remote control Press the MENU button to adjust the screen brightness go to the screen menu to adjust the settings For...

Page 95: ...dio is unclear or discontinuous If the broadcasting station is too far away or the TV is getting interference from other radio waves the stereo audio may not be clear In this case press the SSM button...

Page 96: ...nt button on the VCR to make adjustments Check whether the video tape is in good condition Some channels cannot be received When playing VCR there is no sound Ensure that your channel selection is cor...

Page 97: ...ered on the screen Auto in progress will set the best position automatically Adjust the horizontal and vertical position Page 3 8 Page 3 9 Image is not stable and may appear to vibrate Auto in progres...

Reviews: