


6
HH
OO
WW
TT
OO
FF
OO
CC
UU
SS
TT
HH
EE
PP
CC
CC
AA
MM
EE
RR
AA
II
NN
AA
TT
EE
LL
EE
SS
CC
OO
PP
EE
P
erf
orm these s
teps aft
er y
ou hav
e plugged
in the c
amer
a and hav
e s
tart
ed the "Meade
PC Camer
a" softwar
e. Insert a 25mm wide-
field e
yepiec
e in y
our t
e
lesc
ope.
1
Aim y
our t
e
lesc
ope at a bright object (f
or
e
xampl
e, the Moon or a bright s
tar at
night, or a s
tr
eet light during the
daytime—a daytime object should be at
leas
t 100 y
a
rds away or further). See
Fig. 9.
2
Cent
er the object in the t
e
lesc
ope
eye
p
ie
ce
.
3
Remo
ve
the e
yepiec
e and r
eplac
e it with
the PC Camer
a. See Figs. 10 and 11.
BB
ee
ss
uu
rree
nn
oo
tt
ttoo
cc
hh
aa
nn
gg
ee
tt
hh
ee
pp
oo
ss
iitt
iioo
nn
oo
ff
tthh
ee
ttee
llee
ss
cc
oo
pp
ee
oo
rr
ww
hh
aa
tt
iitt
ii
ss
pp
oo
iinn
ttee
dd
aa
tt..
Tight
en
the thumbscr
e
w
in the e
yepiec
e
holder t
o
secur
e it in plac
e.
4
Ref
ocus the t
e
lesc
ope's whil
e wat
ching
the image on the c
omput
er scr
een. See
Fig. 12.
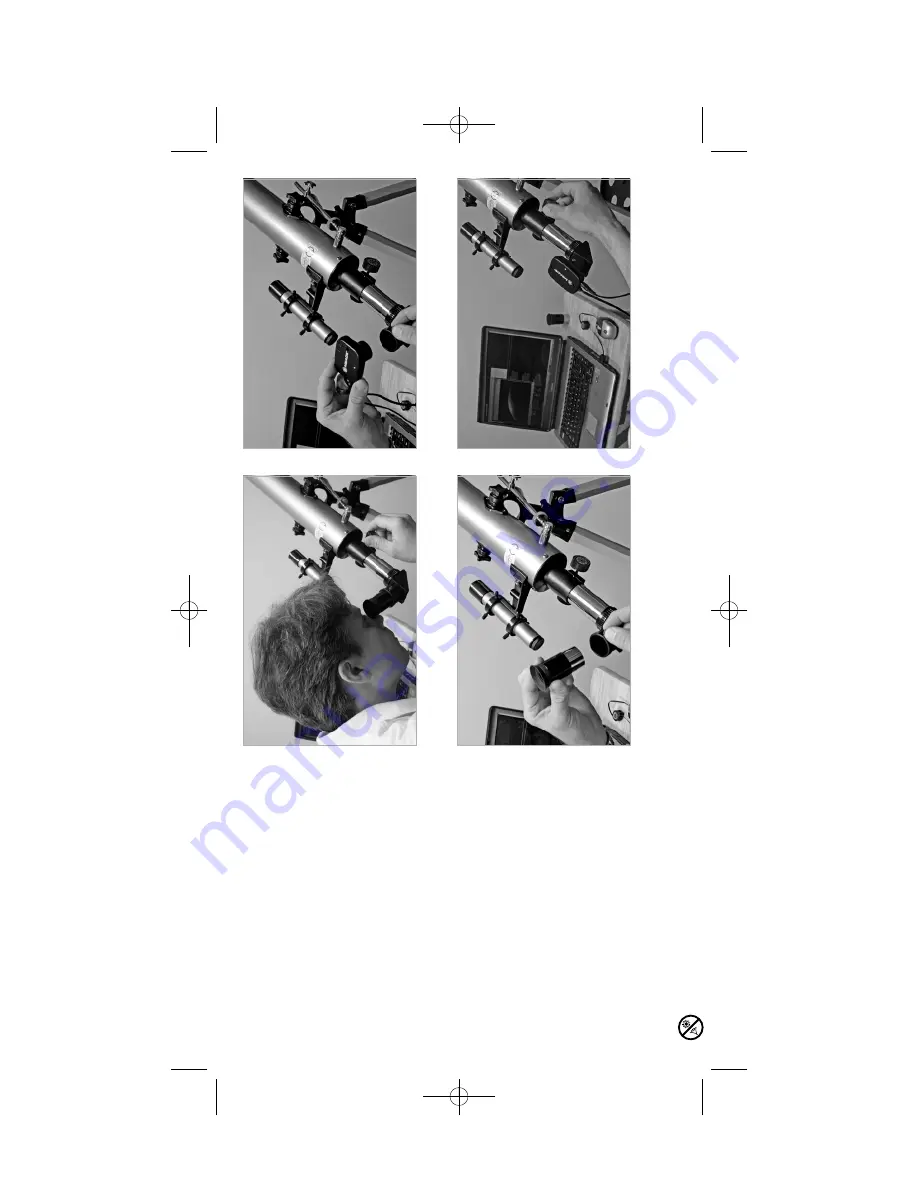
Fig. 9: Aim and f
ocus y
our t
e
lesc
ope.
Fig. 10: Remo
ve
the e
yepiec
e fr
om the
te
lesc
ope.
Fig. 11: Insert the PC Camer
a
int
o the
te
lesc
ope's e
yepiec
e holder
.
Fig. 12: Ref
ocus the t
e
lesc
ope's whil
e
wat
ching the image on the c
omput
er scr
een.
Looking at or near the
Sun
will cause
ir
re
ve
rsible
damage to y
our e
ye. Do not point this telescope at or near the Sun. Do not look through the telescope as it is mo
ving.
PC cam manual 6.07 Q6 6/11/07 11:53 AM Page 6


