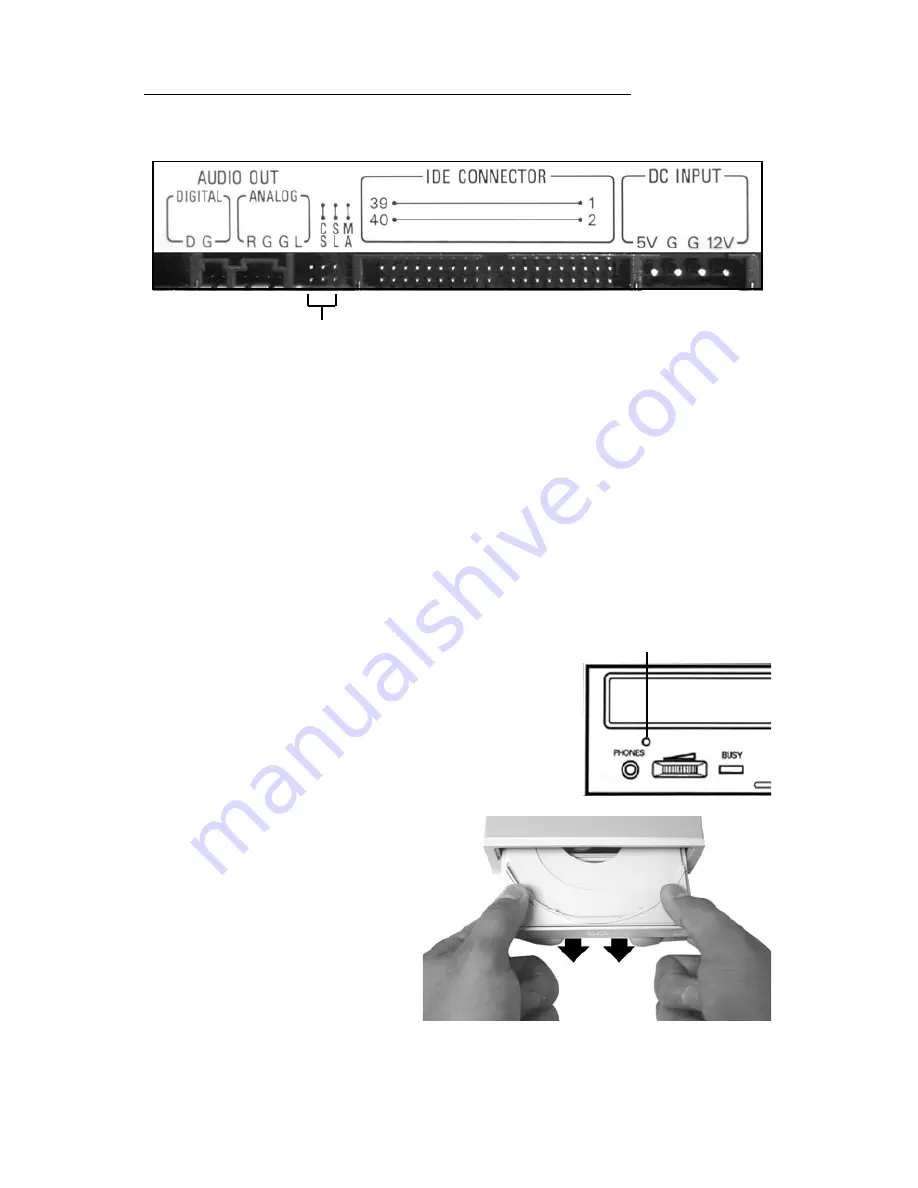
Typical rear panel of original CD/DVD-ROM drive
Relevant pins with no jumper attached
(Note: The drive usually comes with a jumper attached to one of the pairs of pins,
thereby obstructing these two pins from view. The jumper may be removed by you and
replaced onto the desired pair of pins.)
manual eject hole
MCE Desktop Internal DVD-R/RW and CD-R/RW Drive 4
as MS (master), SL (slave) and CS (cable select). On the graphic above,
the jumper would be placed vertically on either the rightmost pair of pins
in the group to set the drive to master, or on the center two pins in the
group to set the drive to slave.
Step 11:
If the MCE drive is being installed into Power Mac G4 with
mirrored drive doors, then you must remove the faceplate from the drive
to allow the driveʼs tray to fit through the computerʼs opening. If not,
you may skip this step.
Step 11 (a):
To manually eject the driveʼs tray,
stick a straightened paperclip through the driveʼs
manual eject hole until the tray ejects slightly.
Pull the tray out several inches.
Step 11 (b):
With the ejected tray
facing you, use both hands to remove
the bezel of the driveʼs tray by us-
ing your index fingers to carefully but
firmly push the bottom of the bezel
towards you. The bezel should
move out and up slightly as
it is released from its inner
latches.
Step 11 (c):
You can then simply slide the bezel up and remove it from
the drive. Push the driveʼs tray back into the drive.
Summary of Contents for Desktop Internal DVD-R/RW and CD-R/RW Drive
Page 2: ......


