12
7.3.
Battery
If the machine is not used for a long period of
time, disconnect the battery removing the cable
terminal from the positive pole (Fig. 9 No. 2). For
maintenance, consult the instruction and use
leaflet of the battery.
IMPORTANT:
Recharge the battery in a dry place.
Protect the contacts from dirt and water
stagnation. Do not spray with water.
Replacing the Battery (Fig. 9)
Handle the battery with particular care
since it contains acid.
1. Remove the protective cover and unhook
the two hooks.
2. Remove the connection terminals and
take care to first remove the negative one
(4) in order to prevent a short circuit.
3. Extract the battery and replace it with one
with the same characteristics (45 Ah).
Dispose
of
the
battery
in
the
appropriate manner in accordance
with the regulations in force in the
country of use.
7.4.
Cleaning the Machine
Clean the float machine at the end of each
working day to prevent cement from hardening
and forming encrustations on the machine. Wash
the dirty parts with a brush and water. Wet the
parts exposed to cement with “stripping” oil (never
fuel oil). Do not oil the rubber moving parts (belts,
etc.).
7.5.
Replacing the Floats
Be careful when installing the machine. One rotor
turns clockwise and the other counter-clockwise,
therefore you need to check that the various
components have been properly arranged.
Before mounting the floats, check that the blades
are clean, i.e. that there are no traces or residues
of cement mixes. The blades must be placed in
the horizontal position using the knobs (Fig. 4 No.
1 & 2).
To replace the floats proceed as follows:
Slightly lift the float machine off the ground (about
10 cm).
Mount the floats on the blades checking the
correct direction of rotation.
When the floats have been mounted, reposition
the float machine on the ground.
7.6.
Replacing the Blades
Always check the state of wear of the blades and
replace if they are damaged or bent. For proper
function all blades need to be replaced.
To replace the blades, proceed as follows (Fig.
10):
Clean any working residue off the
float machine.
Open the guard by unscrewing the
two fixing bolts and hook the guard to the
chain.
Slightly lift the float machine off the
ground (about 10 cm).
Remove the fixing bolts of the blades
on each arm.
Mount the new blades and fix the
bolts with the respective split washers (check
the state of the bolts and replace them if
necessary).
When
the
blades
have
been
mounted, reposition the float machine on the
ground.
Reposition the guard and tighten the
bolts.
7.7.
Replacing the Belts
To replace the belts, operate as follows:
Dismantle the belt protection guard
(Fig. 11 No. 1).
Slightly lift the float machine off the
ground (about 10 cm) in order to be able to
freely turn the pulley and the clutch and thus
easily remove and replace the belts.
Loosen the belt tightener.
Remove the worn belts and replace
them with ones of the same size.
Screw down the belt tightener until
the ideal tension is obtained.
Reposition the float machine on the
ground.
Reposition the guard (1).
7.8.
Gear Reduction Oil Level
To check the oil level in the gear reductions,
follow the instructions below:
There are two caps on the side of the two gear
reductions. The top cap (Fig. 12 No. 1)
determines the oil level in the gearbox. Pay
particular attention when you notice oil in the
lower part of the float machine. Clean and check
where the leak is coming from and take the
appropriate action.
Should the oil need to be topped off, use Mobil
Glygoyle 30 synthetic oil or equivalent. Check the
level on the gauges (2).
To replace the oil filter, open the support (3),
unscrew the filter (4) and proceed with
replacement.
Summary of Contents for 1830041
Page 3: ...3...
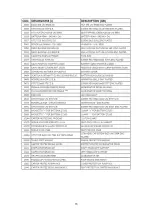
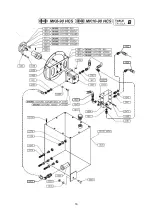
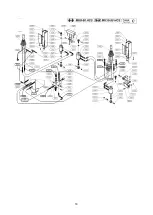
Page 14: ...14 7 11 Parts List...
Page 15: ...15...
Page 16: ...16...
Page 17: ...17...
Page 18: ...18...
Page 19: ...19...
Page 20: ...20...
Page 21: ...21...
Page 22: ...22...
Page 23: ...23...
Page 24: ...24...
Page 25: ...25...
Page 26: ...26...
Page 27: ...27...
Page 28: ...28...
Page 29: ...29...
Page 30: ...30...
Page 31: ...31...
Page 32: ...32...
Page 33: ...33...
Page 34: ...34...
Page 35: ...35...
Page 36: ...36...
Page 37: ...37...
Page 38: ...38...
Page 39: ...39...
Page 40: ...40...
Page 41: ...41...
Page 42: ...42...
Page 43: ...43...
Page 44: ...44...
Page 45: ...45...
Page 46: ...46...
Page 47: ...47...
Page 48: ...48...
Page 49: ...49...
Page 50: ...50...
Page 51: ...51...
Page 52: ...52...
Page 55: ...55 NOTES...


