background image


4. Steps for Operation (Process Flow from Preparation to Finish) 

1) Preparation 

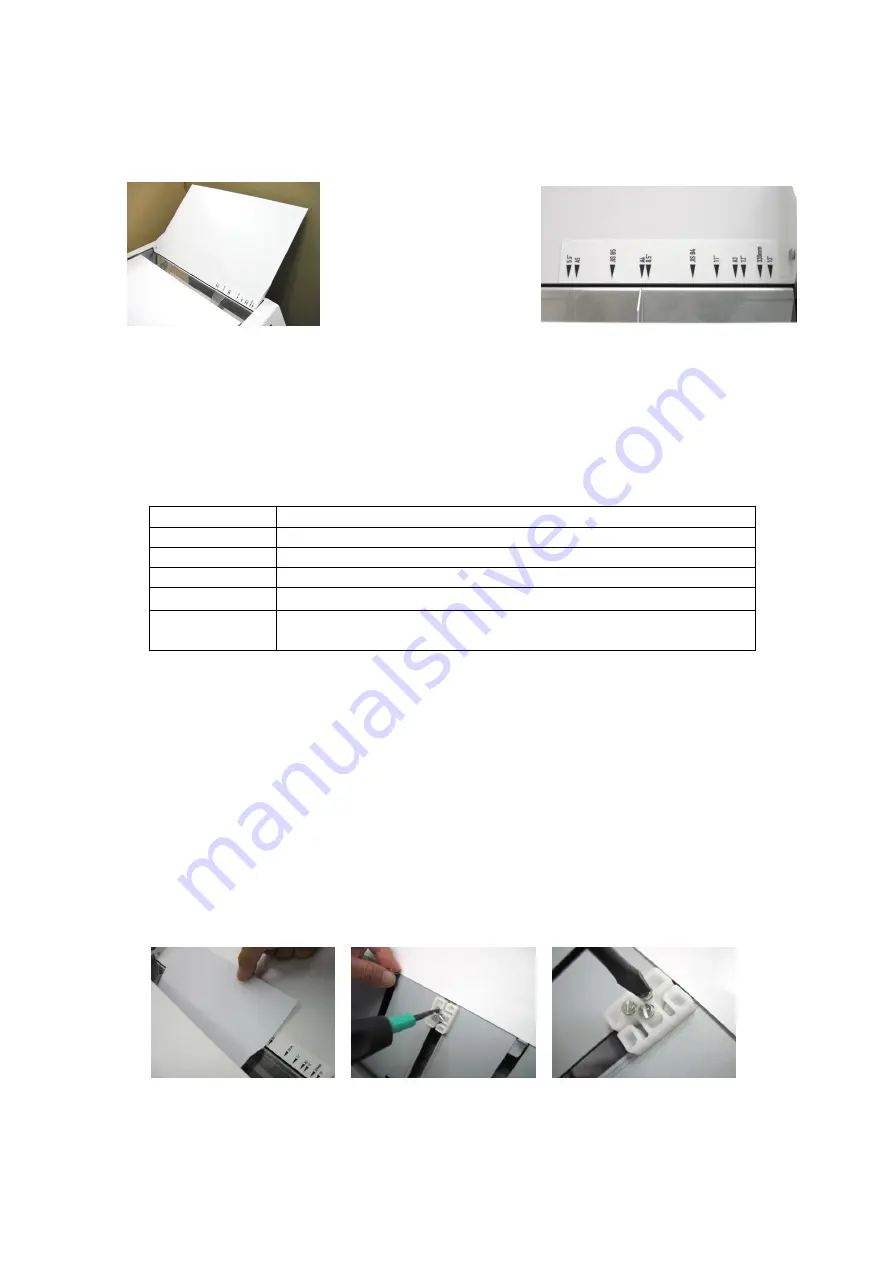
(i) Open the top cover. This cover serves as a table for setting paper.   
 

Paper width guide 


(ii)  Connect  the  accompanying  power  supply  cord  to  the  AC  inlet  to  supply  the 

designated power for the machine.


(iii) Press the power switch of this product. 
(iv) The indicator on the operation panel will start flashing, and after a while will remain 

lit. This indicates that the product is ready for operation.   

* If the lower cover comes open, if there are not enough staples left, or if paper remains 

fed, the product issues an error. The indicator displays E01, E02, or E03.   

(v) Configure the settings.   

Item 

Descriptions 

Paper Feed 

Select between 

Auto


Mode

 and 

Manual Mode

.   

Clincher 

Select between 

Flat 

and 

Loop

.   

Staple and Fold   Select 

Saddle Stapling

Side/Corner


Stapling, 

or 

Fold only

Paper Size 

Select from six paper size options.   

Count Mode


Select between 

Count Up

 or 

Count Down

. In 

Count Down

 mode, 

specify a value in advance.   


2) Bookbinding   

(i) Set the paper width guide to the size of paper to be bound. Put the paper on the table, 

and  then  release  your  finger  to  let  it  fall  naturally.  In  manual  mode,  press  the  Start 
switch.  In  auto  mode,  the  product  will  start  operating  automatically  when  the  optical 
sensor detects the end of the paper that falls down.


(ii) Press the Start switch. Bookbinding will begin. 
(iii) After binding is finished, the number of copies bound is displayed in three digits. 
(iv) If the paper is not cut at the right angle, make an oblique adjustment: 

Power off the product. => Open the lower cover. => Adjust the guide to the paper width, 

and then load the paper.   

=> Slightly loosen the three screws at the center of the paper stopper to set the stopper 
at the end of the paper. => Refasten the three screws. => Remove the paper, and then 
close the lower cover.   


3) Finish 

(i) Turn off the power switch. The lit indicator where numbers show will go out. 

(ii) Close the upper cover. 


Summary of Contents for iBOOKLET

Page 1: ...MBM iBOOKLET May 26 2017 MBM Corporation Operation Manual Ver A_2 ...

Page 2: ... size Read this manual carefully to ensure the product is handled and used under the best conditions Table of Contents 1 Specifications 4 2 Names of Components 1 Front 5 2 Rear 3 Accessories 6 4 Steps for Operation Process Flow from Preparation to Finish 1 Preparation 7 2 Bookbinding 3 Finish 5 Functions 1 Operation Panel 8 2 Refilling Staples 3 Staple Heads 6 Regular Maintenance 1 Cleaning the Op...

Page 3: ...se an electric shock or fire Do not use a damaged power cord Do not process the power cord Do not put anything heavy on the power cord Keep the AC inlet at least 8 cm from the wall Failure to follow these instructions could cause an electric shock or fire Warning Do not use the product when it is acting abnormally such as emitting smoke foul odors or noises Doing so may cause an electric shock or ...

Page 4: ...apacity Anvil clinching From 2 to 16 sheets 80g m2 or 24lb paper Flat clinching From 6 to 16 sheets 80g m2 or 24lb paper 6 Counter Up or Down 7 Staple Width 3 5 5 3 or 7 1 8 Staple Type Standard chisel point staples SF4 9 Multi functional Fold staple Fold only or staple only 10 Stitching Type Squarely flat or loop 11 Speed 800 booklets hour 12 Error Detections Paper jam Cover open No staple 13 Ope...

Page 5: ...5 2 Names of Components 1 Front 2 Rear AC Inlet ...

Page 6: ...6 3 Accessories Accessory Qty Appearance Operation Manual this document 1 Set of staples 1 AC Power Cord 1 Stocker 1 ...

Page 7: ...om six paper size options Count Mode Select between Count Up or Count Down In Count Down mode specify a value in advance 2 Bookbinding i Set the paper width guide to the size of paper to be bound Put the paper on the table and then release your finger to let it fall naturally In manual mode press the Start switch In auto mode the product will start operating automatically when the optical sensor d...

Page 8: ... 2 Paper Size i Choose the original paper size from the following options LETTER LEGAL LEDGER ARCH B SUPER B and FREE ii For FREE set the original paper length within the range of 5 inch to 19 inch iii Press any of the switches twice to increase or decrease the paper length by up to 0 2 inch This is fine adjustment for each preset paper size 3 Paper Feed i Auto Mode Press the auto switch The produ...

Page 9: ...ds of the staple 7 Start Press this switch to start binding 8 Stop Press this switch to stop binding and to initialize the settings 2 Refilling Staples 1 Press the power switch to turn the product off Next open the lower cover 2 Remove the staple retainer and put it at the rear part of the magazine to fix it in place 3 Refill the staples 4 Return the staple retainer slowly to its original state Th...

Page 10: ...peated use of a dirty cloth or the same cloth may scratch the LCD panel ii Do not use a detergent containing abrasives when cleaning the panel Doing so may not only scratch the screen but also hamper normal operations iii If the product is splashed with water solvent or other liquid wipe it off immediately Failure to wipe the liquid off the product may not only cause the panel to deteriorate and m...

Page 11: ...s the paper loaded properly Set the paper guides properly to match the paper width Be sure to load the number of paper within the specified limit Are staples used properly Use the recommended staples Is there an excessive number of sheets loaded Load the paper within the specified limit Is the folding position right Turn the power switch off and turn it on again to move the stopper to the initial ...

Page 12: ...tact the distributor or a person in charge in our sales office to ask for a new one When you want to transfer this product to the next owner be sure to hand over this Instruction Manual along with the product If there is any label that becomes illegible or is about to peel off contact the distributor or a person in charge in our sales office to immediately replace it with a new one Operation Manua...

Reviews:

Related manuals for iBOOKLET