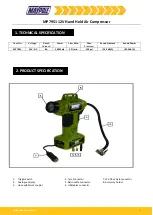
MP7951 12V Hand Held Air Compressor
www.maypole.ltd.uk
3
USE OF ACCESSORIES
Remove the required accessories from the accessory
compartment.
FITTING THE ACCESSORIES
Your inflator is supplied with the standard tapered nozzle,
Presta valve convertor and the needle inflator nozzle, these
are located in in clips on the body of the unit.
• To use the universal valve adaptor, make sure that the lever
is in the up position.
• Place the valve adapter over the stem of the inflation needle
or tapered nozzle.
• Press the lever on the valve adapter down to lock it in place.
• Place the inflation needle or tapered nozzle into the item to
be inflated.
WARNING: Never leave inflator running unattended, it
can burst car tyres and other items.
To use your inflator:
•
Before use, check the manufacturers recommended tyre
pressures for the vehicle.
• Plug the 12Vdc vehicle connector into the vehicle acce
ssory
socket. The LED light will be powered.
• Connect the
quick coupler and an accessory if required, to
the item to be inflated, making sure that the lever of the
coupler is in the down position to lock it in place.
Note: Make sure that the Quick Coupler is correctly fitted
to the item to be inflated.
To start the inflator use the trigger switch.
To do this you must:
•
Slide the Red section of the trigger upwards.
•
Squeeze the trigger to start the compressor.
•
Releasing the trigger will switch OFF the
compressor.
•
To lock the ON /OFF switch in the ON position,
with the trigger still depressed, slide the Red
section downwards.
•
To switch the compressor OFF from this
position, slide the Red section of the trigger
upwards and release he trigger.
• When the item is inf
lated as required or to stop the
inflator at any time release the trigger to the OFF
position as described above.
Note:
You may notice the actual pressure reading may
drop after a couple of seconds, this is normal.
• Remove the
quick coupler and/or accessory from the
inflated item and the 12 Volt connector from your
vehicle's 12 Volt accessory socket.
USING THE INFLATOR AS A PRESSURE GAUGE
• Connect the
quick coupler to the item to be checked.
• The
gauge will display the items pressure.
5. OPERATION
OPERATION


