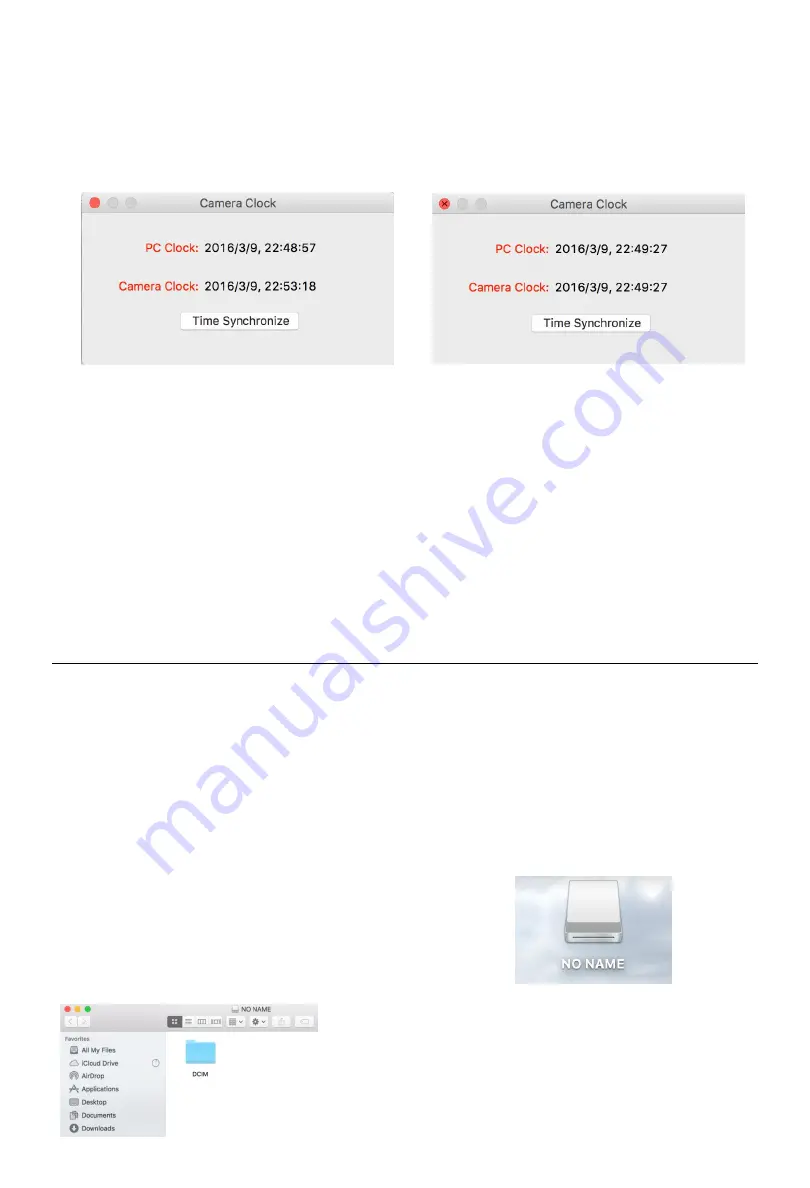
5. When the program opens, you will see a display that shows the date and time on the computer
listed as “PC Clock” and the date and time on the camera listed as “Camera Clock”. They will most
likely be different as the camera has not yet been synced. Click the “Time Synchronize” button to
sync the camera clock to the computer clock.
Before:
After:
NOTE:
You will need to sync the camera module again when seasonal time changes occur. The camera
module will not automatically adjust the time. Syncing the camera module to a computer ensures you
have the proper time.
NOTE:
If the video camera floodlight is OFF or the battery has no power for more than four (4) days, the
date and time on the camera module may slip and no longer be accurate once the video camera
floodlight is switched back to AUTO. Repeat the "
Setting the Date and Time
" section above to sync the
camera again. Be sure the battery pack in the video camera floodlight is fully charged as well.
VIEWING THE VIDEOS
You must follow the steps in this section anytime you wish to view the videos on the micro-SD storage
card located in the camera module.
If the camera is already plugged into the computer, skip to step 3.
If not, start with step 1. If the product or micro-SD card is new and no testing has been done, the card
will not have any files.
1. Disconnect the camera module by following the steps in "
How to Disconnect the Camera Module
"
on page 3 of the main instruction booklet included with the product.
2. Plug the camera module into a USB port on your computer.
3. Open the drive for the storage card, labeled “NO NAME”.
4.
Double-click the folder labelled "
DCIM
"
NOTE:
If the micro-SD card is new or if you have not tested the
coverage area (pg. 4 of the main instructions), the "
DCIM
"
folder will not exist yet.


