4) 3.0: USB 3.0, used for upgrading and connecting with
external mouse/keyboard.
5) LAN: Connect RJ45 terminals.
6) 2.0: Can be connected to a computer through a USB
Type-A to Type-C data cable, providing the computer
with camera, microphone and speaker.
7) DC: Used for 12V power input power supply.
8) Camera:
High-performance camera.
9) Wall-mounted components.
2. Mounting
1) Place on the desktop.
2) Wall-mounted:Fix the bracket onto the Wall with
screws, then place the integrated video conference
terminal onto the bracket.
3. Quick Start
1) Please use HDMI cable to connect this product to the
monitor.
2) To turn on the device, press the power button on the
back of the product or use remote control.
3) After successful startup, the product functions can be
used.
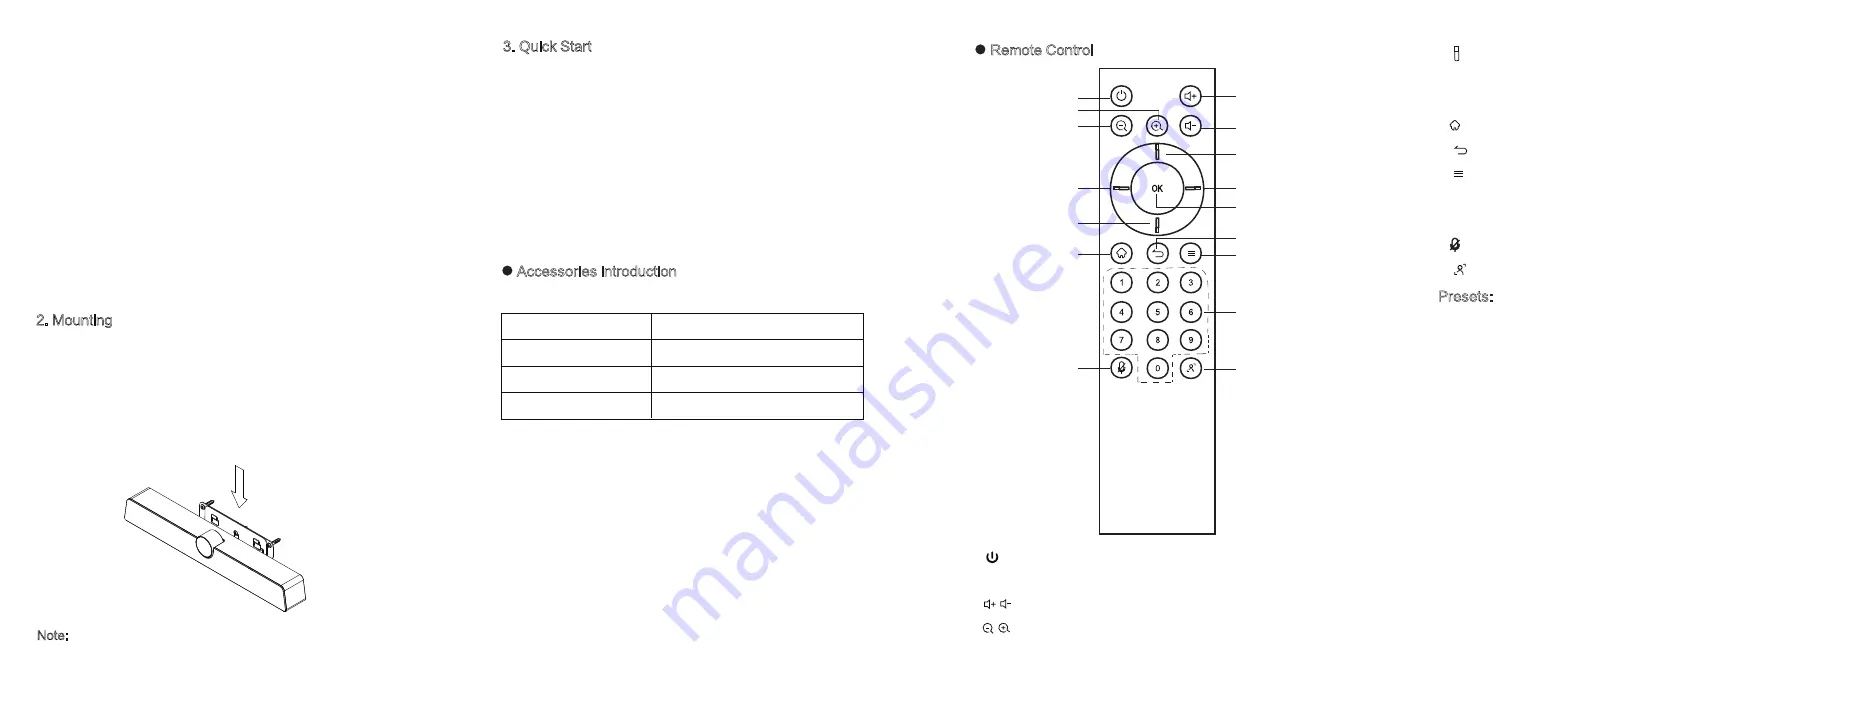
Remote Control
Accessories introduction
Please check the following items in the product box.
HDMI
cable
×
1 Wall-mounted components
×
1
Peeping cover
×
1
Power adapter×1
Battery×2
Remote control
×
1
User manual
×
1
*USB
cable×1
Note: The connection of different samples may slightly differ.
Please refer to the actual product.
Note: * means that some
accessories
are optional.
e
a
c
c
b
b
d
d
d
d
f
j
g
h
i
k
a. : Power Button, press to enter Energy-saving state,
Press and hold for 2 seconds to power off.
b. : Volume Button, press to adjust the system volume.
c. : Digital Zooming, press to digitally zoom the camera.
After zooming in, the direction button may move the camera
image.
d. : Direction Button, Press the direction buttons for selection.
e. OK Button: Confirm the selection. During digital zooming,
press this button would restore the default view.
f. : Return to the home page.
g. : Return Button
h. : Menu Button, press to invoke the menu in different
interfaces.
i. Number keys : Digital input.
j. : Turn on/off the microphone.
k. : Press for 1 second to enable or disable the AI function.
Presets:
1) Smart View mode is off, on the video conferencing page
or open the camera field In view, the camera preset mode
can be set and switched.
2) Press the digital key 2 seconds to save the current
camera settings(settings include zooming and viewing
angle adjustment; provide only three presettings 1,2,3).
3) Short press of 1 / 2 / 3 can switch the corresponding
preset state.�


