


11
Exporting to Matrox MAX H.264 files using Adobe Media Encoder
°
To export material to a Matrox MAX H.264 file:
1
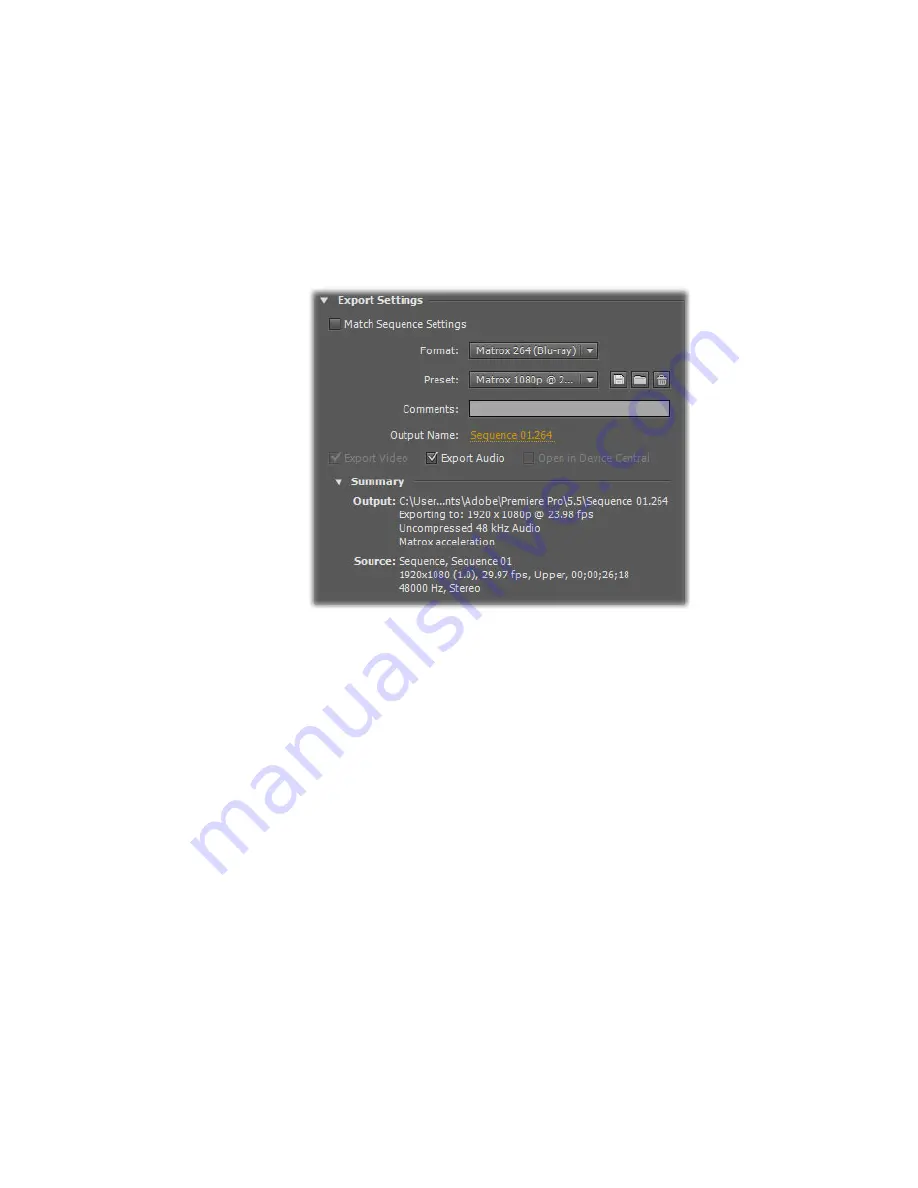
Start Adobe Media Encoder and add the clip, sequence, or composition that
you want to export as explained in your Adobe documentation, then click
Settings
to display the
Export Settings
dialog box.
¦
Note
When using an Adobe program that employs Media Encoder for
exporting material, the
Export Settings
dialog box will be displayed when
you choose to perform the export, such as when you choose
File > Export >
Media
to export a sequence using Adobe Premiere Pro.
2
From the
Format
list, select one of the following Matrox formats:
$
Matrox 264 (Blu-ray)
Creates a .
264
elementary stream file, which is
supported for Blu-ray Disc authoring. Audio is exported as separate mono
or stereo
.wav
files (PCM audio).
$
Matrox MP4
Creates an
.mp4
file with embedded stereo AAC audio,
which is suitable for the web and mobile devices.
3
From the
Preset
list, select the preset that matches the video format you
want for your exported file. Appropriate video and audio settings are
automatically set based on your selected preset.
¦
Note
If you’re exporting to a Matrox
.mp4
file, two types of presets will be
available — Fast Encode and High Quality. Select a Fast Encode preset for fast
encoding that leverages your system’s resources with the hardware. Select a
High Quality preset for high-quality encoding that is performed entirely by
the CompressHD hardware, which frees your system’s resources for other
tasks.


