


37
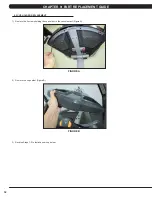
9.6 PEDAL REPLACEMENT
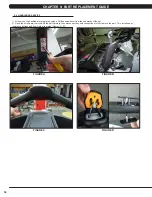
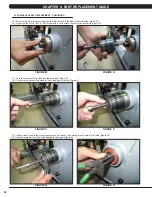
CHAPTER 9: PART REPLACEMENT GUIDE
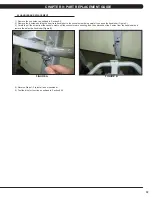
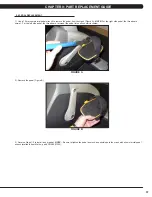
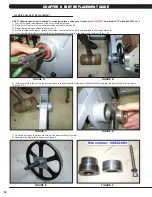
1) Use a 15 mm commercial pedal wrench to remove the pedal from the crank (Figure A).
NOTE:
For the right side pedal, the threads are
normal. For the left side pedal, the threads are reversed (the pedal turns off counterclockwise).
2) Remove the pedal (Figure B).
3) Reverse Steps 1-2 to install a new pedal.
NOTE:
Be sure to tighten the pedal as much as possible onto the crank with a commercial pedal
wrench (available from Matrix - part # ZMS4001254).
FIGURE A
FIGURE B
Summary of Contents for U3X-05
Page 1: ...U 3 X 0 5 B I K E S E R V I C E M A N U A L...
Page 4: ...1 1 1 SERIAL NUMBER LOCATION CHAPTER 1 SERIAL NUMBER LOCATION FRAME SERIAL NUMBER LOCATION...
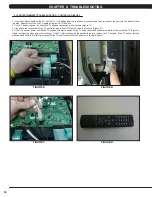
Page 15: ...12 8 1 ELECTRICAL DIAGRAMS CHAPTER 8 TROUBLESHOOTING...
Page 16: ...13 8 1 ELECTRICAL DIAGRAM CHAPTER 8 TROUBLESHOOTING...
Page 19: ...16 8 1 ELECTRICAL DIAGRAMS CONTINUED CHAPTER 8 TROUBLESHOOTING PULSE EXTENDED WIRE...
Page 20: ...17 8 2 LCB LED INDICATORS CHAPTER 8 TROUBLESHOOTING...
Page 73: ...70 NOTES...


