


INTRODUCTION
Notes
The remote control transmits a directional infrared beam. Be sure to aim the
remote control directly at the infrared sensor during operation. When the
sensor is covered or there is a large object between the remote control and
the sensor, the sensor cannot receive signals. The sensor may not be able
to receive signals properly when it is exposed to direct sunlight or a strong
artificial light (such as a fluorescent or strobe light). In this case, change
the direction of the light or reposition the unit to avoid direct lighting.
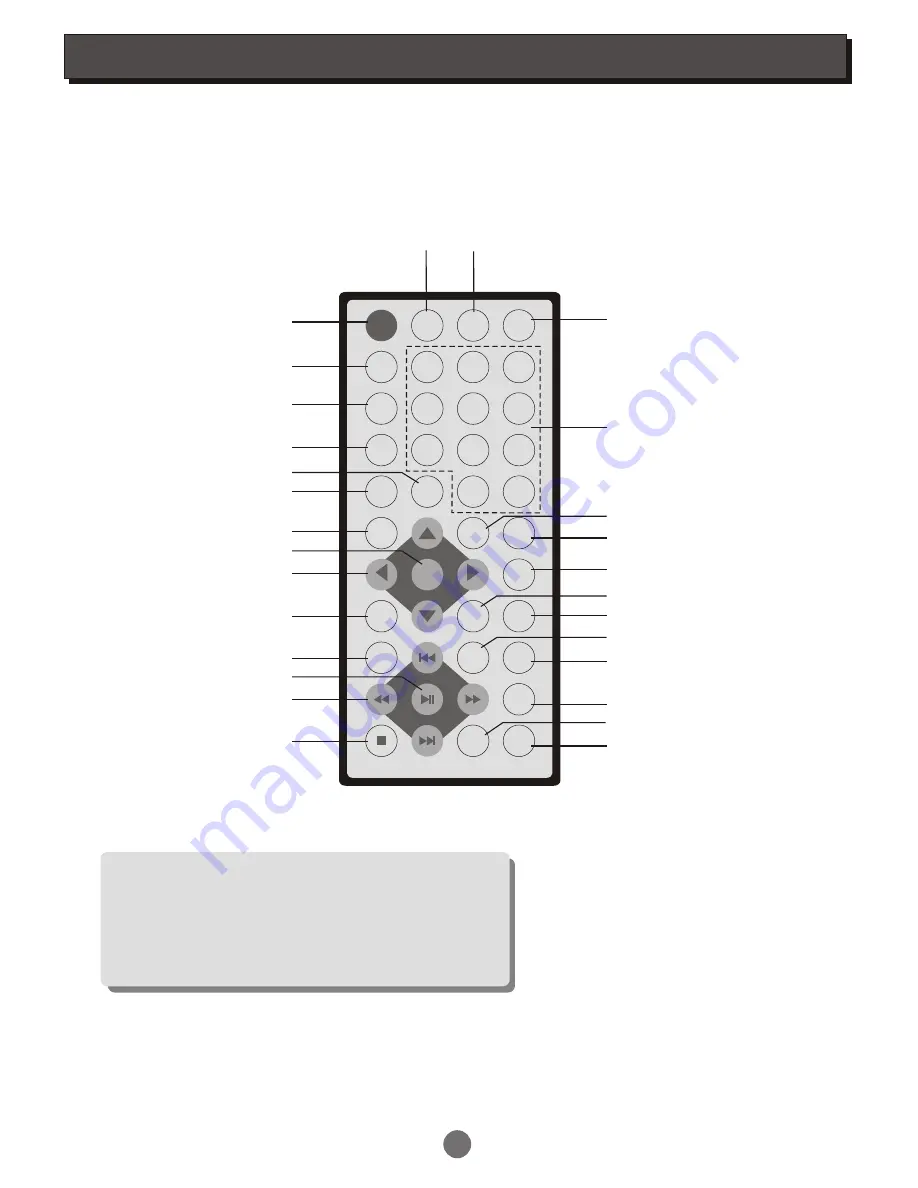
Remote control surface
MUTE
DISPLAY
SETUP
SUBTITLE
ANGLE
AUDIO
PBC
SEARCH
1
2
3
4
5
6
7
8
9
10+
0
ENTER
PS/IS
TITLE
REPEAT
P/N
A-B
RETURN
PROG
CLEAR
ZOOM
MODE
MENU
VOL-
VOL+
LCD
ON/OFF
SLOW
STEP
Mute
PAL/NTSC
Display
Number keys
LCD ON/OFF
Title
Subtitle
Angle
Search
Audio
Menu
Enter
Direction, / -
Mode
Play/Pause
Scan mode
Previous/Next,
Fast Forward/Backward
Stop
Clear
Return
Setup
Playback control
Program
Step
Slow
Zoom
Repeat
Segment repeat select
5
Summary of Contents for MT-705
Page 1: ...MT 705 PORTABLEDVDPLAYER...


