background image

headline bars

continuation tabs

notes

warnings

headline bars

continuation tabs

notes

warnings

headline bars

continuation tabs

notes

warnings

5

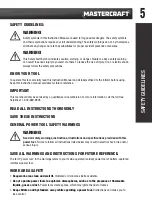
SAFETY GUIDELINES:

WARNING!

Safety symbols in this Instruction Manual are used to flag possible dangers. The safety symbols 
and their explanations require your full understanding. The safety warnings do not, by themselves, 
eliminate any danger, nor are they substitutes for proper accident prevention measures.

WARNING!

This Safety Alert Symbol indicates caution, warning, or danger. Failure to obey a safety warning 
can result in serious injury to yourself or others. To reduce the risk of injury, fire, or electric shock, 
always follow the safety precautions.

KNOW YOUR TOOL

To operate this tool, carefully read this Instruction Manual and all labels affixed to the inflator before using. 
Keep this instruction manual available for future reference.

IMPORTANT

This tool should only be serviced by a qualified service technician. For more information, call the toll free 
helpline at 1-800-689-9928.

READ ALL INSTRUCTIONS THOROUGHLY

SAVE THESE INSTRUCTIONS

GENERAL POWER TOOL SAFETY WARNINGS

WARNING!

Read all safety warnings, instructions, illustrations and specifications provided with this 
power tool. 

Failure to follow all instructions listed below may result in electric shock, fire and/or 

serious injury.

SAVE ALL WARNINGS AND INSTRUCTIONS FOR FUTURE REFERENCE. 

The term “power tool” in the warnings refers to your mains-operated (corded) power tool or battery-operated 
(cordless) power tool.

WORK AREA SAFETY

•  Keep work area clean and well lit. 

Cluttered or dark areas invite accidents.

•  Do not operate power tools in explosive atmospheres, such as in the presence of flammable 

liquids, gases or dust. 

Power tools create sparks, which may ignite the dust or fumes.

•  Keep children and bystanders away while operating a power tool. 

Distractions can cause you to 

lose control.

SAFETY GUIDELINES

Summary of Contents for 054-2435-6

Page 1: ...IMPORTANT Read and understand this instruction manual thoroughly before using the product 160 PSI PISTOL INFLATOR INSTRUCTION MANUAL 054 2435 6...

Page 2: ...headline bars continuation tabs notes warnings headline bars continuation tabs notes warnings headline bars continuation tabs notes warnings...

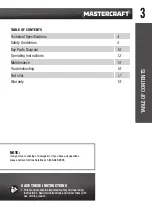
Page 3: ...bleshooting 16 Parts list 17 Warranty 19 TABLE OF CONTENTS NOTE If any parts are missing or damaged or if you have any questions please call our toll free helpline at 1 800 689 9928 SAVE THESE INSTRUC...

Page 4: ...tabs notes warnings model no 054 2435 6 contact us 1 800 689 9928 4 TECHNICAL SPECIFICATIONS TECHNICAL SPECIFICATIONS Rated voltage 20V d c Maximum pressure 160 PSI Recommend using tool with Mastercr...

Page 5: ...d by a qualified service technician For more information call the toll free helpline at 1 800 689 9928 READ ALL INSTRUCTIONS THOROUGHLY SAVE THESE INSTRUCTIONS GENERAL POWER TOOL SAFETY WARNINGS WARNI...

Page 6: ...of inattention while operating power tools may result in serious personal injury Use personal protective equipment Always wear eye protection Protective equipment such as dust mask non skid safety sh...

Page 7: ...Recharge only with the charger specified by the manufacturer A charger that is suitable for one type of battery pack may create a risk of fire when used with another battery pack Use power tools only...

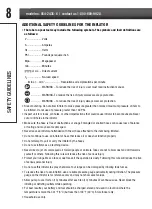
Page 8: ...can cause loss of balance or footing and may become damaged Never leave an inflator unattended with the air hose attached to the item being inflated Do not continue to use an inflator or hose that le...

Page 9: ...as indicated in the instructions for use and care WARNING To reduce the risk of electric shock or damage to the charger and battery use only the Mastercraft batteries and chargers listed BATTERY PACK...

Page 10: ...bars continuation tabs notes warnings headline bars continuation tabs notes warnings headline bars continuation tabs notes warnings model no 054 2435 6 contact us 1 800 689 9928 10 PACKAGE CONTENTS In...

Page 11: ...t KEY PARTS DIAGRAM WARNING Remove the inflator from the package and examine it carefully Do not discard the carton or any packaging material until all parts have been examined If any part of the infl...

Page 12: ...tool 2 Ensure that the battery release button on the battery pack snaps into place and the battery pack is secured to the tool before beginning operation REMOVE THE BATTERY PACK fig 1 1 Press the bat...

Page 13: ...e adaptor Move the lever to the locked position 4 Attach the battery pack to the tool 5 To start inflating press the on off switch until the pointer on the pressure gauge reaches the proper pressure P...

Page 14: ...rea 2 Move tire inflator lever straight up and insert adaptor Move the lever to the locked position 3 Connect the adaptor to the item to be inflated 4 Attach the battery pack to the tool 5 To start in...

Page 15: ...the external surfaces of the tool with a clean cloth 3 Use a vacuum to clean debris from the air intake and external air vents 4 Store the product and its accessories in a dark dry frost free well ve...

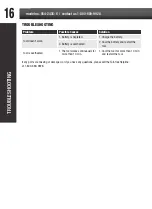
Page 16: ...Possible Causes Solution Tool doesn t work 1 Battery is depleted 1 Charge the battery 2 Battery is overheated 2 Cool the battery and restart the tool Tool is overheated 1 The tool works continuously...

Page 17: ...17 EXPLODED VIEW PARTS LIST...

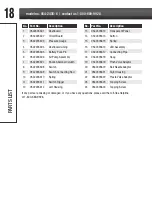
Page 18: ...603 Pressure Gauge 15 0542435615 Spring 4 0542435604 Dashboard Lining 16 0542435616 LED Assembly 5 0542435605 Battery Pack Pin 17 0542435617 Connecting Pipe 6 0542435606 Air Pump Assembly 18 054243561...

Page 19: ...ply to any product or part thereof which is worn or broken or which has become inoperative due to abuse misuse accidental damage neglect or lack of proper installation operation or maintenance as outl...

Page 20: ...f any Additional limitations This warranty applies only to the original purchaser and may not be transferred Neither the retailer nor the manufacturer shall be liable for any other expense loss or dam...

Reviews: