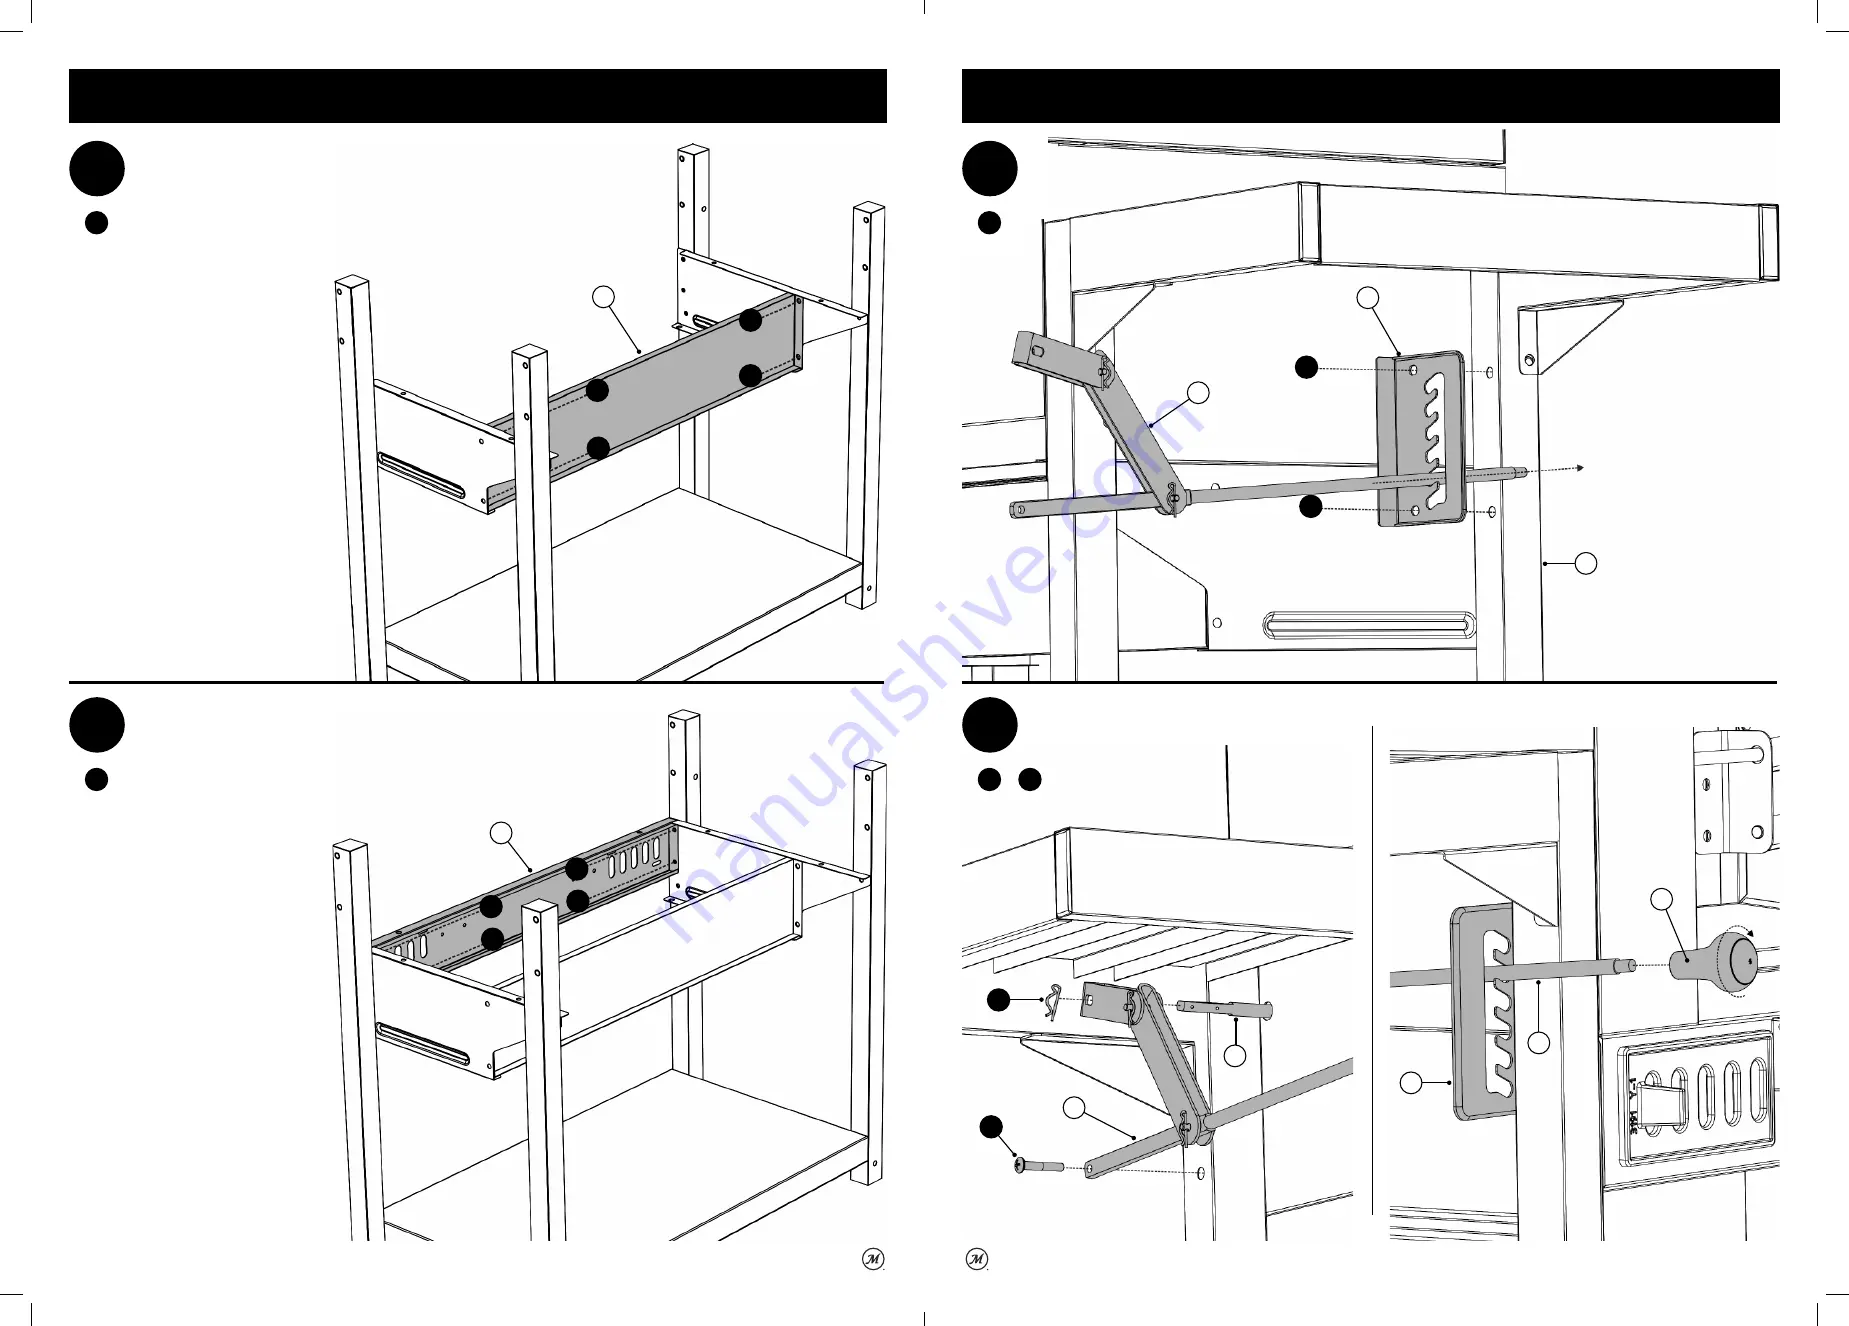
8
Assembly
3
4
K
X4
23
22
Note:
Do not fully tighten
screws until step 11 is complete.
13
14
I
X1
X2
Left Front Leg
15
11
10
L
34
12
Page 1: ...dom masterbuilt UK 44 20 8036 3201 EU 0031 4 7799920 49 2151 4474509 masterbuilt com CHARCOAL GRILL Manual applies to the following model number s These numbers are located on the rating label of the...
Page 2: ...e personal injury or death 19 Masterbuilt 2 Year Limited Guarantee Warranty WHAT IS NOT COVERED These guarantees are based on normal and reasonable domestic use and good maintenance of the product The...
Page 3: ...in use Allow grill to cool completely below 45 C before moving or storing Do not store grill with hot ashes or charcoal inside grill Store only when fire is completely out and all surfaces are cold Ne...
Page 4: ...cause uneven cooking Leave space between food on grate and grill sides to ensure proper heat circulation If utilizing cooking pans place pans on center of grate to ensure even cooking 10 Adjust grill...
Page 5: ...r 20 minutes Frequent seasoning prevents rusting If rusting occurs clean with a steel brush apply vegetable shortening and heat as indicated above 5 Hardware List Qty Description Qty Description A 8 M...
Page 6: ...eel Cap 3 2 1 2 8 6 5 7 4 7 9 10 9 12 11 15 20 14 18 17 19 13 16 24 23 21 22 27 26 30 29 25 28 32 36 31 35 33 34 31 32 33 36 Item Qty Description 19 1 Wheel Axle 20 2 Wheel 21 1 Cart Bottom Shelf 22 1...
Page 7: ...to grill have someone help you position the charcoal door into the hinges and hold it steady until hinge and cotter are installed L X2 30 D L L 30 7 Assembly 1 2 P K K P K P X2 X2 14 16 15 17 28 25 K...
Page 8: ...X4 K K K K K K K K 23 22 Note Do not fully tighten screws until step 11 is complete Note Do not fully tighten screws until step 11 is complete 13 Assembly 14 I X1 13 K X2 Left Front Leg K K 15 11 10 L...
Page 9: ...mbly 11 12 A X8 K X4 A A A A A A A A 9 9 Note After completing step 11 fully tighten screws from steps 1 3 4 and 8 K K K K 34 34 34 9 Assembly 5 6 M X2 G X4 C X2 B X2 C B C B M M 19 20 20 18 18 G G G...
Page 10: ...ve someone help you lift the lid firebox assembly and place onto the cart Your helper should hold the lid firebox assembly steady until all screws are installed 13 Note Do not fully tighten screws unt...