


en
NOTE: The blades of every appliance are bal-
anced, therefore, they must all be installed in
the same direction and must not be changed,
bent or used with blades from other applianc-
es.
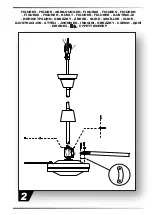
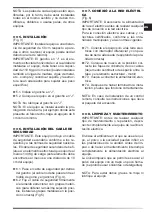
►►5. INSTALLATION
(Fig. 3):
IMPORTANT: Install the appliance at a safe
distance of 50 cm from walls or other objects
(the appliance can oscillate and cause return
air).
IMPORTANT: The “J” hook and the horizontal
structure where the appliance will be installed
must withstand a minimum load of 110 Kg (in-
stallation can also be carried out on wooden
beams, metal beams, etc. as long as the sup-
port and structure can withstand the weight).
►5.1. Install the “J” hook.
►5.2. Position the appliance onto the “J”
hook.
NOTE: Do not lubricate the “J” hook.
NOTE: If the appliance is installed with the
rod extension, for example on a false ceiling,
make a minimum 6 cm diameter hole.
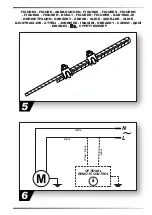
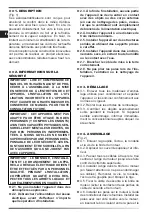
►►6. INSTALLATION OF THE SAFE
-
TY CABLE
IMPORTANT: This appliance includes a sec-
ondary safety cable in compliance with na-
tional requirements and safety standards. The
secondary safety cable must be fastened to a
structural element that can withstand a mini-
mum load of 140 Kg (the structural element
must be approximately 10 cm away from the
appliance).
►6.1. Pass the safety cable behind the hook
(the cable must not pass between the rub-
ber roller and the hook) (Fig. 4).
►6.2. Secure the safety cable to the structur-
al element using metal clips (in order to ob-
tain the maximum possible hold, install the
metal clips in the correct position) (Fig. 5).
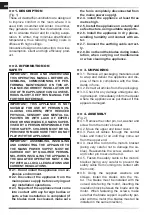
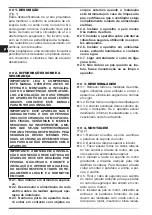
►►7. CONNECTION TO THE ELEC
-
TRICITY MAINS
(Fig. 6)
IMPORTANT: Disconnect the appliance from
the mains power supply before carrying out
any electrical connections.
Use certified cables and connectors in compli-
ance with local legislations and regulations in
force for electrical connection.
►7.1. Only connect the appliance to electri-
cal mains supply duly provided with a differ-
ential switch and suitable earth (complying
with correct polarity).
►7.2. Place the cable covers in a correct po-
sition (leave half a centimetre of clearance
between the cover and the structural ele-
ment - motor).
►7.3. Restore electrical power supply.
►7.4. After completing installation, test cor-
rect operation.
NOTE: In the case of remote control instal-
lation, refer to the instructions in the acces-
sory’s package.
►►8. CLEANING AND MAINTENANCE
IMPORTANT: Before carrying out any main-
tenance or repairs, disconnect the appliance
from the mains power supply.
Depending on the environment where the
appliance is used, dust or dirt can affect per-
formance of the unit. Before carrying out any
cleaning or maintenance, disconnect the ap-
pliance from the mains power supply.
It is only permitted to clean the appliance from
dust with a slightly damp cloth. It is forbidden
to use solvents of detergents.
NOTE: In order to prevent serious injury, it is
forbidden to wet or lubricate the appliance.