


16
5. Setting up the autonomous robots
The steps below describe setting up the system with Marvelmind Autonomous Robots.
Notice that Marvelmind Autonomous Robots relays upon Inverse Architecture.
5.1 Assembling the robot
First thing after receiving and unpacking the robot
– assembling.
How to assemble:
Autonomous Delivery Robot v100 - assembly guide
If you get any extra questions with assembling, you can write directly into
5.2 Test launch
When you assemble the robot, you can start a testing launch process. Test launch is a
process of testing for Autonomous Delivery Robot v100. Test launch consists of 5
autonomous rides from point A to point B and back. If you are experienced enough, you
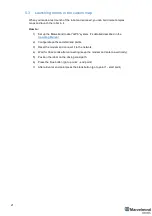
can skip this part and go forward to “Launching robots in custom maps” chapter.
When you received the Marvelmind Autonomous delivery robot, you also got 2 stationary
Super-Beacons and Modem.
It is included to make it possible to do a test launch of the robot and ensure that the robot
works correctly.
How to:
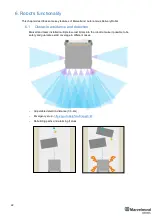
1) Place stationary beacons as described on the picture below
Top view
5m
5m
5m
Side view
3m
3m
Stationary beacon (Right)
Shall be placed on walls
on the height of 3m and
5m distance between
them
Robot
’
s path (Orange)
This is the initial testing
path which is created to
test the robot when it
’
s a
very first time to launch it
Stationary beacon (Left)
-
Shall be placed on walls
on the height of 3m and
5m distance between
them
Starting area (Ø
≈
2m)
Place robot into this area before
start
Point B
Point A
2.
Robot
1.