background image

Versa Electronics 

www.marcumtech.com

- 10 -

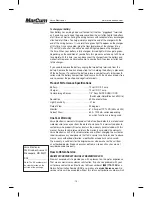
To charge your battery:
Your battery has a wiring harness attached to it that has “piggyback” terminals 
on it, enabling you to keep the power cord from the unit attached to the battery 
at all times, as well as having the wiring harness with receptacle for your charger 
attached at all times. To charge, simply couple the end of the charger with the 
end of the wiring harness. It is normal for a green light to appear on the charger 
at this time. Once connected, plug the transformer end of the charger into a 
110 volt AC wall outlet. You will see a red LED light appear on the charger at 
this time. When your battery is fully charged, this red light will change to green. 
Depending on the condition of your battery, this process can take up to 20 hours 
to complete. At this time, you can disconnect the charger from the battery and  
wall outlet. However, no harm will come to your battery if you leave it attached  
to the charger.

If you need to remove the battery, unplug the two battery terminals from the 
battery. Remove the hook and loop strap that is holding the battery in place and 
lift the battery out. To replace the battery, place a new battery of similar specifi-
cations into the battery compartment and secure it with the hook and loop strap 
and re-connect the positive and negative terminals.

Product Performance Specifications

Battery . . . . . . . . . . . . . . . . . . . . . . . . . . . .12 volt DC, 9.0 amp 
Charger  . . . . . . . . . . . . . . . . . . . . . . . . . . .12 volt DC, 1 amp
Camera Image Sensor . . . . . . . . . . . . . . . .1/3” Sony SUPER HAD II CCD   
 

 (Switchable–Color/Black and White)

Resolution  . . . . . . . . . . . . . . . . . . . . . . . . .800 horizontal lines
Light Sensitivity  . . . . . . . . . . . . . . . . . . . . ..01 lux
Field of View   . . . . . . . . . . . . . . . . . . . . . . .90 degrees
Monitor   . . . . . . . . . . . . . . . . . . . . . . . . . . .6” 4:3 aspect TFT LCD (480v x 600h)
Current Draw  . . . . . . . . . . . . . . . . . . . . . . .600 – 1200mA, varies depending 
 

on which functions are being used

One Year Warranty 

Versa Electronics warrants this product to be free from defects in materials and 
workmanship for one year from the date of purchase. This warranty applies to 
customers who properly fill out and return the warranty card included with this 
manual. Failure to complete and return the warranty card voids the warranty. 
Versa Electronics will, at its sole discretion and without charging the customer, 
repair or replace any components that fail in normal use. Failures due to abuse, 
misuse, or unauthorized alteration, modification or repair are not covered. 
The warranty is valid only for the original owner who purchases the unit from 
an authorized dealer. Products purchased from on-line auction sites are not 
considered under warranty.

How to Obtain Service

REGISTER YOUR PRODUCT ON-LINE AT MARCUMTECH.COM
We want our products to provide you with a pleasant on-the-water experience. 
That means maximum customer satisfaction. If you have a problem with your 
unit please contact Versa Electronics toll free number at 

(888) 778-1208 for a 

Return Authorization Number (RA#) or e-mail us at 

[email protected]No 

service returns will be accepted without this return authorization number, which 

Versa Electronics 
3943 Quebec Avenue N. 
Minneapolis, MN 55427 

RA# _________________

Note: The RA number must 

be clearly marked on the 

outside of the package

Summary of Contents for VS625SD

Page 1: ...VS625sd Underwater Viewing System User Manual www marcumtech com ...

Page 2: ...e applications are endless and it s never been easier or more fun to view Features 480v x 600h Solar Intelligent H2D LCD monitor equipped with a sophisti cated thermostatically controlled heater to enhance your viewing experience in winter conditions The daylight viewable monitor requires no sunshield while viewing outdoors Although classified as daylight viewable it is recom mended that you use t...

Page 3: ...light viewing Front keypad control panel for one touch menu and on screen display Removable down viewing and trolling fin Video Output jack for attaching to external monitor or recording device 90 cable connections to prevent cable wear Padded soft pack encompasses internal molded case that stores battery camera cable and Manta camera Provides for maximum portability and protection 9 0 amp 12v rec...

Page 4: ...ed in the water Dirty or muddy water and or low light penetration can detract from the quality of the color picture Optimum color quality will result from clear water and adequate light penetration Adjusting the Monitor and On Screen Display OSD Settings MONITOR SCREEN ADJUSTMENTS The VS625sd monitor has six different adjustments that can be made to enhance the image on the monitor to the user s p...

Page 5: ... To access Color Kill pressing the UP DOWN arrows after this menu option is highlighted will select either ON OFF which will chance the display image from Color to Black and White and back again For viewing in low light dirty water or after dark Black and White viewing is recommended for optimal viewing Clear or good water clarity and daylight viewing is optimal for viewing in color NOTE The Color...

Page 6: ...tive direction and depth The temperature sensor is pre calibrated The compass sensor may be calibrated with a sophisticated calibration routine contained within the microprocessor software The Depth sensor automatically calibrates itself and can optionally be manually zeroed Compass Calibration Pressing and holding both buttons simultaneously for several seconds will cause the unit to enter Compas...

Page 7: ...LED lights are ON To turn the lighting system OFF press the light button a second time When the lights are first turned ON they will be at the lowest intensity level setting To increase the lighting intensity press the UP arrow key on the right side of the digital keypad There are 4 intensity level settings from low to high To decrease the intensity of the lights while the lights are ON press the ...

Page 8: ...drifting with the wind or using a trolling motor with the VS625sd attach the supplied trolling fin to the rear of the Manta Camera for added stability The internal weight is enough to keep the camera down while the fin assists in keeping the Manta camera tracking straight through the water The direction temp and depth indicators combined with the solar intelligent H2D display makes this is ultimat...

Page 9: ...ou can do is to promptly recharge your battery after each use Not charging your battery immediately after use is the number one thing that leads to battery failure When you get home from a trip put your battery on charge right away and leave it there overnight or for around 8 12 hours We often talk to people who hesitate to charge their battery after each use for fear that the battery will develop...

Page 10: ...ra Image Sensor 1 3 Sony SUPER HAD II CCD Switchable Color Black and White Resolution 800 horizontal lines Light Sensitivity 01 lux Field of View 90 degrees Monitor 6 4 3 aspect TFT LCD 480v x 600h Current Draw 600 1200mA varies depending on which functions are being used One Year Warranty Versa Electronics warrants this product to be free from defects in materials and workmanship for one year fro...

Page 11: ...ence Because the LX 7 is digital we can pack it full of more features than have ever been found in an ice sonar before With an 8 custom izable dashboard display superior target separation 12 level interference rejection dual beam transducer expandable zoom and much much more the LX7 is the perfect combination of macro features and micro precision Showdown 5 6 The Showdown 5 6 Digital Fish Finder d...

Page 12: ...www marcumtech com MarCum User Manuals are available for download from www marcumtech com ...

Reviews: