


SPECIAL MODE
Special mode setting button
b
No. 1: Insert the AC plug while pressing button "
A
", and wait for more than 3 seconds.
b
No. 2 - 4: Insert the AC plug while pressing buttons "
A
" and "
B
" together, and wait for more than 3 seconds.
b
No. 5 - 6: While the power is On, hold down buttons "
A
" and "
B
" for at least 3 seconds.
b
No. 7: While the power is On, hold down buttons "
A
" for at least 3 seconds.
No.
Mode
Button A Button B
Descriptions
1 Selecting the Mode1 for Service-
related
Power
Service mode information is selected in Service-related selection mode 1.
Service-related modes: No. 1-1 - No. 1-5 (See
1. Selecting the Mode1 for Service-related
)
1-1 Version Display Mode
↑
The firmware version is shown on the display. (See
1-2 IR Control Test
↑
This function is used to check IR control operations. (See
)
1-3 Protection history display mode
↑
Displays the protection occurrence history. (See
1-3. Protection History Display Mode
)
1-4 All Device DPMS Update
↑
Since this mode is only for production/development, the detailed information is not provided.
1-5 Initialize
↑
Initialize the backup data for the MCU and network module. (Settings for the Installer Setup are not initialized.)
(See
)
2 Factory Initialization Mode
(Factory Reset)
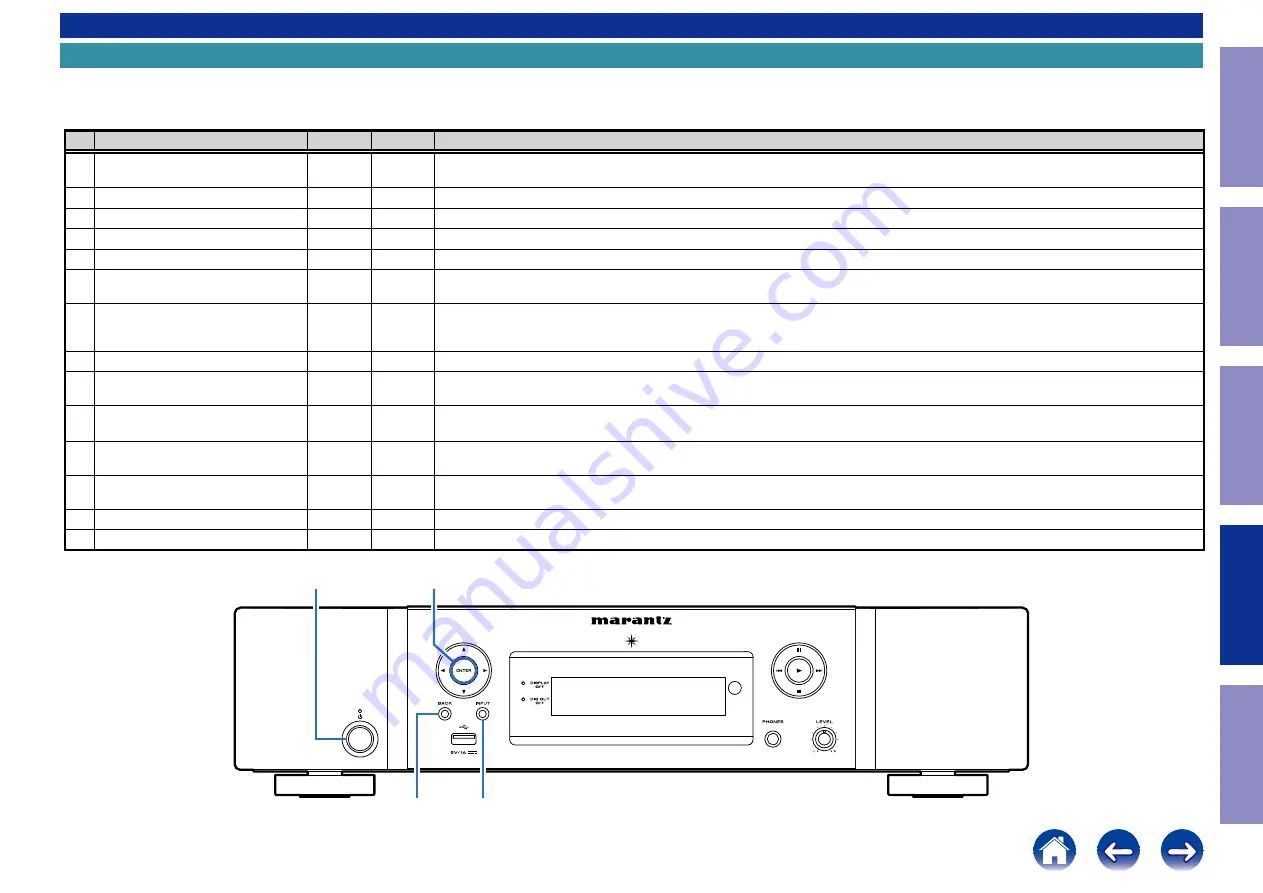
INPUT
BACK
Initialize the backup data only for MCU.
(Settings for the Installer Setup are initialized) (Network function settings are not initialized.)
(See
2. Factory Initialization Mode
)
3 All Device USB Update
INPUT
ENTER
Forcibly rewrite the firmware of all devices by USB. (See
)
4 Firmware Factory Restore
POWER
BACK
Used when replacing the Network module.
(See
5 Network Function Reset
POWER
BACK
Network module backup data is initialized.
6 Selecting the Mode2 for Service-
related
POWER
ENTER
Service mode information is selected in Service-related selection mode 2.
Service-related modes: No. 6-1 - No. 6-2 (See
6. Selecting the Mode2 for Service-related
)
6-1 LEGO Log Capture mode
↑
↑
Acquires the Network Module log. The log is deleted when the Network Module is deleted.
(See
)
6-2 Change LEGO Audio Path
↑
↑
Since this mode is only for production/development, the detailed information is not provided.
7 Restart
POWER
Use this to resolve network issues. (See
)
BACK
INPUT
ENTER
X
Before Servicing
This Unit
Electrical
Mechanical
Repair Information
Updating
53


