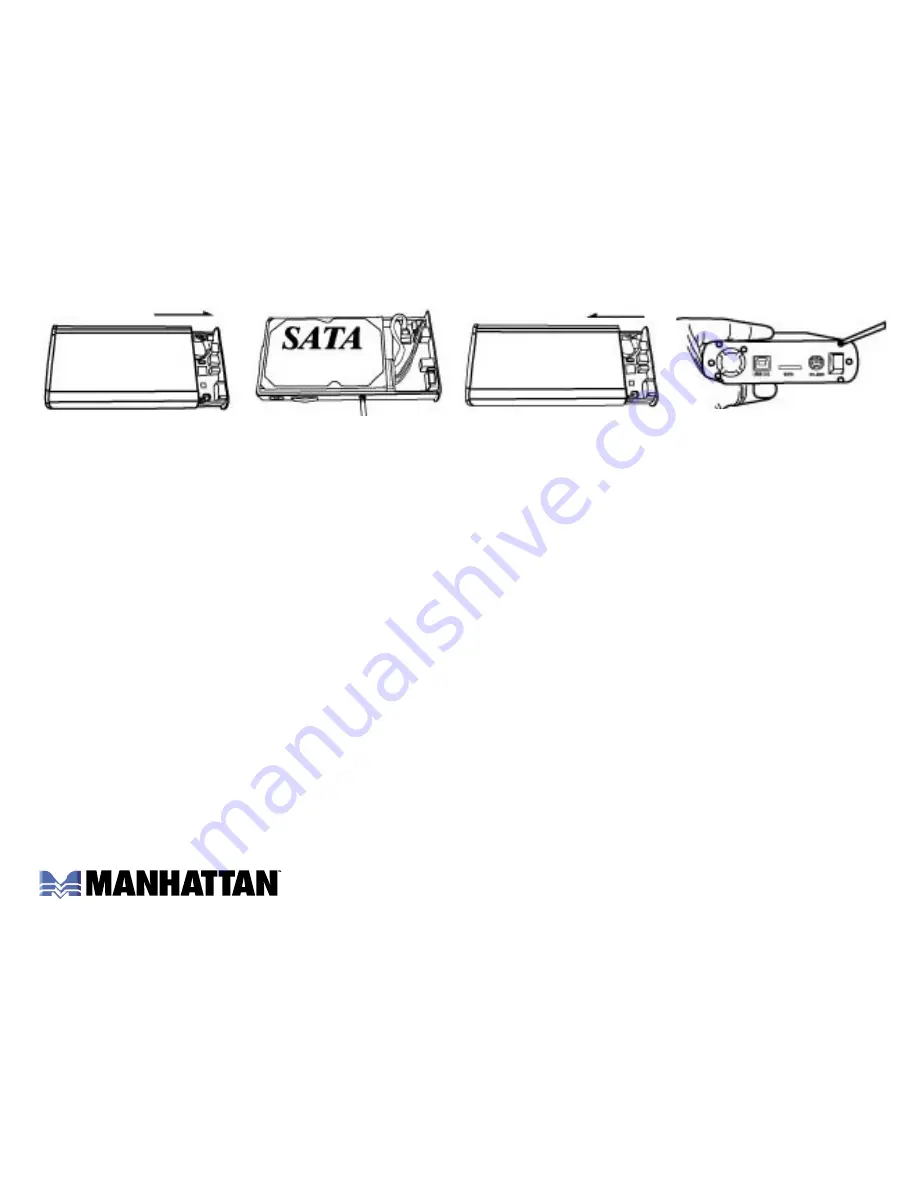
1. Remove the tray from the 2. Connect the SATA and
3. Insert your hard disk
4. Attach the back cover with
enclosure.
power cables to the disk drive into the enclosure.
the 4 screws to complete
drive and screw in place.
the procedure.
USB 2.0 Windows 98SE Installation:
Place the installation CD in the CD-ROM and connect
the external enclosure to your computer. Auto Detect will run the Add New Hardware wizard,
which searches for Jmicron: SATA-USB Combo Device. Click "Next."
Select "Search for the best driver for your device (recommended)"; click "Next."
Select "Specify location"; browse to "CD-ROM:\Win98 Driver Jm20336"; click "Next." With
the prompt "Windows driver file is now searching for the Jmicron: SATA-USB Combo Device,"
click "Next." Restart your computer to complete the installation.
NOTE:
For Windows Me/2000/XP, no need to install the additional driver: It’s already
installed. Windows XP needs to be updated with SP2.
SATA Installation:
There is no need for drive setup: The interface is already installed. Use it to
boot your operating system, or use Plug and Play.
NOTE:
Don’t hot swap when using the boot-
up function. You can also use the SATA I-type to L-type bracket for direct computer connection.


