background image

3


HARDWARE & DRIVER INSTALLATION

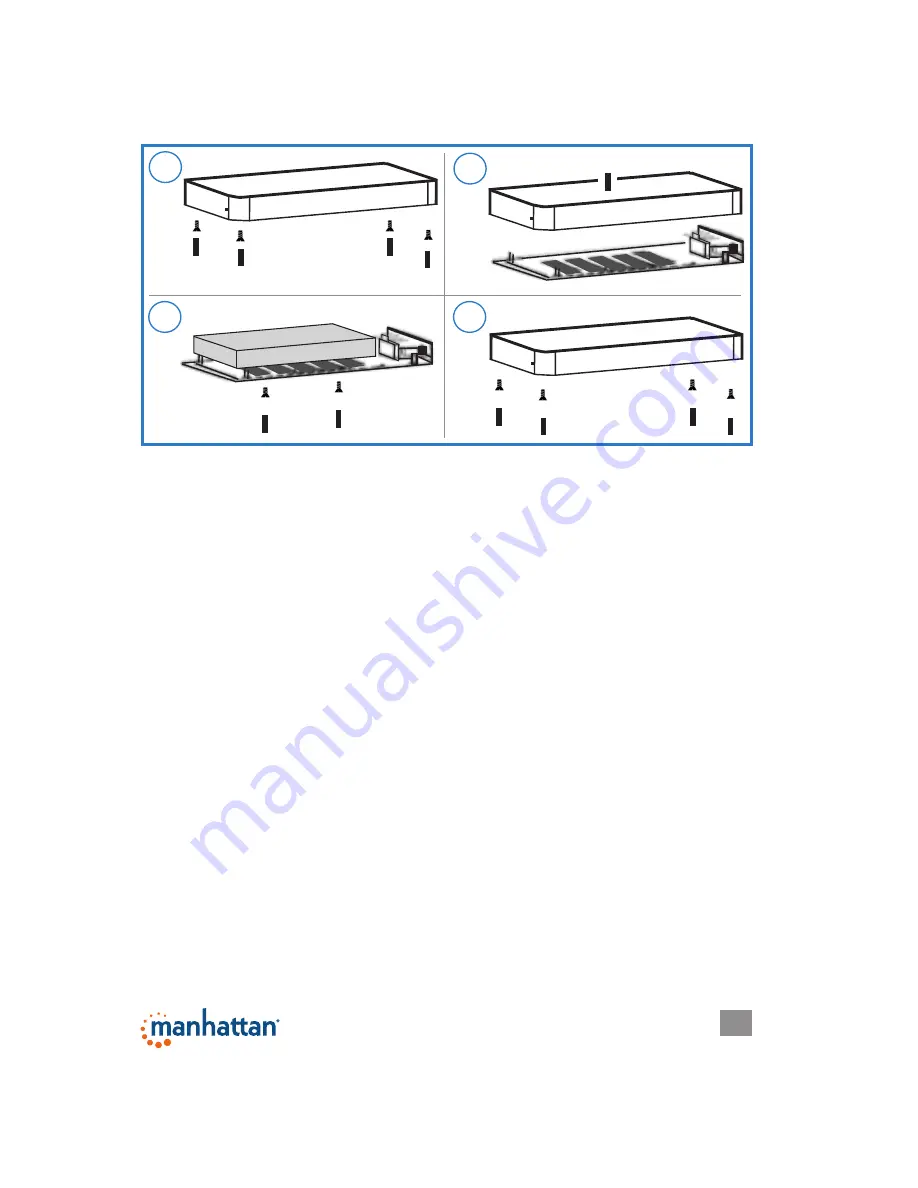
1. Remove the 4 screws on the bottom of the enclosure (

A

) and lift off the top (

B

).

2. Connect the hard drive to the SATA data and power connectors on the  

  enclosure, then secure it to the enclosure using the included screws (

C

).               

3. Re-assemble the enclosure (

D

) using the 4 screws in Step 1.                                          

4. Using the included USB cable, connect the enclosure to a USB port on the  

 computer. 

Once the enclosure is connected to your PC, your system will automatically detect 

the new hardware and complete the setup, confirmed when “USB Mass Storage 

Device” displays in the Device Manager folder. 

A

B

C

D

Summary of Contents for 130295

Page 1: ...DRIVE ENCLOSURE USER MANUAL MODELS 130295 130349 VERSION 2 MAN 130295 130349 UM 0515 04 manhattanproducts com At Right Model 130295 Below Model 130349 ...

Page 2: ...able data solution without bulky external power supplies or annoying cables and adapters By following the instructions in this user manual you ll soon be enjoying these popular features Plug and play and hot swappable Windows and Mac compatible Lifetime Warranty For a complete list of country specific warranties go to manhattanproducts com warranty System Requirements Available USB 3 0 Standard A ...

Page 3: ...ure it to the enclosure using the included screws C 3 Re assemble the enclosure D using the 4 screws in Step 1 4 Using the included USB cable connect the enclosure to a USB port on the computer Once the enclosure is connected to your PC your system will automatically detect the new hardware and complete the setup confirmed when USB Mass Storage Device displays in the Device Manager folder A B C D ...

Page 4: ...s your software version may be slightly different than the one represented here 1 Load the included software CD The JMicron Backup program s InstallShield Wizard Welcome screen will display automatically Click Next to continue 2 When the wizard s Complete screen displays click Finish NOTE Most screens present the option of clicking Back to return to a previous screen or Quit to stop the installati...

Page 5: ...o launch the program or go to Start Programs JMicron Storage on your desktop 2 When the backup program is opened the initial screen presents two options for Backup Files Backup or Restore To back up files click Add in the Host panel You can click on the folders you want to select for backup ...

Page 6: ...n drive and folder selected click Backup for a default backup The operation will display the files being backed up as well as a status progress bar After all files selected are backed up a pop up message will announce that the backup is complete and successful Click Close to finish ...

Page 7: ...es Allow the backup to continue while the status screen is displayed Or click Abort if you need to interrupt or stop the process When the backup message displays click Close If you last set to your options in order to back up modified files only the program will only back up the files that have been modified since your previous backup operation which will save you more time without having to back ...

Page 8: ...the USB Device panel below right hand side 3 When the desired folder is selected check the box the files corresponding to the backed up files will display in the Path window of the Host panel above left hand side Select the backup file s you want to restore check the box or boxes and click Restore 4 A progress bar will display to indicate the status of the restoration process After all backed up f...

Page 9: ... Panel Programs Uninstall a program JMicron One Touch Backup Click Uninstall or Remove to continue then click Yes 2 When the uninstall is complete you ll be prompted to restart your computer Close all programs and click Finish to restart your computer ...

Reviews: