


10 ENGLISH
3.
Re-tighten the screws firmly to secure the triangu
-
lar/rectangular pad.
Triangular pad
1
3
2
Fig.16
►
1.
Screws
2.
Triangular pad
3.
Sanding base
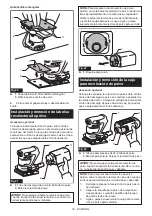
You can install the abrasive paper on the side of the pad
as illustrated.
1
2
1
Fig.17
►
1.
Abrasive paper
2.
Pad
Rectangular pad
1
3
2
Fig.18
►
1.
Screws
2.
Rectangular pad
3.
Sanding base
4.
Remove all dirt and foreign matter from the trian-
gular/rectangular pad.
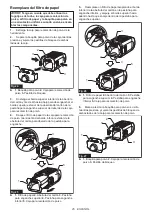
5.
Attach a sheet of optional hook-and-loop abrasive
paper to the triangular/rectangular pad, aligning the
dust-suction holes in the paper with those in the pad.
Triangular pad
1
2
1
2
3
1
3
3
Fig.19
►
1.
Abrasive paper
2.
Triangular pad
3.
Dust-suction holes
Rectangular pad
1
2
3
1
2
3
Fig.20
►
1.
Abrasive paper
2.
Rectangular pad
3.
Dust-suction holes
6.
To remove the abrasive paper, peel it off from the edge.


