23 ENGLISH
Cleaning the side brush
For the procedure for mounting and removing the side
brush, refer to “
Attaching and removing the side brush
.”
1.
Remove the side brush.
2.
Shake off dust, and wash the brush with water if it
is very dirty. After washing, leave the brush to dry in the
shade; do not use it until it is completely dry.
►
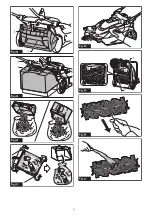
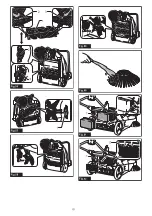
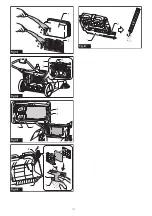
Fig.60
3.
Mount the side brush.
NOTE:
If the side brush is worn down to a shorter
length, replace it.
Cleaning the filters
CAUTION:
Make sure the filters are mounted
properly, and do not use the appliance when the
filters are not in place. Also, do not use filters that
are damaged or wet.
Motor burnout or a breakdown
may result.
NOTICE:
The filters can be washed and reused.
To prevent damage to the filters, do not use the
following items when cleaning them.
— Air dusters
— High-pressure washers
— Brushes made of hard materials such as metal
1.
Remove the waste container.
2.
While pushing on the hook of the prefilter in the direc
-
tion indicated by the arrow in the figure, remove the prefilter.
►
Fig.61:
1.
Prefilter
2.
Hook
3.
While pushing on the hooks of the HEPA filter
in the direction indicated by the arrows in the figure,
remove the HEPA filter.
►
Fig.62:
1.
HEPA filter
2.
Hook
4.
Shake off dust, and wash the filters with water if
they are very dirty. After washing, leave the prefilter and
HEPA filter to dry in the shade; do not use them until
they are completely dry.
►
Fig.63:
1.
Prefilter
2.
HEPA filter
5.
To mount the HEPA filter, fit the edge of the HEPA
filter onto the grooves on the appliance, and push the
filter into place. Check that the hooks are securely fixed.
►
Fig.64:
1.
HEPA filter
2.
Edge
3.
Groove
4.
Hook
6.
To mount the prefilter, fit the protrusions on the
prefilter into the grooves on the appliance, and push the
filter into place. Check that the hook is securely fixed.
►
Fig.65:
1.
Prefilter
2.
Protrusion
3.
Groove
4.
Hook
Cleaning the sponge filter
CAUTION:
After cleaning the sponge filter, be
sure to install it on the waste container. If washed
in water, dry it up before installing.
When the sponge filter is clogged with dust, remove it
from the waste container and then wipe it off or wash
in water.
1.
Remove the sponge case from the waste
container.
2.
Open the sponge case to remove the sponge filter.
►
Fig.66:
1.
Waste container
2.
Sponge case
3.
Sponge filter
3.
Wipe off the sponge filter or wash in water.
4.
Install the sponge filter in its original position.
Cleaning the tube
When using the dust bag (optional accessory), the tube
may become clogged with fine refuse such as sand,
pebbles, and small fallen leaves.
1.
Pull the tube from the dust bag frame.
2.
Remove the refuse from the tube.
►
Fig.67:
1.
Dust bag frame
2.
Tube
3.
Install the tube in its original position.
Periodic inspections
To ensure a long service life for the appliance and
safety usage, perform the inspections listed below
periodically.
Daily inspections
•
Waste container: empty the container.
•
Filters: if they are dirty, cleaning them.
•
Brushes: if string-like refuse get entangled,
remove it.
•
Control and movable parts: check that they move
smoothly.
Weekly inspections
•
Main brush height: if the height is inappropriate,
readjust it.
•
Screws (when using multifunction adapter): if they
are loose, tighten them.
Replacement/replenishment of
consumable items
Brush replacement
If the main brushes and side brush become worn out,
ask your local Makita service center for replacement.
Replacing the main brushes
Replace the main brushes if they cannot be adjusted
appropriately. Refer to "
Main brush height adjustment
."
For removing and mounting the main brushes, refer to
“
Cleaning the main brushes
.”
Replacing the side brush
Replace the side brush if it does not contact the floor
when the side brush height adjusting knob is turned to
the lowest position. Refer to "
Side brush height adjust-
ment
."
For removing and mounting the side brush, refer to
“
Attaching and removing the side brush
.”
Summary of Contents for VS001G
Page 3: ...3 1 2 3 Fig 5 1 Fig 6 1 2 Fig 7 1 Fig 8 1 2 Fig 9 1 2 Fig 10...
Page 4: ...4 1 Fig 11 1 Fig 12 2 3 1 Fig 13 1 Fig 14 1 2 Fig 15 1 2 Fig 16...
Page 5: ...5 1 3 2 Fig 17 1 2 3 Fig 18 2 1 Fig 19 1 Fig 20 1 Fig 21 1 2 3 Fig 22 Fig 23...
Page 6: ...6 1 2 Fig 24 1 1 Fig 25 1 Fig 26 1 Fig 27 1 2 Fig 28 1 2 Fig 29 1 2 Fig 30 1 2 Fig 31...
Page 9: ...9 1 2 Fig 48 1 2 Fig 49 Fig 50 Fig 51 Fig 52 1 1 A B Fig 53 Fig 54 Fig 55...
Page 10: ...10 1 2 3 2 3 Fig 56 1 Fig 57 Fig 58 Fig 59 Fig 60 1 2 Fig 61 1 2 Fig 62...
Page 11: ...11 1 2 Fig 63 1 2 3 4 Fig 64 1 2 3 4 Fig 65 1 2 3 Fig 66 1 2 Fig 67...
Page 112: ...112 7 8 9 10 11 12 13 14 15 16 17 18 19 20 21 22 23 24 25 26 1 2 3 4 5 6 130 C 7...
Page 115: ...115 Makita Makita 1 2 2 1 2 3 3 1 4 5 1 2 3 1 6 1 2 2 2 6 7 1 2 2 6 8 1...
Page 116: ...116 9 1 2 75 100 50 75 25 50 0 25 3 50 100 20 50 0 20 10 1 2 11 1...
Page 117: ...117 1 2 3 Makita 12 1 13 1 2 1 3 2 1 1 2 1 2 1 2...
Page 118: ...118 14 1 15 1 2 16 1 2 1 2 15 30 3 25 40 1 1 9 16 17 1 2 3 18 1 2 3 19 1 2 20 1 21 1...
Page 119: ...119 1 I 22 1 2 3 2 3 23 4 O 24 1 2...
Page 120: ...120 15 25 1 30 26 1 1 2 27 1 3 28 1 2 1 29 1 2 2 30 1 2 1 31 1 2 2 32 1 2 3 3 33 4 34 1 2...
Page 123: ...123 52 1 2 53 1 3 4 5 54 6 55 7 56 1 2 3 8 57 1 9 58 7 10 59 1 2 60 3 1 2 61 1 2...
Page 125: ...125...
Page 126: ...126...
Page 127: ...127...

