3
strong impacts to the outside of the tool-body.
Always check the accuracy of laser before use.
For a better visibility of the laser-beam line, Receiver is
available as an optional accessory. Use the receiver
when it is difficult to see the laser-beam line.
Battery life indicator LED (yellow) indicates that the
batteries become weak.
Replace all the batteries (2 pieces) at one time with new
alkaline ones.
When you finish your work, always be sure that the laser
level is switched off and the laser-beam lines is not
projected.
Always keep the laser level in the carrying case when it
is carried.
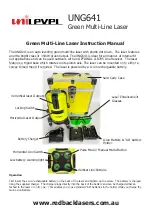
Explanation of general view
1. Operating-mode selecting buttons
(H, V, VH)
2. Interior/exterior mode change button
3. Exterior mode indicator LED (green)
4. Round vial with backlight
5. Power switch (Switch lock provided)
6. Tripod connection
7. Battery life indicator LED (yellow)
8. Exit opening for horizontal laser beam
9. Exit opening for vertical laser beam
10. Level adjusting screw (hidden)
Battery cover
1
2
3
4
5
6
9
8
7
10
Attaching and replacing batteries (Fig.1)
Use the laser level by mounting to Elevating tripod
Fig. 1
To use the laser level by mounting to elevating tripod
(optional accessory), stick the spacer provided to the top
of elevating tripod (See the Fig.2) and screw up the level
adjusting screw (10) of the unit (laser level).
Fig. 2


