Makita HS012GZ, Instruction Manual
The Makita HS012GZ is a powerful and efficient circular saw designed for professional and DIY use. For your convenience, the instruction manual can be easily downloaded for free from manualshive.com, ensuring hassle-free usage and optimal performance. Get the most out of your Makita HS012GZ with our comprehensive user manual.
Share
Download


Reviews:
No comments
Related manuals for HS012GZ

KX-TG1611
Brand: Panasonic Pages: 32

DCT 707X
Brand: switel Pages: 24
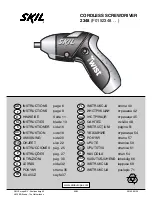
Twist 2348
Brand: Skil Pages: 11

PDKS 6.3 A1
Brand: Parkside Pages: 74

102787
Brand: Parkside Pages: 52

827200
Brand: Toledo Pages: 14

KGSZ 250 N
Brand: ATIKA Pages: 180

PSSAP 20-Li A1
Brand: Parkside Performance Pages: 105

91815
Brand: Central Machinery Pages: 25

JMS-10X
Brand: Jet Pages: 36

C11DECT10
Brand: Currys Essentials Pages: 32

4412
Brand: Bosch Pages: 104

CD5 Series
Brand: Motorola Pages: 64

CORDLESS EXPANSION HANDSET-MD4153
Brand: Motorola Pages: 75

D800 Series
Brand: Motorola Pages: 116

D710 Series
Brand: Motorola Pages: 114

CD301
Brand: Motorola Pages: 48

C4A
Brand: Motorola Pages: 39


