background image

8

ENGLISH (Original instructions)

IMPORTANT SAFETY 

INSTRUCTIONS

WARNING:

When using electric tools, basic safety precautions should 
always be followed to reduce the risk of fire, electric 
shock, and personal injury, including the following:
1. Read this instruction manual and the charger 

instruction manual carefully before use.

2. Clean only with dry cloth.
3. Do not block any ventilation opening. Install in 

accordance with the manufacturer’s instruction.

4. Do not install near any heat sources such as radiators, 

heat registers, stoves, or other apparatus (including 
amplifiers) that produce heat.

5. Only use attachments/accessories specified by the 

manufacturer.

6. Unplug this apparatus during lighting storms or when 

unused for long periods of time.

7. A battery operated radio with integral batteries or a 

separate battery pack must be recharged only with the 
specified charger for the battery. A charger that may 
be suitable for one type of battery may create a risk of 
fire when used with another battery.

8. Use battery operated radio only with specifically 

designated battery packs. Use of any other batteries 
may create a risk of fire.

9. When battery pack is not in use, keep it away from 

other metal objects like: paper clips, coins, keys, nails, 
screws, or other small metal objects that can make a 
connection from one terminal to another. Shorting the 
battery terminals together may cause sparks, burns, 
or a fire.

10. Avoid body contact with grounded surfaces such as 

pipes, radiators, ranges and refrigerators. There is an 
increased risk of electric shock if your body is 
grounded.

11. Under abusive conditions, liquid may be ejected from 

the battery; avoid contact. If contact accidentally 
occurs, flush with water. If liquid contacts eyes, 
additionally seek medical help. Liquid ejected from the 
battery may cause irritation or burns.

SPECIFIC SAFETY RULES

SAVE THESE INSTRUCTIONS.

FOR BATTERY CARTRIDGE

1. Before using battery cartridge, read all instructions 

and cautionary markings on (1) battery charger, (2) 
battery, and (3) product using battery.

2. Do not disassemble battery cartridge.
3. If operating time has become excessively shorter, stop 

operating immediately. It may result in a risk of 
overheating, possible burns and even an explosion.

4. If electrolyte gets into your eyes, rinse them out with 

clear water and seek medical attention right away. It 
may result in loss of your eyesight.

5. Do not short the battery cartridge:

(1) Do not touch the terminals with any conductive 

material.

(2) Avoid storing battery cartridge in a container with 

other metal objects such as nails, coins, etc.

(3) Do not expose battery cartridge to water or rain. A 

battery short can cause a large current flow, 
overheating, possible burns and even a 
breakdown.

6. Do not store the tool and battery cartridge in locations 

where the temperature may reach or exceed 50°C 
(122°F)

7. Do not incinerate the battery cartridge even if it is 

severely damaged or is completely worn out. The 
battery cartridge can explode in a fire.

8. Be careful not to drop or strike battery.
9. Do not use dropped or struck battery. (Do not use a 

damaged battery.)

Features:

• AM/FM-stereo PLL Synthesized
• Large LCD display with illumination
• Manual/Preset/Scan tuning
• Rotary tuning and volume control
• 5 preset stations each band
• Time and 2 alarm timers (radio and HWS buzzer) with 

Snooze

• Adjustable sleep (auto shut off) timer
• Stereo speaker for rich sound performance
• Ultra rugged design
• Water resistant to IPX 4
• Powered by both Makita battery pack and supplied 

power adaptor

Explanation of general view 

(Fig. 1)

Controls:

1. Power and Sleep timer
2. Band and Mono button
3. Radio alarm set
4. Buzzer alarm set
5. Preset stations
6. Scan tuning and Time set
7. Tuning/Volume control knob
8. DC IN socket
9. Input terminal (AUX IN1)
10. Soft bended rod antenna
11. Battery compartment (covering main battery pack and 

back up batteries)

12. Handle
13. Speaker
14. Battery compartment locker
15. Main battery compartment
16. Back up battery compartment
17. Red indicator
18. Button
19. Battery cartridge
20. Input terminal (AUX IN2)
21. Supporting bar

Summary of Contents for BMR102

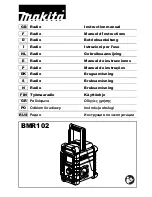
Page 1: ...er l uso NL Radio Gebruiksaanwijzing E Radio Manual de instrucciones P Rádio Manual de instruções DK Radio Brugsanvisning S Radio Bruksanvisning N Radio Bruksanvisning FIN Työmaaradio Käyttöohje GR Ραδιόφωνο Οδηγίες χρήσης PO Odbiornik radiowy Instrukcja obsługi RUS Радио Инструкция по эксплуатации BMR102 ...

Page 2: ...2 1 PM 2 3 1 5 9 4 6 7 8 10 12 14 13 20 11 L K J A B C D E I H G F ...

Page 3: ...3 2 3 4 5 6 7 11 14 15 15 15 16 17 18 19 21 19 19 ...

Page 4: ...4 8 9 10 11 12 19 19 10 10 8 9 ...

Page 5: ... at du forstår deres betydning før du bruger udstyret Symboler Följande symboler används för utrustningen Se till att du förstår innebörden av dem innan du använder utrustningen Symboler Nedenfor ser du symbolene som brukes for dette utstyret Forsikre deg om at du forstår hva de betyr før bruk Merkkien selitykset Laitteessa on käytetty seuraavia symboleja Varmista ennen käyttöä että ymmärrät niide...

Page 6: ...ature elettriche e le batterie esauste devono essere raccolte separatamente al fine di essere riciclate in modo eco compatibile Alleen voor EU landen Geef elektrisch gereedschap en accu s niet met het huisvuil mee Volgens de Europese richtlijn 2002 96 EC inzake oude elektrische en elektronische apparaten 2006 66 EC inzake batterijen en accu s en oude batterijen en accu s en de toepassing daarvan b...

Page 7: ...seen kierrätykseen Μόνο για τις χώρες της ΕΕ Μην απορρίπτετε τον ηλεκτρικό εξοπλισμό ή την μπαταρία μαζί με τα οικιακά απορρίμματα Σύμφωνα με την Ευρωπαϊκή Οδηγία 2002 96 ΕΚ περί αποβλήτων ηλεκτρικού και ηλεκτρονικού εξοπλισμού την 2006 66 ΕΚ περί μπαταριών και συσσωρευτών και των αποβλήτων των μπαταριών και των συσσωρευτών και την ενσωμάτωσή τους στην εθνική νομοθεσία ο ηλεκτρικός εξοπλισμός και ...

Page 8: ...dge read all instructions and cautionary markings on 1 battery charger 2 battery and 3 product using battery 2 Do not disassemble battery cartridge 3 If operating time has become excessively shorter stop operating immediately It may result in a risk of overheating possible burns and even an explosion 4 If electrolyte gets into your eyes rinse them out with clear water and seek medical attention ri...

Page 9: ...cartridge with the groove in the housing and slip it into place Always insert it all the way until it locks in place with a little click If you can see the red indicator on the upper side of the button it is not locked completely Install it fully until the red indicator cannot be seen If not it may accidentally fall out of the tool causing injury to you or someone around you Do not use force when ...

Page 10: ...irm hour setting the minute digit will flash 6 Rotate Tuning Volume control knob to set the required minute 7 Press the button again to complete clock setting Operating the radio This radio equips with three tuning methods Scan tuning Manual tuning and Memory presets recall Scan Tuning 1 Press the Power button to turn on the radio 2 Select the required waveband by pressing the Band button Make sur...

Page 11: ...bove radio alarm time and station are set press and hold down radio alarm button for 2 seconds followed by a beep to switch alarm on or off Display will show when radio alarm is set Note If new radio alarm station is not selected it will select the last alarm station Setting the HWS Humane Wake System buzzer alarm A beep tone will activate when selecting the HWS buzzer alarm The alarm beep will be...

Page 12: ...o or mono source i e iPod MP3 or CD player to either AUX 1 or AUX 2 by audio cord Repeatedly press and release the Band button until AU1 or AU2 is displayed then AUX function is activated AUX can t be activated as alarm source MAINTENANCE CAUTION Never use gasoline benzine thinner alcohol or the like Discoloration deformation or cracks may result Specifications Power Requirements AC power adaptor ...

Page 13: ...geluk aanraakt wast u deze goed af met water Als de vloeistof in uw ogen komt raadpleegt u tevens een arts Vloeistof uit de accu kan irritatie en brandwonden veroorzaken AANVULLENDE VEILIGHEIDSVOORSCHRIFTEN BEWAAR DEZE INSTRUCTIES VOOR ACCU S 1 Alvorens de accu in gebruik te nemen leest u eerst alle instructies en waarschuwingsopschriften op 1 de acculader 2 de accu en 3 het apparaat waarin de acc...

Page 14: ...k de vergrendelpal van het batterijvak uit om het batterijvak vrij te geven Er is een vak voor de hoofdbatterij en een voor de back upbatterij zie afb 2 en 3 2 Verwijder de klep van het batterijvak en plaats 2 nieuwe UM 3 batterijen AA formaat Plaats de batterijen met de juiste polariteit zoals aangegeven aan de binnenzijde van het vak Plaats de klep terug 3 Plaats nadat u de back upbatterijen heb...

Page 15: ...e antenne De meegeleverde netadapter gebruiken zie afb 12 Verwijder de rubber beschermkap en sluit de adapterstekker aan op het gelijkstroom aansluitcontact op de voorzijde van de radio Steek de adapter in een standaard stopcontact Bij gebruik van de adapter wordt de accu automatisch uitgeschakeld De netstroomadapter moet losgekoppeld zijn van de netstroom wanneer u deze niet gebruikt Opmerking Al...

Page 16: ...s overschrijven door nogmaals de bovenstaande procedures te volgen Stations uit het voorkeuzegeheugen oproepen 1 Druk op de aan uitknop om de radio in te schakelen 2 Selecteer de gewenste golfband 3 Druk kort op de gewenste voorkeuzetoets Het voorkeuzenummer en de frequentie van het station verschijnen op het display De alarmfunctie instellen Als het radioalarm wordt geselecteerd wordt de radio op...

Page 17: ...de tijd is verstreken 1 Houd de aan uitknop langer dan 2 seconden ingedrukt De radio geeft een geluidssignaal weer en op het display verschijnen de beschikbare uitschakeltijden in de volgorde 60 45 30 15 120 90 60 Laat de aan uitknop los zodra de gewenste uitschakeltijd op het display wordt weergegeven Het symbool verschijnt op het display en de radio geeft het laatst geselecteerde station weer 2 ...

Page 18: ...35 Antennesysteem FM flexibele sprietantenne AM staafantenne Afmetingen B x H x D in mm 280 x 302 x 163 Gewicht zonder batterij 4 0 kg ...

Page 19: ...ALA Makita Corporation Anjo Aichi Japan 3A81VE5Z10000 www makita com BMR102 14L 0812 ...

Reviews: