


P 8 /14
R
epair
[3] DISASSEMBLY/ASSEMBLY
[3] -5. Impact Bolt Section (cont.)
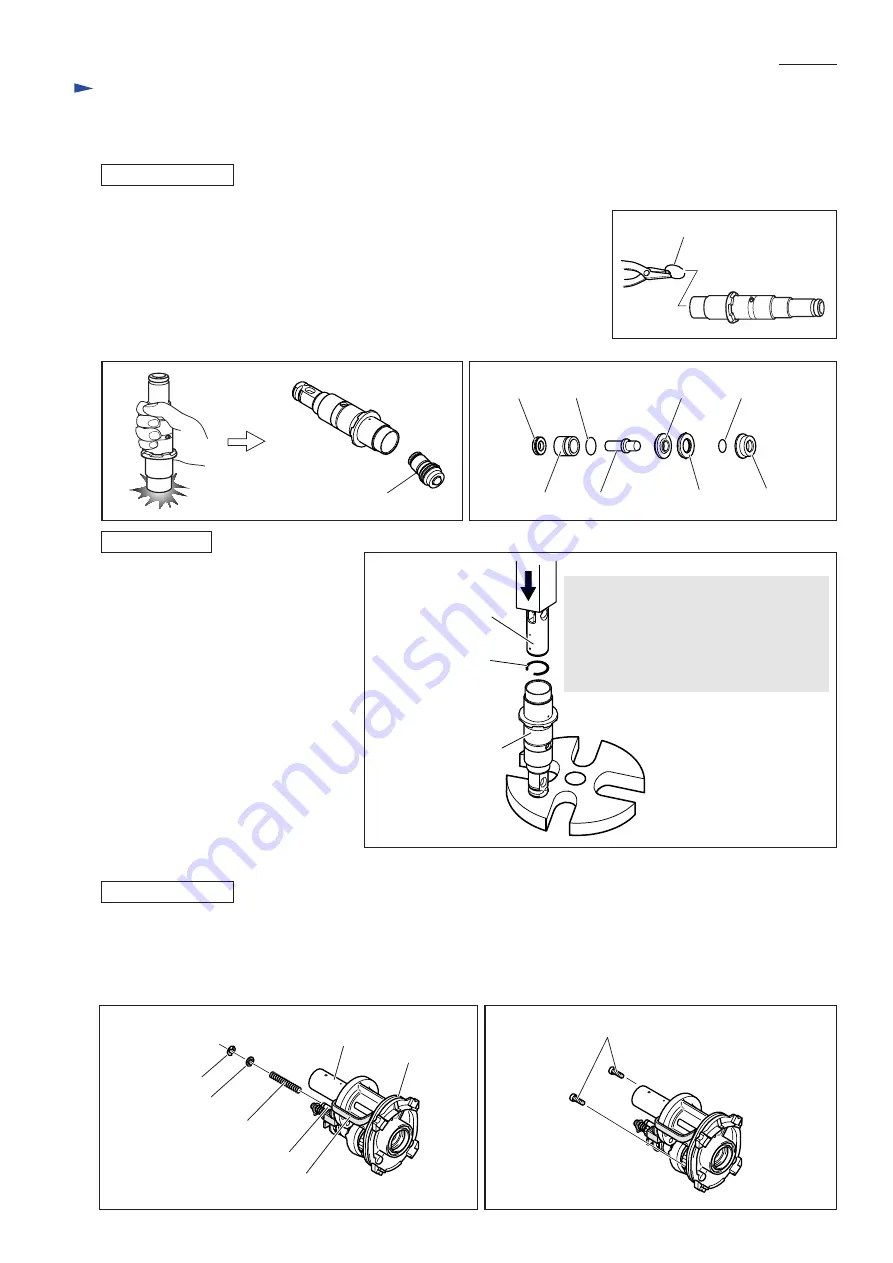
DISASSEMBLING
ASSEMBLING
Do the reverse of the disassembling steps.
Note:
When assembling Ring spring 28 to
Tool holder complete;
*Be careful not to position the end of the
spring in either of the side holes on Tool
holder complete.
*Use Piston cylinder as a jig as illustrated
in Fig. 23.
Fig. 21
Fig. 22
5) Ring spring 28 can be pulled off from Tool holder complete when completely
removed from the groove (Fig. 20).
Note: Ring spring 28 will be damaged or deformed in the steps 4) and 5).
Be sure to replace damaged/deformed Ring spring 28 when
assembling Tool holder section.
6) Remove Impact bolt section from Tool holder complete by striking Tool holder
complete against workbench (Fig. 21).
7) Disassemble Impact bolt section as illustrated in Fig. 22.
[3] -6. Swash Bearing Section
DISASSEMBLING
Impact bolt section
X ring 9 O ring 16
Ring 10
O ring 9
Sleeve 9 Impact bolt
Cushion ring 13 O ring case
Fig. 23
Piston cylinder as
an assembling jig
Note:
Never use the Piston cylinder built-in the
machine as the jig because it is scratched
when inserted in Tool holder complete.
Be sure to have an extra Piston cylinder
as a jig for the application.
Ring spring 28
Tool holder complete
1) Remove Inner housing from Gear housing (Fig. 14 in page 6). If Ball bearing 606ZZ remains fixed in Gear housing,
See page 9 for removal. Remove Inner housing from Tool holder section (Fig. 15 in page 6).
2) Remove Stop ring E-4, Flat washer 5 and Compression spring 6 from the pin of Inner housing (Fig. 24).
3) Remove two M4x12 Hex socket head bolts that fasten Bearing retainer to Inner housing (Fig. 25).
Fig. 24
Fig. 25
Inner housing
Ring spring 28
Fig. 20
Fat washer 5
Compression spring 6
Stop ring E-4
Pin of Inner housing
Piston cylinder
Change plate
Hex socket head bolts M4x12


