background image

7

NOTE:

• Use a dry cloth to wipe the dirt off the lens of lamp. Be 

careful not to scratch the lens of lamp, or it may lower 
the illumination.

Reversing switch action (Fig. 5)

This tool has a reversing switch to change the direction of 
rotation. Depress the reversing switch lever from the A 
side for clockwise rotation or from the B side for 
counterclockwise rotation.
When the reversing switch lever is in the neutral position, 
the switch trigger cannot be pulled.

CAUTION:

• Always check the direction of rotation before operation.
• Use the reversing switch only after the tool comes to a 

complete stop. Changing the direction of rotation 
before the tool stops may damage the tool.

• When not operating the tool, always set the reversing 

switch lever to the neutral position.

Speed change (Fig. 6)

This tool has a three-gear speed change lever. To change 
the speed, first switch off the tool and then slide the speed 
change lever to the “1” position for low speed, “2” position 
for medium speed or “3” position for high speed. Be sure 
that the speed change lever is set to the correct position 
before operation. Use the right speed for your job.

NOTE:

• When changing the position from “1” to “3” or from “3” 

to “1”, it may be a little difficult to slide the speed 
change lever. At this time, switch on and run the tool for 
a second at the “2” position, then stop the tool and slide 
to your desired position.

CAUTION:

• Always set the speed change lever fully to the correct 

position. If you operate the tool with the speed change 
lever positioned halfway between the “1” position, “2” 
position and “3” position, the tool may be damaged.

• Do not use the speed change lever while the tool is 

running. The tool may be damaged.

Selecting action mode (Fig. 7)

This tool has an action mode change lever. For drilling, 
slide the action mode change lever to the left (  symbol). 
For screwing, slide the action mode change lever to the 
right (  symbol).

NOTE:

• When changing the position from “ ” to “ ”, it may be 

a little difficult to slide the mode change lever. At this 
time, switch on and run the tool for a second at the 
“Screw” position, then stop the tool and slide to your 
desired position.

CAUTION:

• Always slide the action mode change lever all the way 

to your desired mode position. If you operate the tool 
with the lever positioned halfway between the mode 
symbols, the tool may be damaged.

• Do not use the action mode change lever while the tool 

is running. The tool may be damaged.

Adjusting the fastening torque (Fig. 8)

The fastening torque can be adjusted in 16 steps by 
turning the adjusting ring so that its graduations are 
aligned with the pointer on the tool body.
First, slide the action mode change lever to the position of 

 symbol.

The fastening torque is minimum when the number 1 is 
aligned with the pointer, and maximum when the marking 
is aligned with the pointer. The clutch will slip at various 
torque levels when set at the number 1 to 16. Before 
actual operation, drive a trial screw into your material or a 
piece of duplicate material to determine which torque level 
is required for a particular application.

NOTE:

• The adjusting ring does not lock when the pointer is 

positioned only halfway between the graduations.

ASSEMBLY

CAUTION:

• Always be sure that the tool is switched off and the 

battery cartridge is removed before carrying out any 
work on the tool.

Installing side grip (auxiliary handle) 
(Fig. 9)

Always use the side grip to ensure operating safety.
Insert the side grip so that the protrusions on the grip base 
fit in between the grooves on the tool barrel. Then tighten 
the grip by turning clockwise.

Installing or removing driver bit or drill bit 
(Fig. 10)

Turn the sleeve counterclockwise to open the chuck jaws. 
Place the bit in the chuck as far as it will go. Turn the 
sleeve clockwise to tighten the chuck. To remove the bit, 
turn the sleeve counterclockwise.

Installing bit holder (Fig. 11)

Fit the bit holder into the protrusion at the tool foot on 
either right or left side and secure it with a screw.
When not using the driver bit, keep it in the bit holders. 
Bits 45 mm long can be kept there.

Hook (Fig. 12)

The hook is convenient for temporarily hanging the tool. 
This can be installed on either side of the tool.
To install the hook, insert it into a groove in the tool 
housing on either side and then secure it with a screw. To 
remove, loosen the screw and then take it out.

OPERATION

Screwdriving operation (Fig. 13)

First, slide the action mode change lever to the position of 

 symbol and select the fastening torque.

Place the point of the driver bit in the screw head and 
apply pressure to the tool. Start the tool slowly and then 
increase the speed gradually. Release the switch trigger 
as soon as the clutch cuts in.

Summary of Contents for BDF441

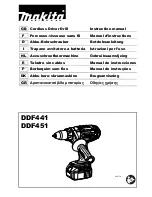
Page 1: ...ber Betriebsanleitung I Trapano avvitatore a batteria Istruzioni per l uso NL Accuschroefboormachine Gebruiksaanwijzing E Taladro sin cables Manual de instrucciones P Berbequim sem fios Manual de instruções DK Akku bore skruemaskine Brugsanvisning GR Δραπανοκατσάβιδο μπαταρίας Οδηγίες χρήσης DDF441 DDF451 006716 ...

Page 2: ...2 1 012089 2 012128 3 006718 4 006719 5 006720 6 006721 7 006723 8 006722 1 2 3 4 5 6 A B 7 8 9 10 11 12 ...

Page 3: ...3 9 006724 10 006726 11 006725 12 006727 13 006728 14 006258 15 006729 16 006730 13 14 16 15 17 18 19 20 21 22 17 23 24 25 26 27 28 ...

Page 4: ...4 17 006731 18 006304 29 30 29 ...

Page 5: ...l in high locations 4 Hold the tool firmly 5 Keep hands away from rotating parts 6 Do not leave the tool running Operate the tool only when hand held 7 Do not touch the drill bit or the workpiece immediately after operation they may be extremely hot and could burn your skin 8 Some material contains chemicals which may be toxic Take caution to prevent dust inhalation and skin contact Follow materia...

Page 6: ...moving of the battery cartridge To remove the battery cartridge slide it from the tool while sliding the button on the front of the cartridge To install the battery cartridge align the tongue on the battery cartridge with the groove in the housing and slip it into place Always insert it all the way until it locks in place with a little click If you can see the red indicator on the upper side of th...

Page 7: ...l with the lever positioned halfway between the mode symbols the tool may be damaged Do not use the action mode change lever while the tool is running The tool may be damaged Adjusting the fastening torque Fig 8 The fastening torque can be adjusted in 16 steps by turning the adjusting ring so that its graduations are aligned with the pointer on the tool body First slide the action mode change leve...

Page 8: ...s be sure that the tool is switched off and the battery cartridge is removed before attempting to perform inspection or maintenance Never use gasoline benzine thinner alcohol or the like Discoloration deformation or cracks may result Replacing carbon brushes Replace when they wear down to the limit mark Keep the carbon brushes clean and free to slip in the holders Both carbon brushes should be rep...

Page 9: ... method and may be used for comparing one tool with another The declared vibration emission value may also be used in a preliminary assessment of exposure WARNING The vibration emission during actual use of the power tool can differ from the declared emission value depending on the ways in which the tool is used Be sure to identify safety measures to protect the operator that are based on an estim...

Page 10: ...lectrique chez l utilisateur 3 Veillez à toujours avoir une bonne position d équilibre Assurez vous que personne ne se trouve sous l outil lorsque vous l utilisez en position élevée 4 Tenez l outil fermement 5 Gardez les mains éloignées des pièces en rotation 6 N abandonnez pas l outil alors qu il tourne Ne faites fonctionner l outil qu une fois que vous l avez bien en main 7 Ne touchez pas la mèc...

Page 11: ...rie alors que la température de la pièce se trouve entre 10 C et 40 C 50 F et 104 F Si une batterie est chaude laissez la refroidir avant de la charger 4 Si vous n utilisez pas l outil pendant une période prolongée rechargez la batterie tous les six mois DESCRIPTION DU FONCTIONNEMENT ATTENTION Assurez vous toujours que l outil est hors tension et que sa batterie est retirée avant d ajuster l outil...

Page 12: ...ition 3 ou de la position 3 à la position 1 Il faut alors mettre l outil en marche et le faire fonctionner pendant une seconde sur la position 2 arrêter l outil puis glisser le levier sur la position désirée ATTENTION Placez toujours parfaitement le levier de changement de vitesse sur la position correcte Si vous faites fonctionner l outil avec le levier de changement de vitesse situé à mi course ...

Page 13: ... le perçage de trous pilotes rendra votre tâche plus aisée et empêchera que le matériau ne se fende Consultez le tableau 006421 NOTE Si l outil a fonctionné de façon continue jusqu à ce que la batterie soit épuisée laissez le reposer pendant 15 minutes avant de recommencer avec une batterie fraîche Perçage Glissez d abord le levier de changement de mode jusqu à la position du symbole Perçage du bo...

Page 14: ...tre inclus en tant qu accessoires standard dans le coffret de l outil envoyé Ils peuvent varier suivant les pays Pour le modèle DDF441 Bruit ENG103 4 Les niveaux de bruit pondéré A typiques ont été mesurés selon la norme EN60745 Niveau de pression sonore LpA 70 dB A ou moins Incertitude K 3 dB A Le niveau de bruit peut dépasser 80 dB A lors de l utilisation Portez des protections auditives Vibrati...

Page 15: ...Le dossier technique conforme à la norme 2006 42 CE est disponible auprès de Makita Jan Baptist Vinkstraat 2 3070 Belgique 31 12 2013 Yasushi Fukaya Directeur Makita Jan Baptist Vinkstraat 2 3070 Belgique ...

Page 16: ...iener erleidet einen Stromschlag 3 Achten Sie jederzeit auf sicheren und festen Stand Achten Sie bei Verwendung des Werkzeugs an erhöhten Orten darauf dass sich keine Personen unter dem Standort des Bedieners aufhalten 4 Halten Sie das Werkzeug mit festem Griff 5 Halten Sie Ihre Hände von beweglichen Teilen fern 6 Lassen Sie das Werkzeug nicht unbeaufsichtigt eingeschaltet Das Werkzeug darf nur da...

Page 17: ... Sie den Akkublock auf bevor der Akku vollständig entladen ist Sobald Sie eine verringerte Leistung des Werkzeugs bemerken beenden Sie stets den Betrieb des Werkzeugs und laden Sie den Akkublock auf 2 Ein voll aufgeladener Akkublock darf niemals erneut geladen werden Durch Überladungen wird die Lebensdauer des Akkus verkürzt 3 Laden Sie den Akkublock bei einer Zimmertemperatur von 10 C bis 40 C au...

Page 18: ...hwindigkeit Abb 6 Dieses Werkzeug verfügt über einen Dreiganghebel zur Änderung der Geschwindigkeit Schalten Sie zum Ändern der Geschwindigkeit zunächst das Werkzeug aus und schieben Sie dann den Hebel zur Änderung der Geschwindigkeit auf 1 Position für niedrige Geschwindigkeit 2 Position für mittlere Geschwindigkeit oder 3 Position für hohe Geschwindigkeit Überprüfen Sie vor dem Betrieb des Werkz...

Page 19: ...rkzeuggehäuse die Seite ist beliebig und befestigen Sie diesen mit einer Schraube Zur Entfernung müssen Sie nur die Schraube lockern und den Haken herausnehmen BETRIEB Schraubendreherbetrieb Abb 13 Schieben Sie zunächst den Hebel zum Wechsel der Aktionsbetriebsart in die Position mit dem Symbol und wählen Sie das Anzugsdrehmoment aus Setzen Sie die Spitze des Dreheinsatzes in den Schraubenkopf und...

Page 20: ...RHEIT und ZUVERLÄSSIGKEIT des Produkts zu gewährleisten sollten Reparaturen Wartungsarbeiten und Einstellungen nur durch von Makita autorisierte Servicecenter durchgeführt und immer Makita Ersatzteile verwendet werden SONDERZUBEHÖR ACHTUNG Für das in diesem Handbuch beschriebene Makita Gerät werden die folgenden Zubehör und Zusatzteile empfohlen Bei Verwendung anderer Zubehör und Zusatzteile kann ...

Page 21: ...t Nur für europäische Länder ENH101 17 EG Konformitätserklärung Makita erklärt dass die nachfolgende n Maschine n Bezeichnung der Maschine n Akku Bohrschrauber Nummer Typ des Modells DDF441 DDF451 den folgenden Richtlinien der Europäischen Union genügt genügen 2006 42 EG Sie werden gemäß den folgenden Standards oder Normen gefertigt EN60745 Die technischen Unterlagen gemäß 2006 42 EG sind erhältli...

Page 22: ... Controllare che nessuno si trovi sotto all utensile quando lo si utilizza in posizioni elevate 4 Tenere l utensile in modo saldo 5 Tenere le mani lontano dalle parti rotanti 6 Non lasciare l utensile acceso Azionare l utensile solo dopo averlo impugnato 7 Non toccare la punta e il pezzo in lavorazione subito dopo aver utilizzato l utensile in quanto possono raggiungere temperature elevate e provo...

Page 23: ...ione o rimozione della batteria Fig 1 Prima di installare o rimuovere la batteria occorre sempre spegnere l utensile Per rimuovere la batteria è sufficiente estrarla dall utensile facendo scorrere il pulsante nella parte anteriore della batteria Per installare la batteria allineare la linguetta sulla batteria con la scanalatura nell alloggiamento e farla scorrere in posizione Inserire a fondo la b...

Page 24: ...tensile potrebbe essere danneggiato Non utilizzare la leva di regolazione della velocità mentre l utensile è in funzione perché potrebbero verificarsi danni Selezione della modalità operativa Fig 7 Questo utensile dispone di una leva che consente di modificare la modalità operativa Per la foratura far scorrere la leva di modifica della modalità operativa sulla sinistra simbolo Per l avvitatura far...

Page 25: ...foratura utilizzare un punzone per centri e un martello per creare una cavità nella posizione in cui eseguire il foro Collocare l estremità della punta nella cavità e iniziare la foratura Se si forano metalli utilizzare un lubrificante per taglio Ferro e ottone devono invece essere forati a secco ATTENZIONE Se si applica una pressione eccessiva sull utensile non si accelera la foratura Al contrari...

Page 26: ...eriore Variazione K 1 5 m s2 Per il Modello DDF451 Rumorosità ENG104 2 Il tipico livello di rumore ponderato A è determinato in conformità alla norma EN60745 Livello di pressione sonora LpA 72 dB A Variazione K 3 dB A Il livello acustico in funzionamento può superare 80 dB A Indossare una protezione acustica Vibrazione ENG202 3 Il valore totale della vibrazione somma vettoriale triassiale è determ...

Page 27: ...eerde metalen delen van het gereedschap onder spanning komen te staan zodat de gebruiker een elektrische schok kan krijgen 3 Zorg er altijd voor dat u stevig staat Zorg ervoor dat er niemand zich onder u bevindt wanneer u het gereedschap op een hoge plaats gebruikt 4 Houd het gereedschap stevig vast 5 Houd uw handen uit de buurt van draaiende delen 6 Laat het gereedschap niet ingeschakeld liggen B...

Page 28: ...en warme accu eerst afkoelen voordat u deze oplaadt 4 Laad de accu ieder half jaar op als u deze gedurende een lange tijd niet gebruikt BESCHRIJVING VAN DE FUNCTIES LET OP Controleer altijd of het gereedschap is uitgeschakeld en de accu is verwijderd alvorens de functies van het gereedschap te controleren of af te stellen De accu aanbrengen en verwijderen zie afb 1 Schakel het gereedschap altijd u...

Page 29: ...verandert van 1 naar 3 of van 3 naar 1 kan het een enigszins moeilijk zijn de snelheidsinstelknop te verschuiven Als dat het geval is verschuift u de snelheidsinstelknop naar stand 2 en schakelt u het gereedschap eventjes in Schakel vervolgens het gereedschap uit en verschuif de snelheidsinstelknop naar de gewenste stand LET OP Zet de snelheidsinstelknop altijd volledig in de gewenste stand Als u ...

Page 30: ...nen worden beschadigd Bij het schroeven van houtschroeven moet u de boorgaten voorboren om het schroeven te vergemakkelijken en te voorkomen dat het werkstuk splijt Zie de tabel 006421 OPMERKING Als het gereedschap continu wordt bediend totdat de accu leeg is laat u het gereedschap gedurende 15 minuten liggen alvorens verder te werken met een volle accu Gebruik als boor Verschuif eerst de werkings...

Page 31: ...eren polijstaccessoire OPMERKING Sommige items op de lijst kunnen zijn inbegrepen in de doos van het gereedschap als standaard toebehoren Zij kunnen van land tot land verschillen Voor model DDF441 Geluid ENG103 4 Het standaard A gewogen geluidsniveau zoals vastgesteld conform EN60745 Geluidsdrukniveau LpA 70 dB A of minder Onzekerheid K 3 dB A Het geluidsniveau kan tijdens gebruik hoger worden dan...

Page 32: ...32 Het technische bestand volgens 2006 42 EG is verkrijgbaar bij Makita Jan Baptist Vinkstraat 2 3070 België 31 12 2013 Yasushi Fukaya Directeur Makita Jan Baptist Vinkstraat 2 3070 België ...

Page 33: ...descarga 3 Colóquese siempre en una posición bien equilibrada Si utiliza la herramienta en una ubicación elevada asegúrese de que nadie se encuentre debajo 4 Sujete con fuerza la herramienta 5 Mantenga las manos alejadas de las partes giratorias 6 No deje la herramienta encendida Póngala en marcha solamente cuando la tenga en las manos 7 No toque la broca ni la pieza de trabajo inmediatamente desp...

Page 34: ... 3 Cargue el cartucho de la batería a una temperatura ambiente que oscile entre 10 C y 40 C 50 F 104 F Antes de cargar un cartucho de batería caliente deje que se enfríe 4 Cargue la batería una vez cada seis meses si no la utiliza durante un período de tiempo prolongado DESCRIPCIÓN DEL FUNCIONAMIENTO PRECAUCIÓN Asegúrese siempre de apagar la herramienta y extraer el cartucho de la batería antes de...

Page 35: ...re en la posición pertinente Seleccione la velocidad adecuada en función de la tarea que deba realizar NOTA Cuando cambie de la posición 1 a 3 o de la posición 3 a 1 puede encontrar alguna dificultad para deslizar la palanca de cambio de velocidad En ese caso encienda y utilice la herramienta durante un segundo en la posición 2 detenga la herramienta y deslice la palanca hasta la posición deseada ...

Page 36: ...tornillo y o la punta podrían sufrir daños Cuando utilice tornillos para madera perfore primero unos orificios a modo de guía para facilitar el atornillamiento y evitar la fragmentación del material Consulte la figura 006421 NOTA Si la herramienta se utiliza continuamente hasta que el cartucho de la batería se descarga deje reposar la herramienta durante 15 minutos antes de continuar con una bater...

Page 37: ...de Makita Conjunto de almohadillas de goma Gorra de lana Almohadilla para pulido de espuma NOTA Algunos elementos de la lista se pueden incluir en el paquete de la herramienta como accesorios estándar Pueden ser diferentes de un país a otro Para el modelo DDF441 Ruido ENG103 4 Nivel de ruido típico de ponderación A establecido según la EN60745 Nivel de presión de sonido LpA 70 dB A o menos Incerti...

Page 38: ...38 El archivo técnico de acuerdo con 2006 42 CE está disponible en Makita Jan Baptist Vinkstraat 2 3070 Bélgica 31 12 2013 Yasushi Fukaya Director Makita Jan Baptist Vinkstraat 2 3070 Bélgica ...

Page 39: ...mãos das peças em movimento 6 Não abandone a ferramenta a funcionar Ponha a a funcionar apenas quando estiver a segurá la 7 Não toque numa broca ou no material em que tiver estado a trabalhar logo após a operação porque podem estar demasiado quentes 8 Alguns materiais contêm químicos que podem ser tóxicos Tenha cuidado para evitar a inalação e o contacto da pele com o pó produzido Obedeça às instr...

Page 40: ...O PRECAUÇÃO Certifique se sempre de que a ferramenta está desligada e a bateria foi removida antes de proceder a ajustamentos ou testar acessórios Inserir ou retirar a bateria Fig 1 Desligue sempre a ferramenta antes de instalar ou retirar a bateria Para retirar a bateria mantenha premido o botão na frente da bateria e puxe Para colocar a bateria alinhe a respectiva saliência com a calha do compar...

Page 41: ... ferramenta possui um manípulo de selecção do modo de funcionamento Para perfurar deslize a alavanca de mudança do modo de funcionamento para a esquerda símbolo Para aparafusar deslize a alavanca de mudança do modo de funcionamento para a direita símbolo NOTA Quando mudar a posição de para poderá ser um pouco difícil fazer deslizar o manípulo de selecção do modo de funcionamento Nesta altura ligue...

Page 42: ...dade o excesso de força acabará apenas por danificar a ponta da broca diminuir o desempenho da ferramenta e diminuir o seu tempo de vida funcional No início da perfuração já é exercida uma enorme força na broca e na própria ferramenta Mantenha a ferramenta firme e concentre se no posicionamento da broca no início da perfuração Uma broca encravada pode ser removida com facilidade invertendo o senti...

Page 43: ...do quando em funcionamento pode exceder os 80 dB A Use protecção para os ouvidos Vibração ENG202 3 O valor total da vibração soma vectorial triaxial é determinado segundo a EN60745 Modo de trabalho Perfuração em metal Emissão de vibração ah D 2 5 m s2 ou menos Imprecisão K 1 5 m s2 ENG901 1 O valor da emissão de vibração declarado foi medido de acordo com o método de teste padrão e pode ser utiliz...

Page 44: ...øjet på højtliggende steder 4 Hold godt fast i værktøjet 5 Hold hænderne på afstand af roterende dele 6 Gå ikke fra værktøjet mens det kører Lad kun værktøjet køre mens du holder det i hænderne 7 Berør ikke boret eller arbejdsemnet umiddelbart efter brugen De kan være meget varme og kan forårsage forbrændinger af huden 8 Nogle materialer indeholder kemikalier som kan være giftige Sørg for at forhi...

Page 45: ...es tungen på batteripakken med rillen i huset hvorefter pakken skubbes på plads Sæt den altid hele vejen ind indtil den låses på plads med et lille klik Hvis den røde indikator øverst på knappen er synlig er batteripakken ikke låst helt fast Sæt den helt ind indtil den røde indikator ikke er synlig Ellers kan den falde ud af maskinen og skade dig eller andre personer i nærheden Brug ikke magt ved ...

Page 46: ...in ved at dreje på justeringsringen så dens gradinddelinger er justeret med pilen på værktøjet Skub først håndtaget til skift af funktionstilstand mod symbolet Stramningsmomentet er mindst når tallet 1 er justeret med pilen og størst når mærket er justeret med pilen Koblingen slipper ved de forskellige stramningsmomenter når det er indstillet til tallene 1 til 16 Før den faktiske anvendelse skal D...

Page 47: ...il at glide i holderne Begge kulbørsterne skal udskiftes samtidig Brug altid identiske kulbørster Fig 14 Brug en skruetrækker til at fjerne de to skruer og fjern derefter bagdækslet Fig 15 Løft armen på fjederen og placer den i den forsænkede del af huset med en kærvskruetrækker med et tyndt skaft eller lignende Fig 16 Brug en pincet til at fjerne kulbørstedækslerne fra kulbørsterne Tag de udslidt...

Page 48: ...tiske brug af maskinen kan afvige fra den opgivne emissionsværdi afhængigt af den måde maskinen anvendes på Sørg for at bestemme sikkerhedsforanstaltninger for beskyttelse af operatøren som er baseret på en eksponeringsvurdering for brug under faktiske forhold hvor alle anvendelsescyklussens dele inddrages som f eks antal gange maskinen slukkes og når den kører i tomgang ud over triggertiden Kun f...

Page 49: ... και μπορεί να προκληθεί ηλεκτροπληξία στο χειριστή 3 Να βεβαιώνεστε πάντοτε ότι στέκεστε σταθερά Όταν χρησιμοποιείτε το εργαλείο σε υψηλές τοποθεσίες να βεβαιώνεστε ότι δεν βρίσκεται κανένας από κάτω 4 Να κρατάτε το εργαλείο σταθερά 5 Μην πλησιάζετε τα χέρια σας σε περιστρεφόμενα μέρη 6 Μην αφήνετε το εργαλείο σε λειτουργία Το εργαλείο πρέπει να βρίσκεται σε λειτουργία μόνο όταν το κρατάτε 7 Μην ...

Page 50: ...ρία μειώνεται η ωφέλιμη διάρκεια ζωής της 3 Να φορτίζετε την μπαταρία σε θερμοκρασία δωματίου δηλαδή στους 10 C έως 40 C 50 F έως 104 F Αν η μπαταρία είναι θερμή αφήστε την να ψυχθεί πριν τη φορτίσετε 4 Να φορτίζετε την κασέτα μπαταρία μια φορά κάθε έξι μήνες όταν δεν τη χρησιμοποιείτε για μεγάλο χρονικό διάστημα ΠΕΡΙΓΡΑΦΗ ΛΕΙΤΟΥΡΓΙΑΣ ΠΡΟΣΟΧΗ Να βεβαιώνεστε πάντοτε ότι είναι σβηστό το εργαλείο και...

Page 51: ...ε να ολισθήσετε το μοχλό αλλαγής ταχύτητας Σε αυτήν την περίπτωση ενεργοποιήστε το εργαλείο και θέστε το σε λειτουργία για ένα δευτερόλεπτο στη θέση 2 Κατόπιν σταματήστε το εργαλείο και ολισθήστε το μοχλό στη θέση που επιθυμείτε ΠΡΟΣΟΧΗ Να ρυθμίζετε πάντοτε το μοχλό αλλαγής ταχύτητας πλήρως στη σωστή θέση Αν χειρίζεστε το εργαλείο όταν ο μοχλός αλλαγής ταχύτητας βρίσκεται ανάμεσα από τη θέση 1 τη ...

Page 52: ... από πριν καθοδηγητικές οπές για να διευκολύνετε το βίδωμα και να αποφύγετε τη διάσπαση του ξύλου Ανατρέξτε στον πίνακα 006421 ΠΑΡΑΤΗΡΗΣΗ Αν το εργαλείο λειτουργεί συνεχόμενα έως ότου αποφορτιστεί η μπαταρία αφήστε το εργαλείο σβηστό για 15 λεπτά πριν συνεχίσετε την εργασία με καινούργια μπαταρία Λειτουργία τρυπανίσματος Αρχικά ολισθήστε το μοχλό αλλαγής τρόπου δράσης στη θέση του συμβόλου Τρυπάνι...

Page 53: ... γνήσιων μπαταριών και φορτιστών της Makita Διάταξη λαστιχένιου βύσματος Μάλλινο κάλυμμα Αφρώδες βύσμα λείανσης ΣΗΜΕΙΩΣΗ Ορισμένα από τα στοιχεία της λίστα μπορεί να περιέχονται στην συσκευασία του εργαλείου ως κανονικά αξεσουάρ Αυτά ενδέχεται να διαφέρουν από χώρα σε χώρα Για το μοντέλο DDF441 Θόρυβος ENG103 4 Το σύνηθες σταθμισμένο επίπεδο θορύβου που έχει καθοριστεί σύμφωνα με την EN60745 Επίπε...

Page 54: ...ρ Μοντέλου Τύπος DDF441 DDF451 Συμμορφώνονται με τις ακόλουθες Ευρωπαϊκές Οδηγίες 2006 42 EΚ Κατασκευάζονται σύμφωνα με το παρακάτω πρότυπο ή τυποποιημένα έγγραφα EN60745 Το τεχνικό αρχείο σύμφωνα με την 2006 42 ΕΚ είναι διαθέσιμο από Makita Jan Baptist Vinkstraat 2 3070 Belgium 31 12 2013 Yasushi Fukaya Διευθυντής Makita Jan Baptist Vinkstraat 2 3070 Belgium ...

Page 55: ...55 ...

Page 56: ...Makita Jan Baptist Vinkstraat 2 3070 Belgium Makita Corporation Anjo Aichi Japan 885241A994 www makita com ALA ...

Reviews: