background image

9

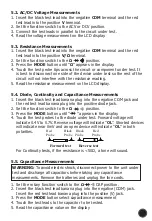
5.3. Resistance Measurements 

1.  Insert the black test lead into the negative 

COM

 terminal and the red 

test lead into the positive 

V/

Ω

 terminal.

2.  Set the function switch to the 

Ω

           position.

3.  Press the 

MODE

 button until "

Ω

" appears in the display. 

4.  Touch the test probe tips across the circuit or component under test. It 

is best to disconnect one side of the device under test so the rest of the 
circuit will not interfere with the resistance reading. 

5.  Read the resistance measurement on the LCD display. 

5.2. AC/DC Voltage Measurements

1.  Insert the black test lead into the negative 

COM

 terminal and the red 

test lead into the positive 

V

 terminal. 

2.  Set the function switch to the ACV or DCV position. 
3.  Connect the test leads in parallel to the circuit under test. 
4.  Read the voltage measurement on the LCD display. 

5.4. Diode, Continuity and Capacitance Measurements  

1.  Insert the black test lead banana plug into the negative COM jack and 

the red test lead banana plug into the positive diode jack. 

2.  Set the function switch to the 

Ω

           position.

3.  Press the 

MODE

 button until "


" appears in the display. 

4.  Touch the test probes to the diode under test. Forward voltage will 

indicate 0.4V to 0.7V. Reverse voltage will indicate "

OL

". Shorted devices 

will indicate near 0mV and an open device will indicate "

OL

" in both 

polarities. 


For Continuity tests, if the resistance is <50Ω, a tone will sound. 


Red               Black     Black           Red 
Probe            Probe    Probe           Probe 

Forward test        Reverse test


5.5. Capacitance Measurements 


1.  Set the rotary function switch to the 

Ω

          CAP position. 

2.  Insert the black test lead banana plug into the negative (COM) jack. 

Insert the red test lead banana plug into the positive (V) jack. 

3.  Press the 

MODE

 button select capacitance measurement 

4.  Touch the test leads to the capacitor to be tested. 
5.  Read the capacitance value on the display 

WARNING:

 To avoid electric shock, disconnect power to the unit under 

test and discharge all capacitors before taking any capacitance 
measurements. Remove the batteries and unplug the line cords.  

Summary of Contents for MT767

Page 1: ...MT767 600A AC DC CLAMP METER WITH IR THERMOMETER INSTRUCTION MANUAL...

Page 2: ...2...

Page 3: ...4 9 Temp type K 7 4 10 IR Temp D S 4 1 7 4 10 General Specifications 7 5 Operation 8 5 1 AC Current Measurements 8 5 2 AC DC Voltage Measurement 9 5 3 Resistance Measurements 9 5 4 Diode Continuity a...

Page 4: ...his meter can cause damage shock injury or death Read and understand this user manual before operating the meter Always remove the test leads before replacing the battery Inspect the condition of the...

Page 5: ...o 5999 measurement reading with 61 segment Analogue Bargraph 4 Auto Range mode 5 Diode test mode 6 Audible Continuity 7 Data Hold mode 9 Units of measure list 10 Frequency duty cycle mode AC DC 8 8 8...

Page 6: ...ts 600 0 1 5 6 digits 6 000K 60 00K 2 0 5 digits 600 0K 6 000M 2 8 10 digits 60 00M 2 8 10 digits Range Resolution 4 5 Resistance Accuracy of reading digits 999 9nF 9 999 F 4 reading 6 digits 99 99 F...

Page 7: ...or AC current Diode Test Test current of 0 3mA typical Open circuit voltage 3 2V DC typical Continuity Check Threshold 50 Test current 0 5mA Low Battery Indication is displayed Range Basic Functions 4...

Page 8: ...ion Degree 2 Category II includes local level appliance portable equipment etc with transient over voltages less than Over voltage Cat III 4 11 General Specifications continued 5 1 AC DC Current Measu...

Page 9: ...into the negative COM jack and the red test lead banana plug into the positive diode jack 2 Set the function switch to the position 3 Press the MODE button until appears in the display 4 Touch the te...

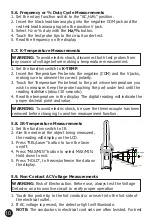
Page 10: ...roper decimal point and value WARNING To avoid electric shock disconnect both test probes from any source of voltage before making a temperature measurement WARNING To avoid electric shock be sure the...

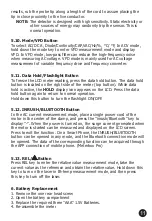
Page 11: ...Button In the AC current measurement mode place a single power cord of the motor in the center of the clamp and press the inrush Bluetooth key to display When the power is turned on the surge current...

Page 12: ...www major tech com www majortech com au sales major tech com info majortech com au MAJOR TECH PTY LTD South Africa Australia...

Reviews: